A contact group is a communication distribution list formed with multiple contacts, filters put together to send alerts instantly to everyone in that group.
Step by step process on “How to understand groups section” in Zsuite, Quick and Easy with this video.
Here the user can create a group with available list of contacts and filters for sending information like Threat Alerts or Emergency Mass Notifications etc., An individual contact can be a part of many groups.
Creating new Groups:
The user can form various groups for specific team or department or function like Project Call Tree Recipients, Europe BCM Team, Philippines Customer Support Team, IT DR Team, etc.,
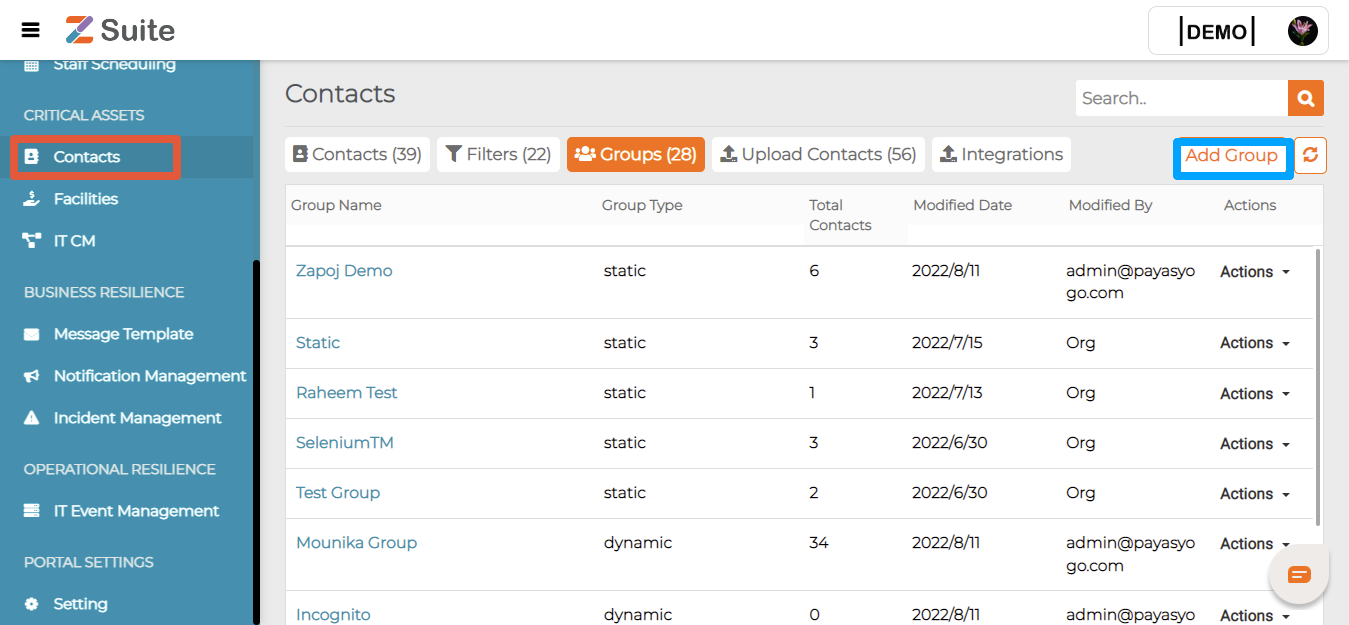
Adding a new group: For creating a Group click on the “Add Group” button.
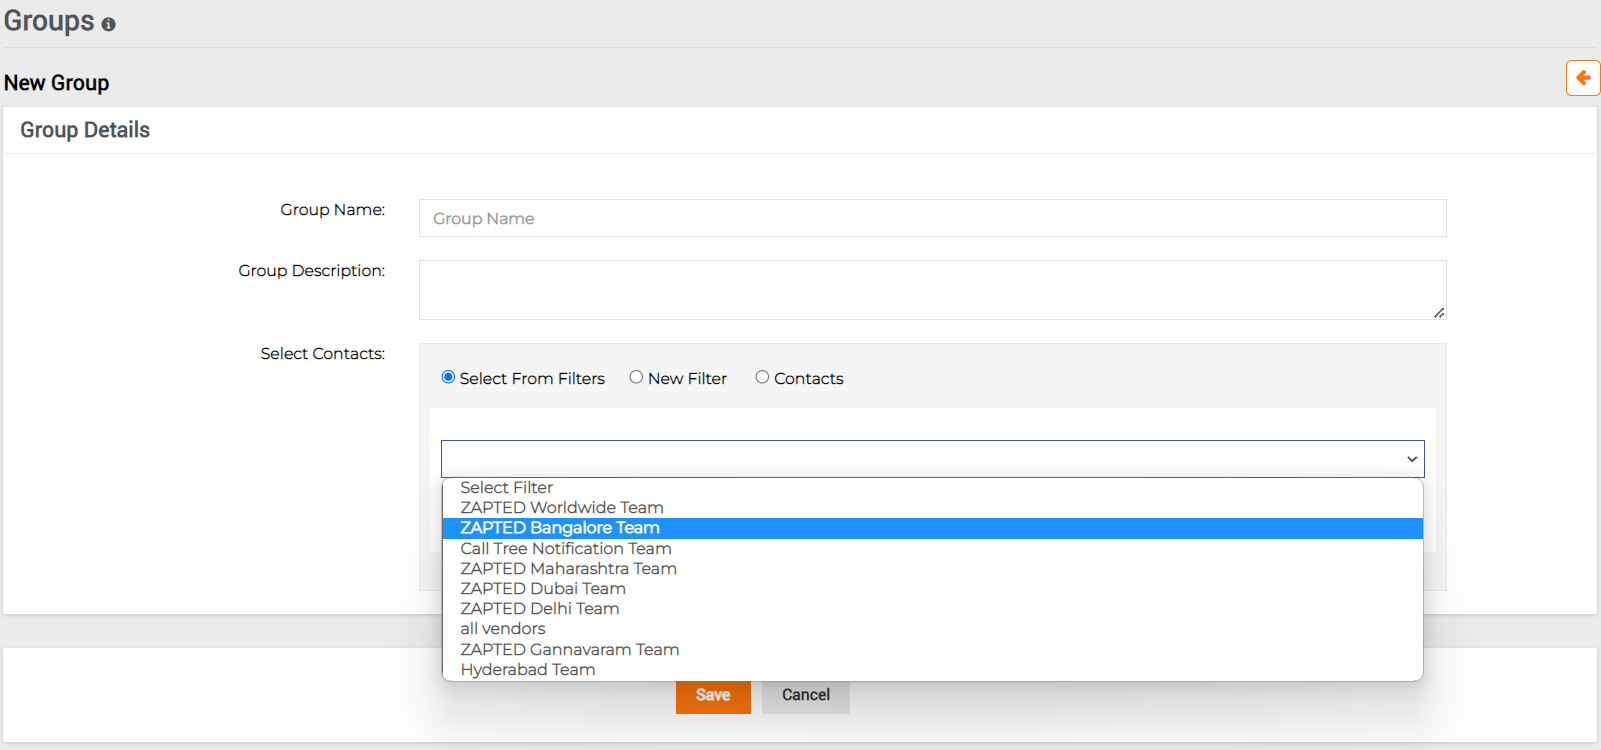
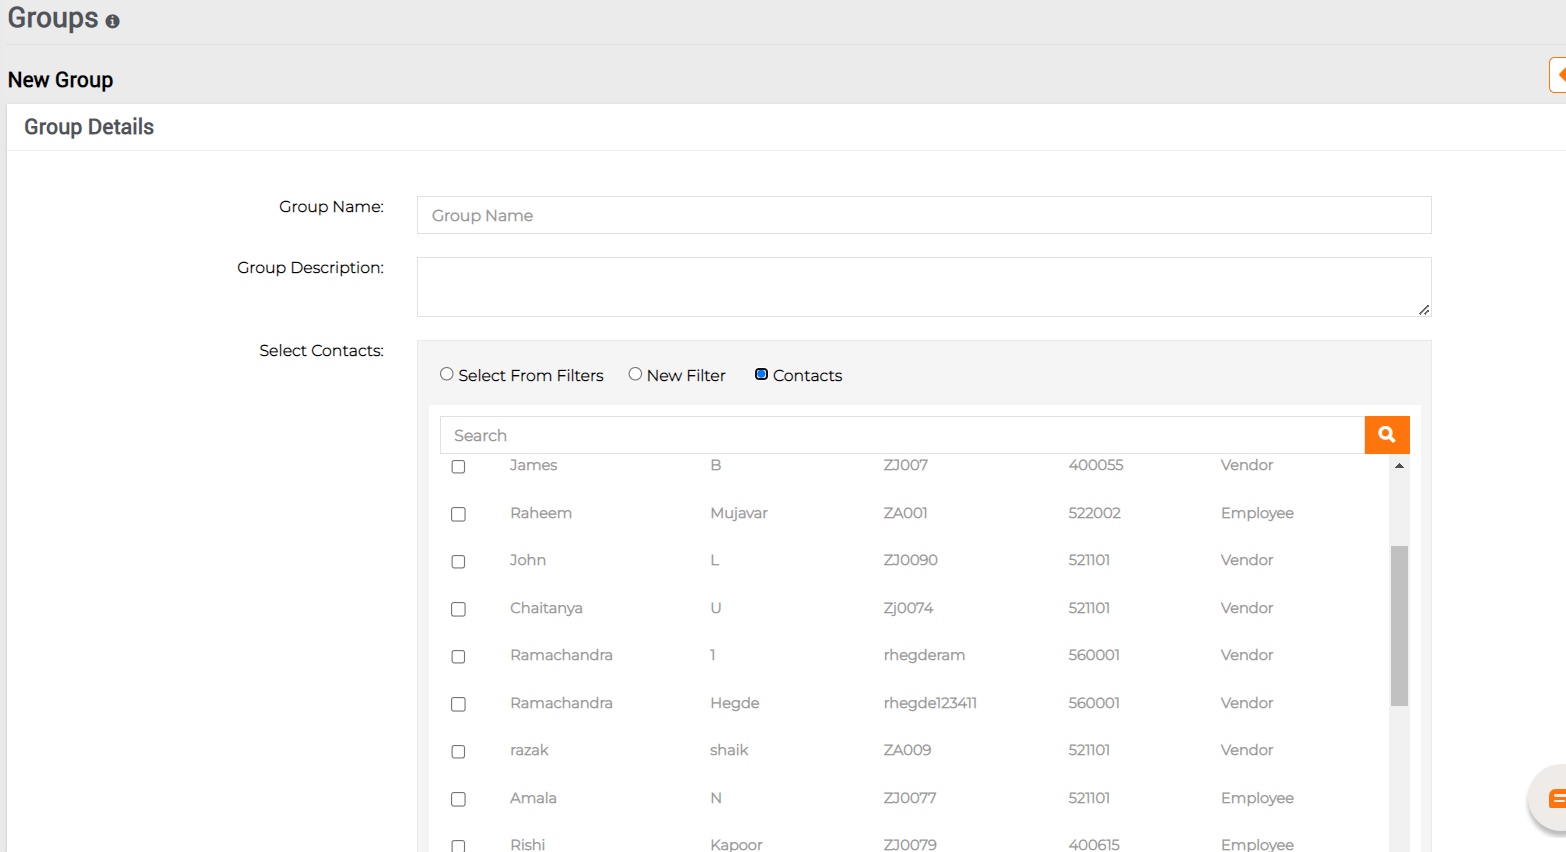
The user will be directed to a “New Group” page. Fill the mandatory details for creating a new group.
Group Details:
Group Name: The user can name the group like IMT, GRC, BCM, etc.,
Group Description: The user can write a description of the group here.
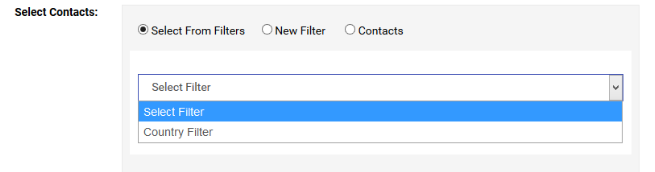
Select Contacts: The user can select Contacts for a Group from Filters or Contacts.
Select from filters:
User can select from existing filters from the dropdown.
Group Name: Name for the Group the User wanted.
Group Description: Users can write a description of the group here.
Select Contacts: Here Users can select Contacts for a Group in three ways.
Select from filters:
Here there are already some filters that are created. Users can select from them and add a group with the contacts which are available through that filter.
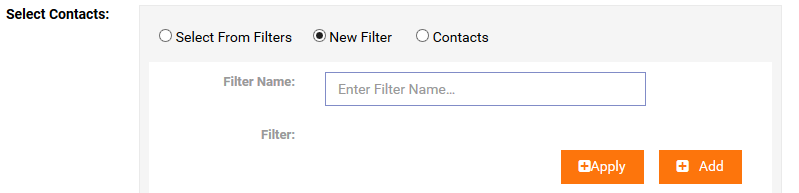
New Filters:
Users can add new filters here and create a Group from them. The process is the same as creating “Filters”. Give the filter name, then click on “Add” to add the requirements of the Filter. Select from the options given and apply filters and “Save” the changes.
Contacts:
A list of all the “Contacts” will be displayed here. Select the required Contacts and “Save”.
A User cannot create a “Group” with single Contact.
Users can now see the Group created.
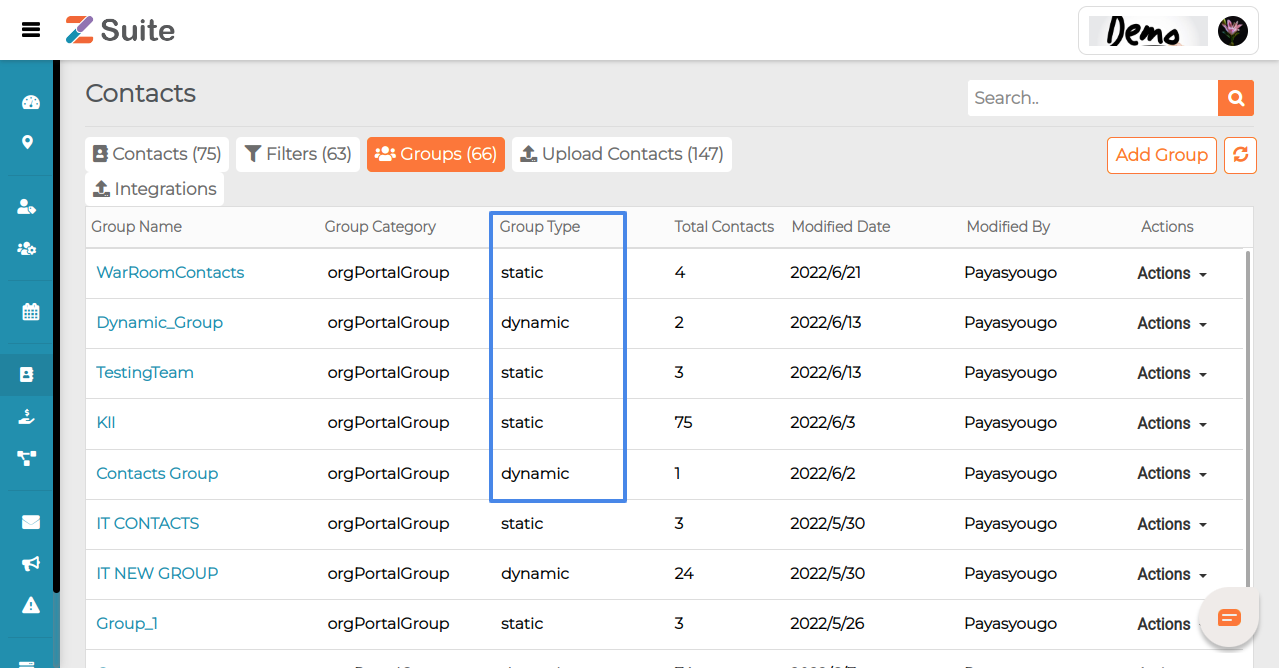
Note: There are two types of “Groups”. One is “Static” and the other is “Dynamic”
A “Group” created by selecting contacts manually is referred as “static”
A “Group” created by selecting contacts from “Filters” is referred to as “dynamic”
Editing a Groups:
The user can edit a group’s details in two ways.
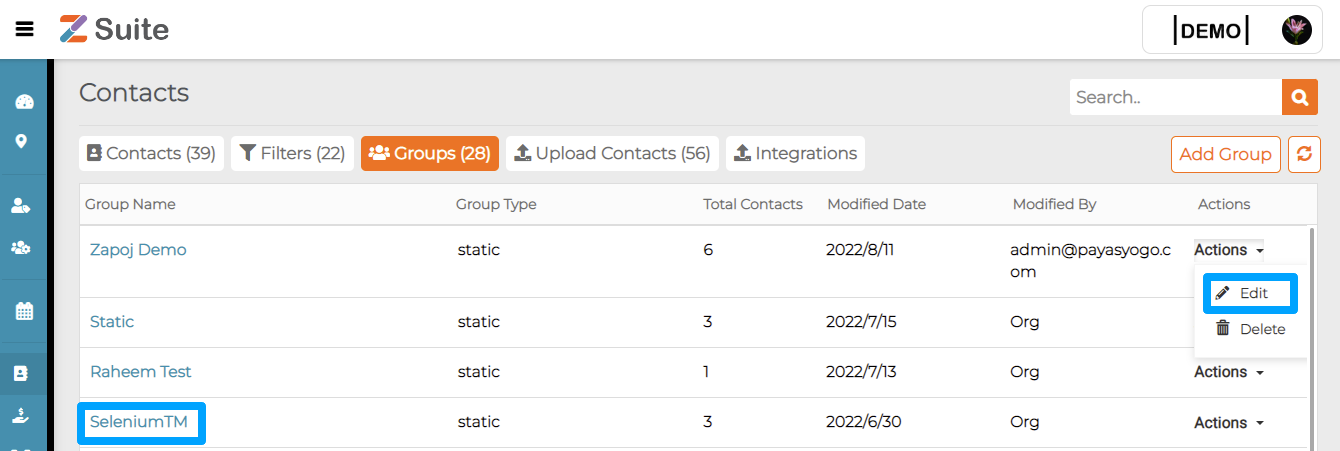
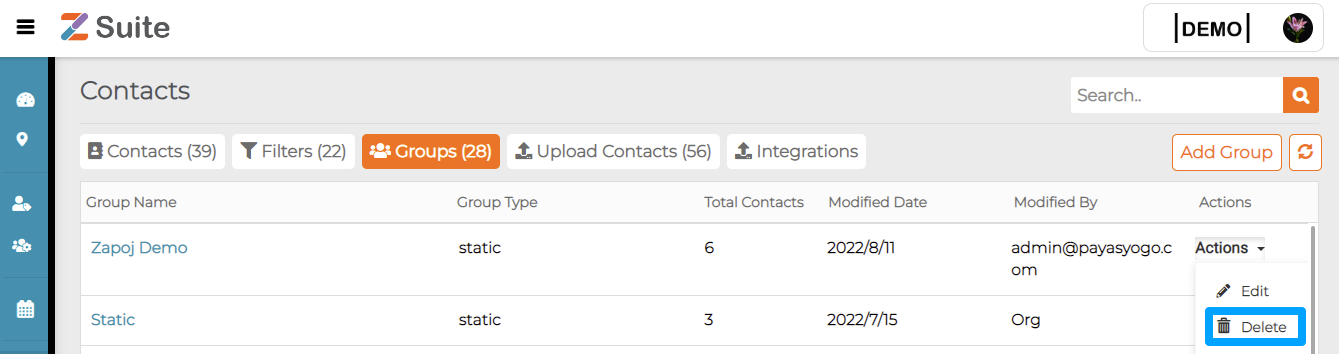
Click on “Actions” which is shown on the “Filters” tab. A dropdown with “Edit” and “Delete” is found. Click on “Edit”, it redirects to the Group Information. The User can edit the details and click on “Save”.
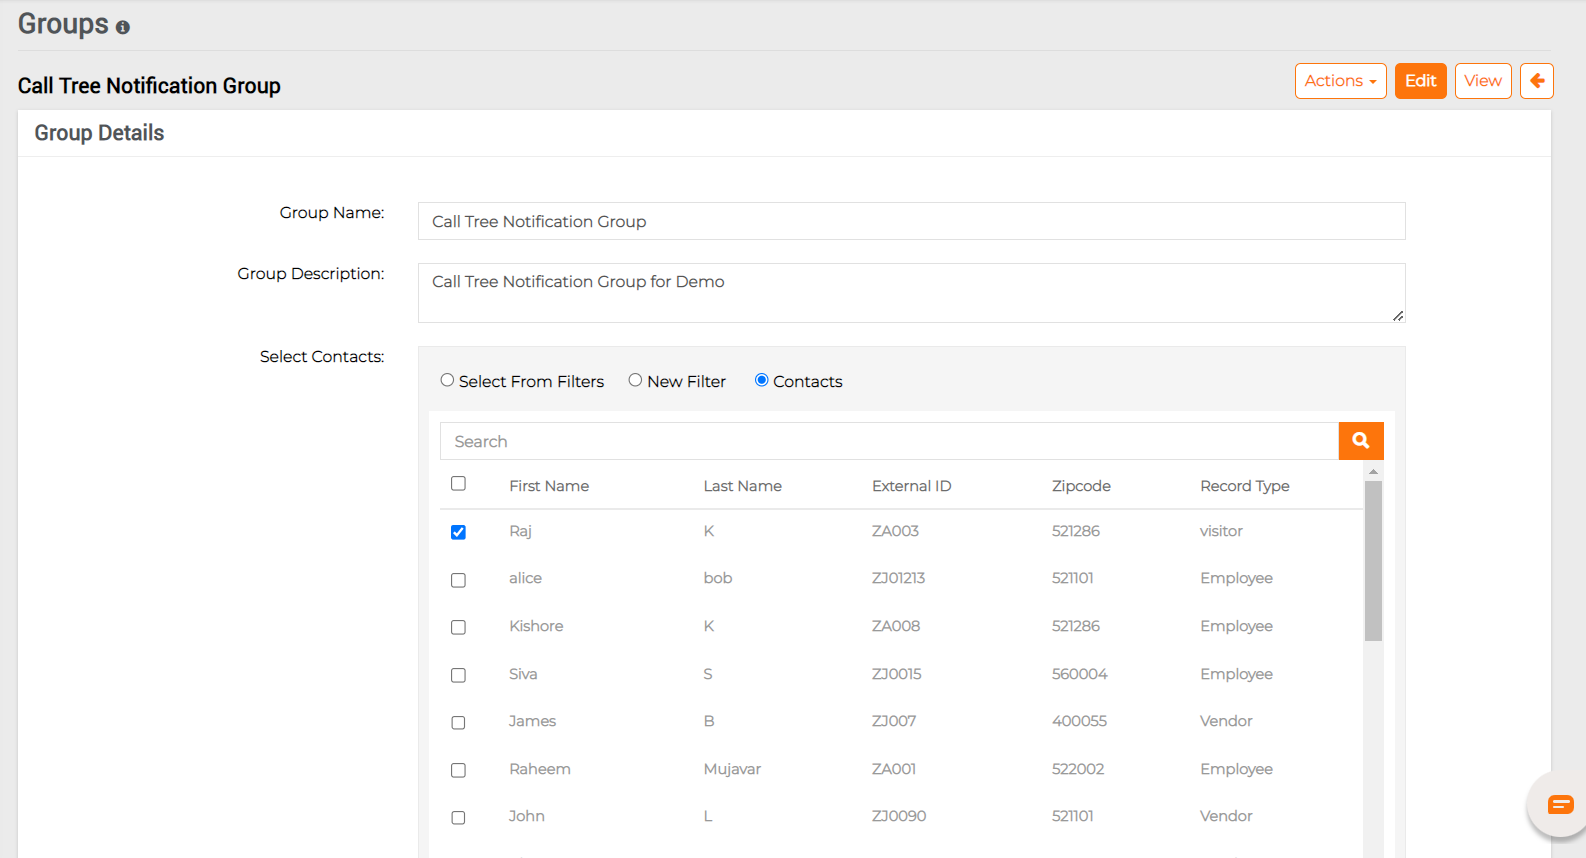
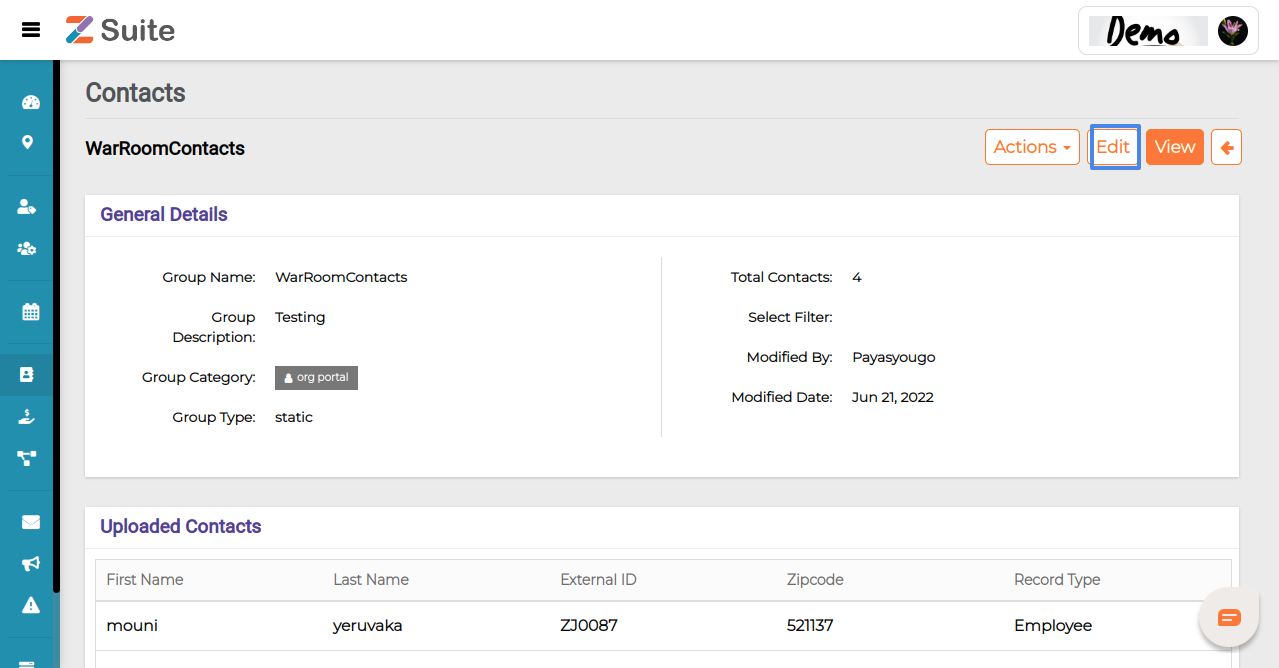
Click on the name of the “Group”, the user will be redirected to the group details page, click on the “Edit” button, edit the details needed and click on “Save” button.
Deleting a Group:
There are two ways to “Delete” a Group.
Click on “Actions” which is shown on the “Filters” tab. A dropdown with “Edit” and “Delete” is found. Click on “Delete”.
Click on the name of the “Group”, the user will be redirected to the group details page, click on “Actions” and then click on “Delete”.
Critical Assets Terminology
Critical Assets Terminology
Contact: Contact is the person identified by an organization to notify on critical events, threat alerts, incidents, tasks, etc., through the Z suite application. Example: Employee, Customer, Supplier, Vendor, or Contractor.
Facilities: Facilities are premises like office buildings, schools, hospitals, hotels, laboratories, government institutions, etc., that hosts people, systems, data, etc.,
Equipment: Equipment means all kinds of machines or apparatus or appliances such as mechanical, electrical, electronic fabrication used for the operations or maintenance.
Supply chain: A supply chain encompasses everything from the delivery of source materials from the supplier to the manufacturer through to its eventual delivery to the end user.
IT CMDB: An IT Configuration Management Database is a database used to store IT asset information essential for an organization’s IT service management (ITSM). Example: Hardware, Software, Network, Voice, Data Systems, etc.,
Supply Chain
Supply Chain
Supply chain logistics coordinate the storage and shipping of goods and services across the supply chain. This helps in getting the right product, in the right quantity, in the right condition, at the right place, at the right time, to the right customer, at the right price.
Step by step process on “How to create supplychain” in Zsuite, Quick and Easy with this video.
Add Supply chain
A supply chain encompasses everything from the delivery of source materials from the supplier to the manufacturer through to its eventual delivery to the end user.
Category: Select the Asset Category from the dropdown list. Supply Chain categories include Manufacturing units such as factories, storage facilities such as warehouses, processing centers, distributions centers, and even offices to move and track products and services within and throughout the supply chain.
External ID: Asset ID is the unique Supply Chain ID with Alphabets or Numbers or Alphanumeric.
External ID cannot be changed once data is saved and created.
Supply chain traceability allows you to track products from source to consumer. It connects all the points in supply chain together, keeping you in control of your goods and branding.
Name: Users can enter the Supply Chain name.
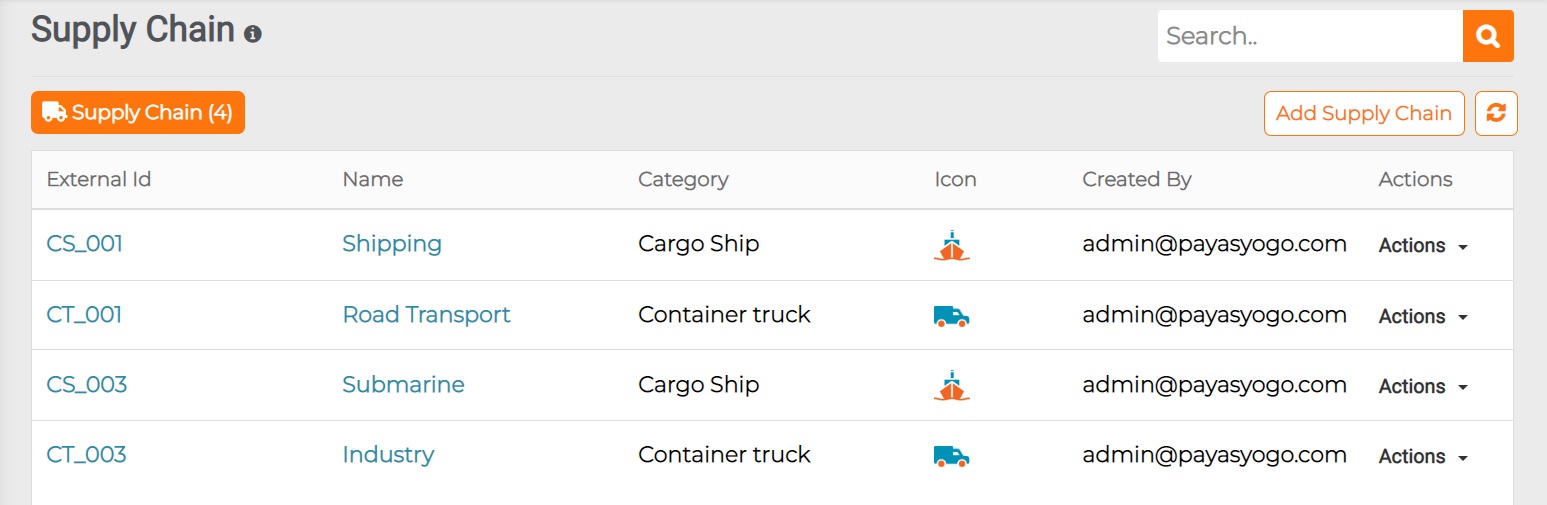
All the created “Supply chains” are listed here.
Add Supply chain:
Click on the “Add Asset” button displayed in the top right
The user will be navigated to the” New Asset” page
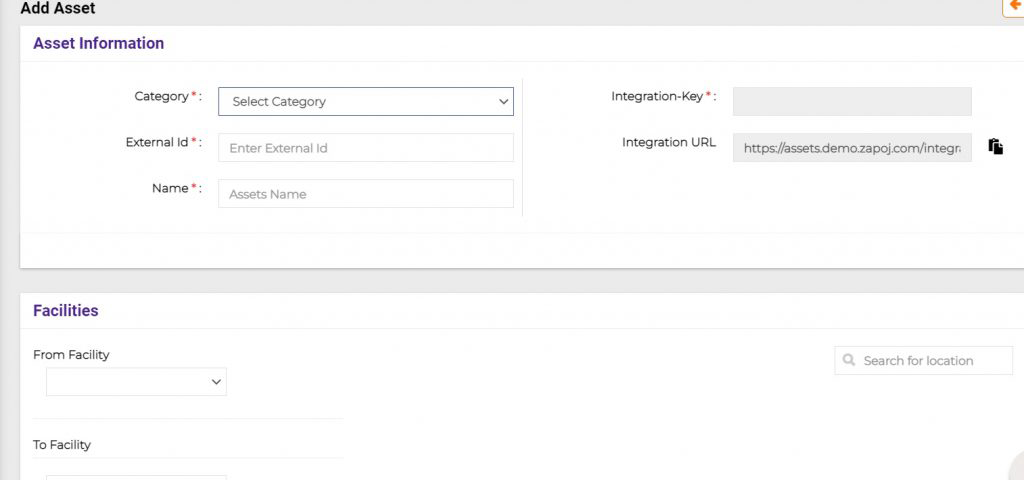
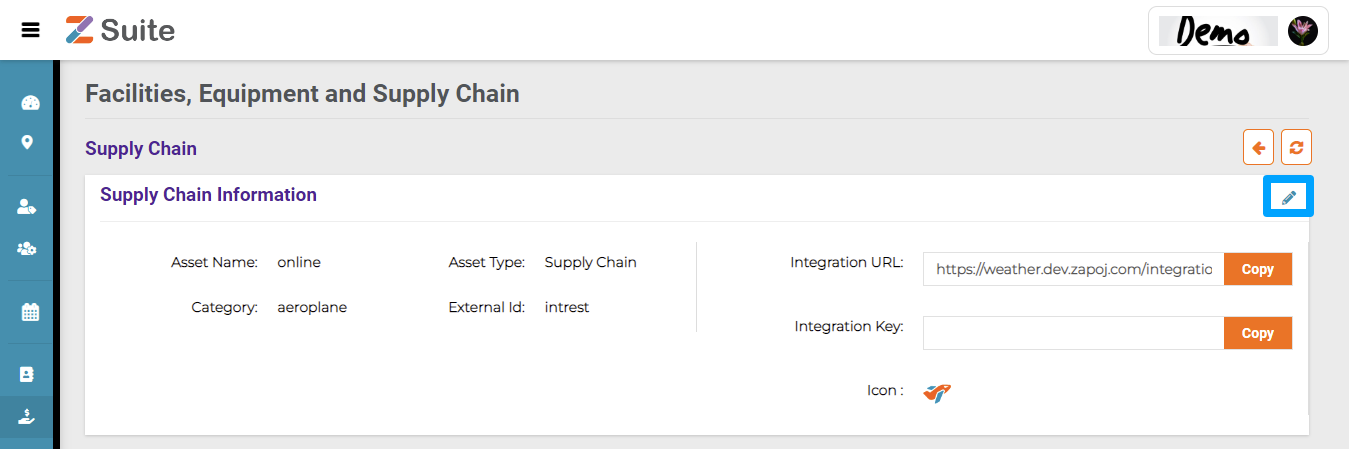
Add Supply Chain Information :
Fill in the Supply Chain details Category, External id, Name, Integration key and URL. From Facility to Facility.
With integration key and URL supply chain logistics between source facility to destination facility can be seamlessly tracked and get alerted on any potential threat enroute.
Example: Delivery companies typically use GPS tracking to simplify their customer service workflow. With GPS tracking, there is no need to call the drivers and ask for their location in order to update the delivery status. With GPS tracking, deliveries are tracked in real time.
Satellite trackers successfully provide constant updates on the vehicle’s location and can also be used by drivers to call for help when their cell phones are not in a service area.
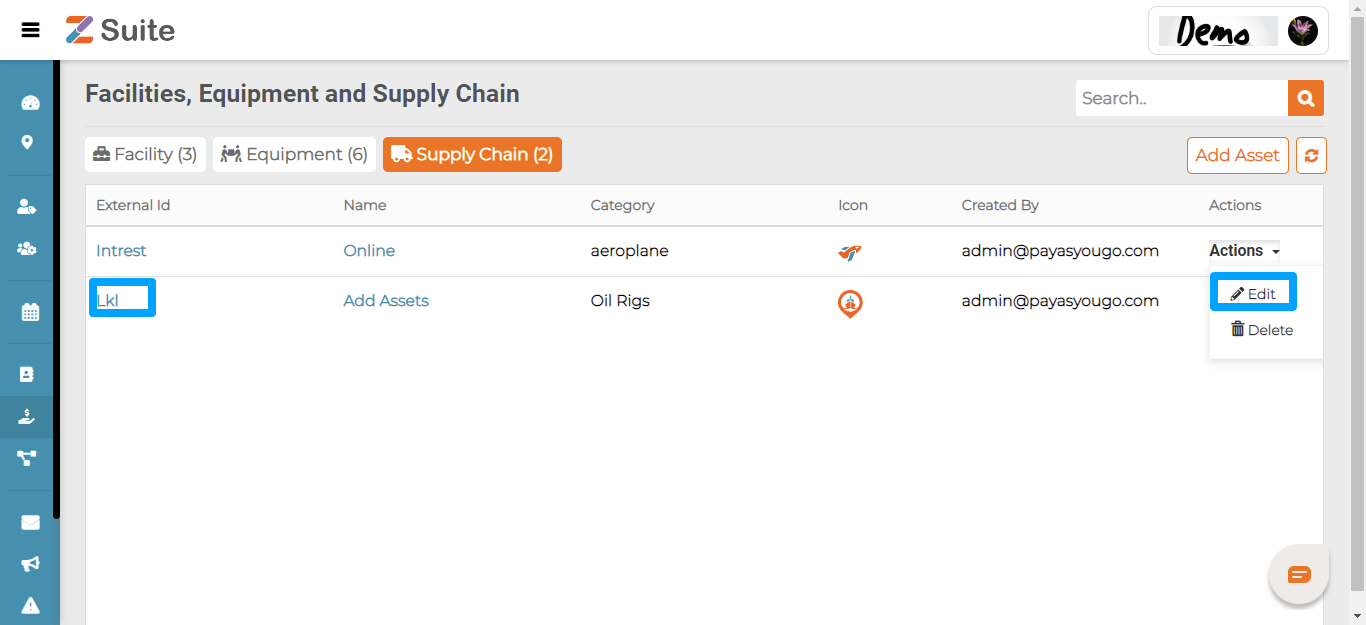
Editing a Supply Chain:
Click on “Supply Chain Name” or on the “Actions” dropdown and click on “Edit”.
The user can Edit the details and click on the “Save” button.
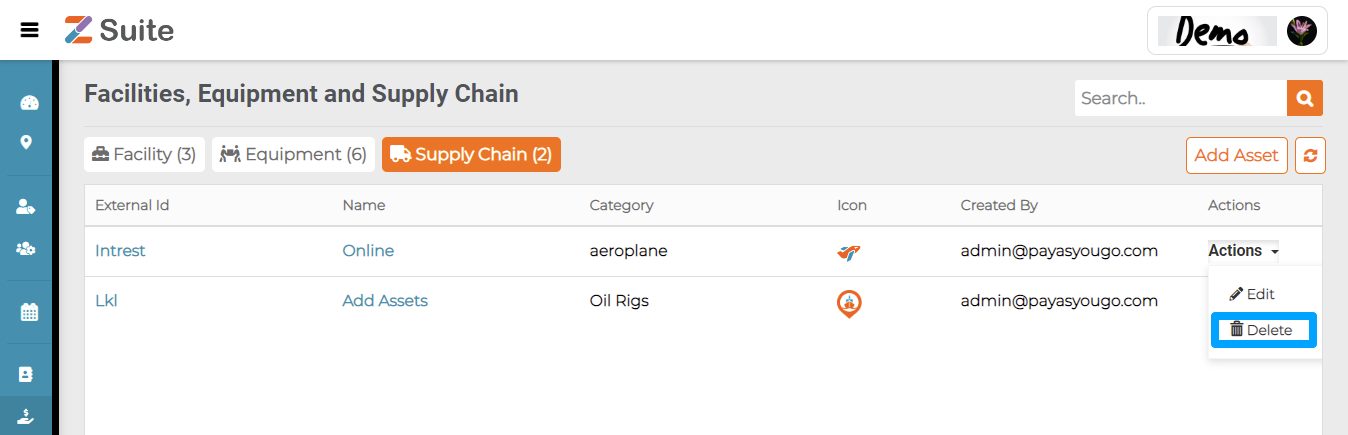
Deleting a Supply Chain:
If the user wants to delete an Asset, click on the “Actions” dropdown, and then the “Delete” option.
Contacts
Critical Assets Contacts
Organizational contacts are the Human resources associated with your organization. Example: Employees, Suppliers, Contractors, Customers, Visitors, etc., Contact information normally contains the name of a contact, identification, phone numbers, email addresses, personal or business addresses, etc.,
Step by step process on “How to add individual contacts” in Z suite, Quick and Easy with this video.
When organization faces disaster like the 2011 Japan tsunami, that may test its communications efforts to reach their employees with timely information. It may take days or weeks for organizations to locate all their employees and make sure they are safe.
A well-organized contact management and emergency notification system can help HR to reach out to employees in affected areas through various modes of communication like phones, texts, and e-mails to identify Employees who needs support.
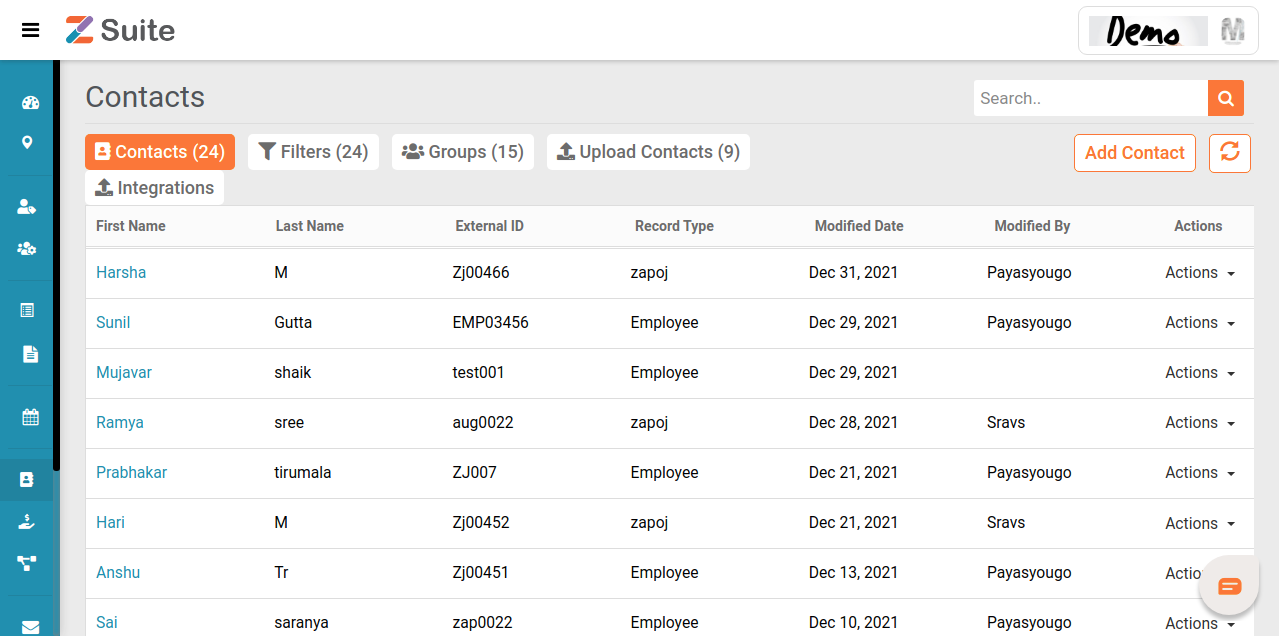
Contacts
All the created “Contacts” will be listed here.
If the user wants to create a Contact there are two ways.
To create individual contact, click on the “Add Contact” button displayed on the top right.
To create bulk contacts, click on the “Upload Contacts” button.
Creating an Individual Contact:
Click on the “Add Contact” button displayed on the top right.
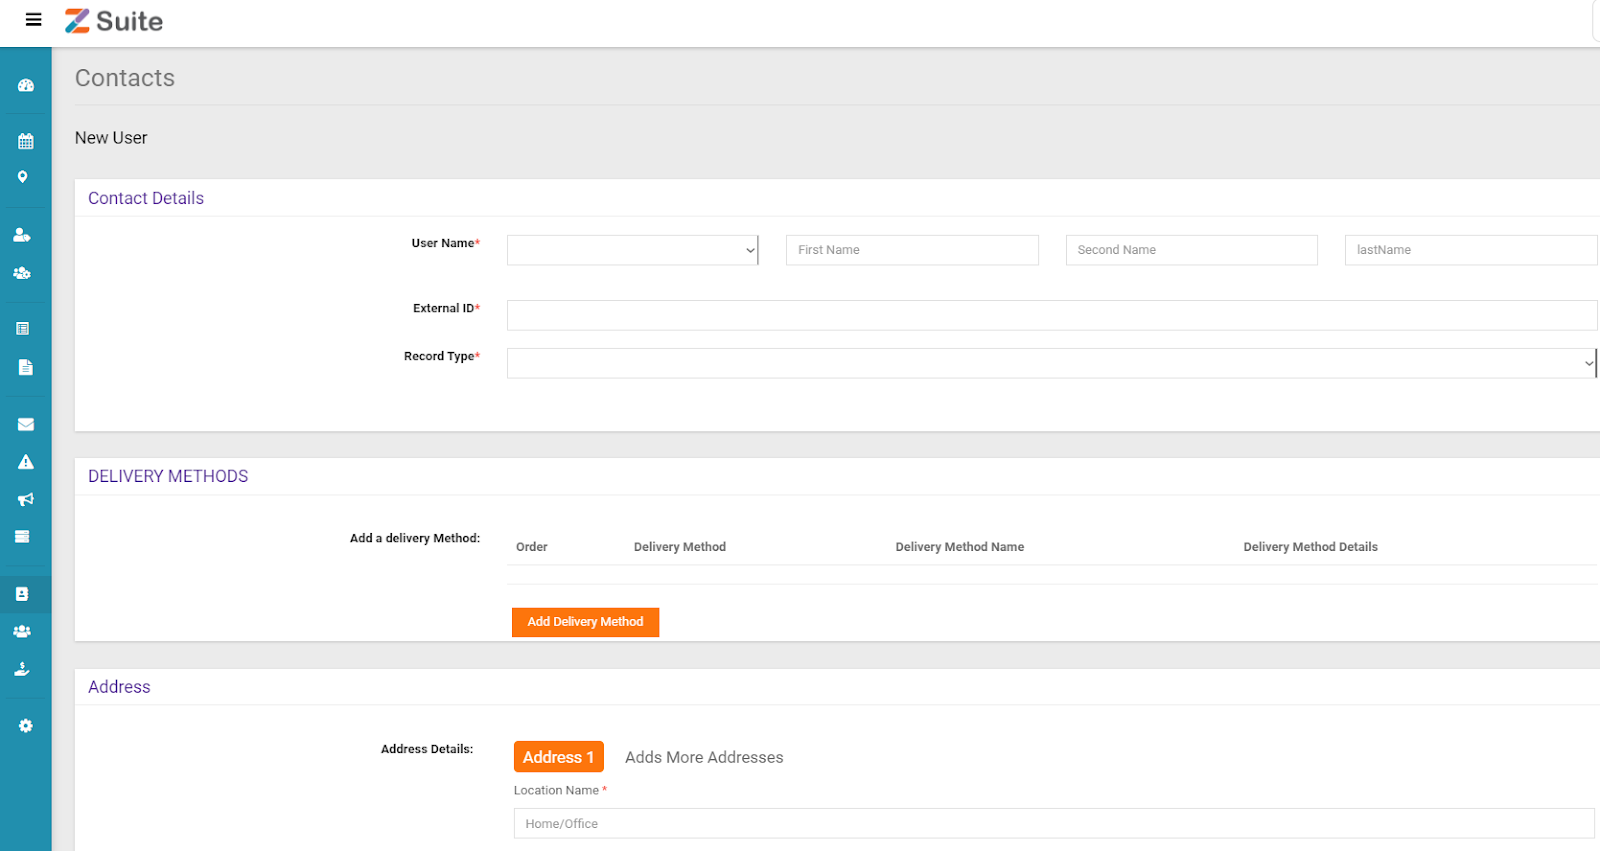
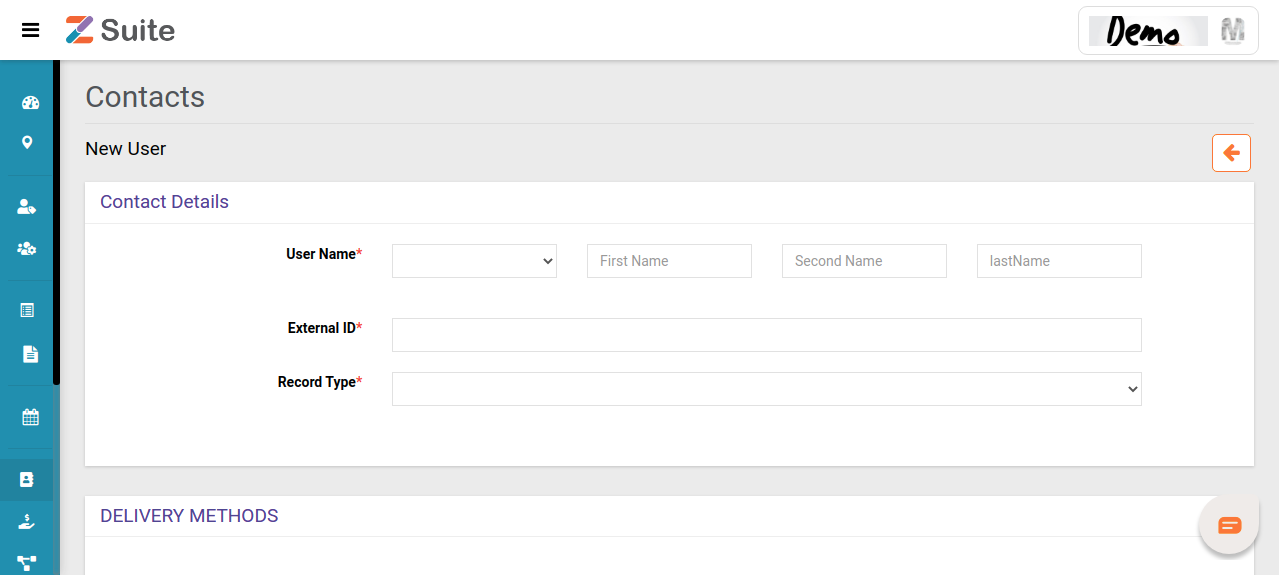
The User will be navigated to the “New Contact” page
For creating a new Contact, the user needs to fill in the information like “Contact Details”, “Delivery Methods” and “Address” of the contact.
Contact Details
Fill in the details that are mandatory i.e., “User Name”, “External ID”, “Record Type”.
User Name: The user has to give the details of the User as asked below.
Note: First Name, Last Name, and Suffix like Mr/Ms are mandatory.
External ID: An External ID is a numeric or alphanumeric string that is assigned for a contact within the system. Unique identifiers can be assigned to anyone or anything that needs to be distinguished from other entities, such as individual users, buildings, machines or IT systems.
These values are usually auto-generated with an algorithm, allocated incrementally or chosen by the user.
Record Type: Record type is meant to filter and categorize on Employees, Customers, Vendors, Visitors etc.,
If the user is adding a Contact as “Customer” record type, the user needs to add the product details. Press the “Enter” key in the keyboard after providing each product detail.
If the user is adding a Contact of an Employee, the user should add the skills of that employee.
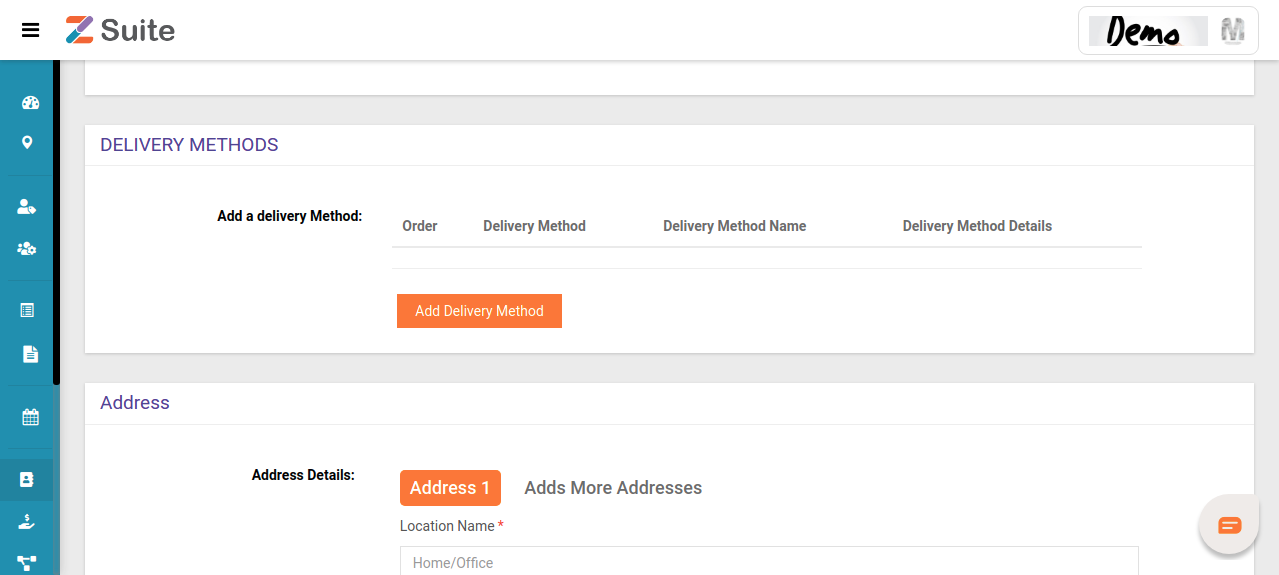
Delivery Details:
Here we can set the message delivery methods such as SMS, email, and voice call for which the user needs to be notified on threats, risk events, incidents, emergency, etc.,
Note: “Email” and “SMS” details should be provided in order to create a contact.
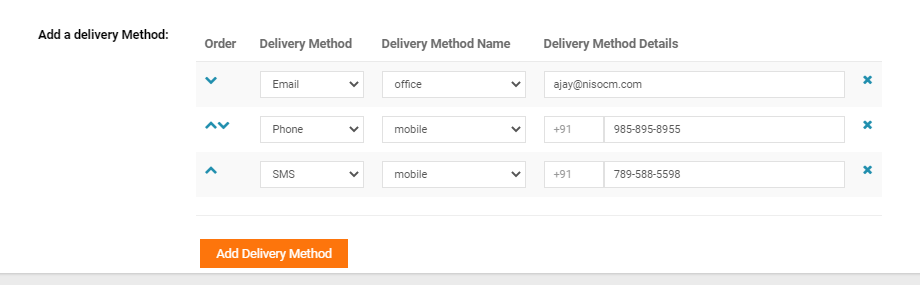
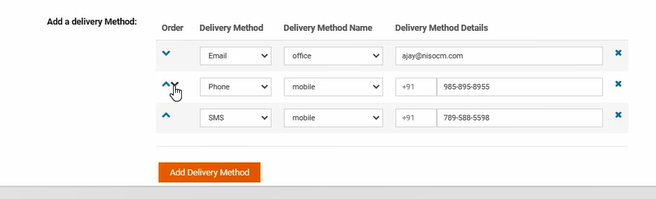
Click on “Add Delivery Method”. The User can add as many delivery methods they need.
Email: For the “Email” Delivery method there are two options, The User can add “personal” or “office” Email Id. And add the mail address in the Delivery Method Details.
SMS: For “SMS” add mobile and give the number there. Give the country code and mobile number.
Phone: For the “Phone” Delivery Method there are three options, like mobile, office, home. Add the preferred number there.
We can adjust the priority of the Delivery Method.
By clicking on the Up and Down arrow, we can change the sequence of delivery method.
Delivery Method List:
Email – Office: Upon selecting this option, an Email notification will be sent on the Official Email ID.
Email – Personal: Upon selecting this option, an Email notification will be sent on Personal Email ID
Phone: Upon selecting this option, notification will be shared via phone call.
SMS: Upon selecting this option, notification will be shared via Message.
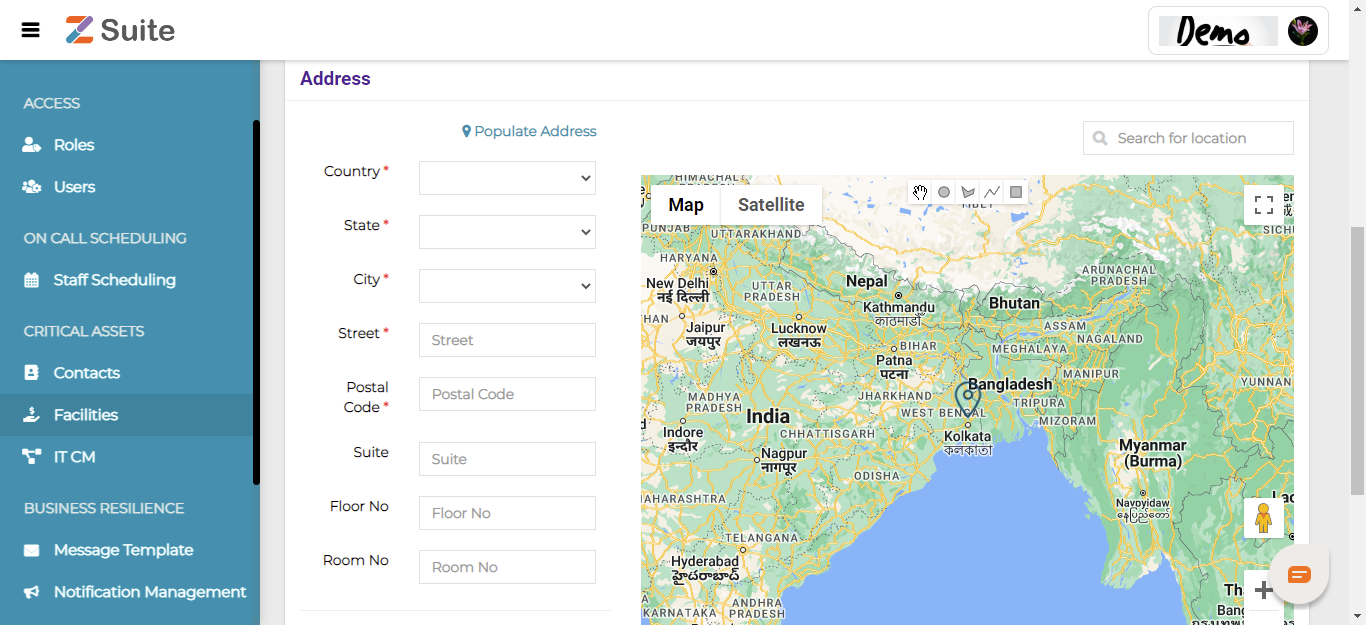
Address Details:
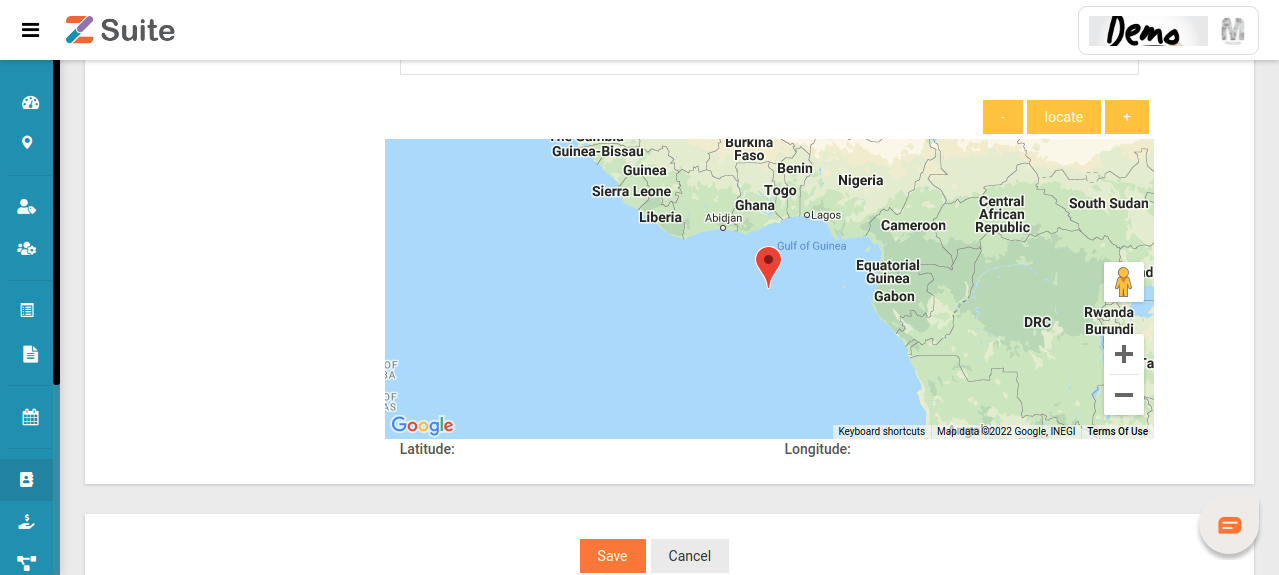
For adding a new contact User has to give the address of the contact to be created. One address is mandatory. Every detail here is mandatory here except the “Apartment/suite”.
After filling in all the details, the map is located.
Click on the “Save” button after filling in the details.
Multiple Address:
In case a user/member wants to add more than one address then he can surely add multiple addresses by clicking on the option Add More Addresses.
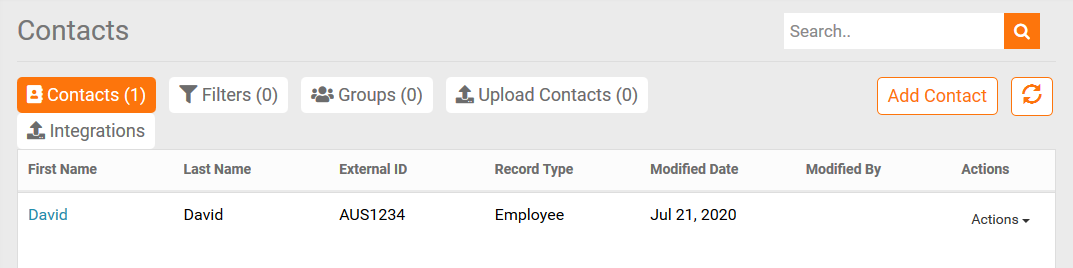
Now the User can see this Contact on the Contacts tab of the “Contacts” page.
Creating Bulk Contacts:
Step by step process on “How to create bulk contacts” in Zsuite, Quick and Easy with this video.
After clicking “Upload Contacts” the User has to click on the “Add Uploads” button.
The User will be redirected to the “New Upload” page.
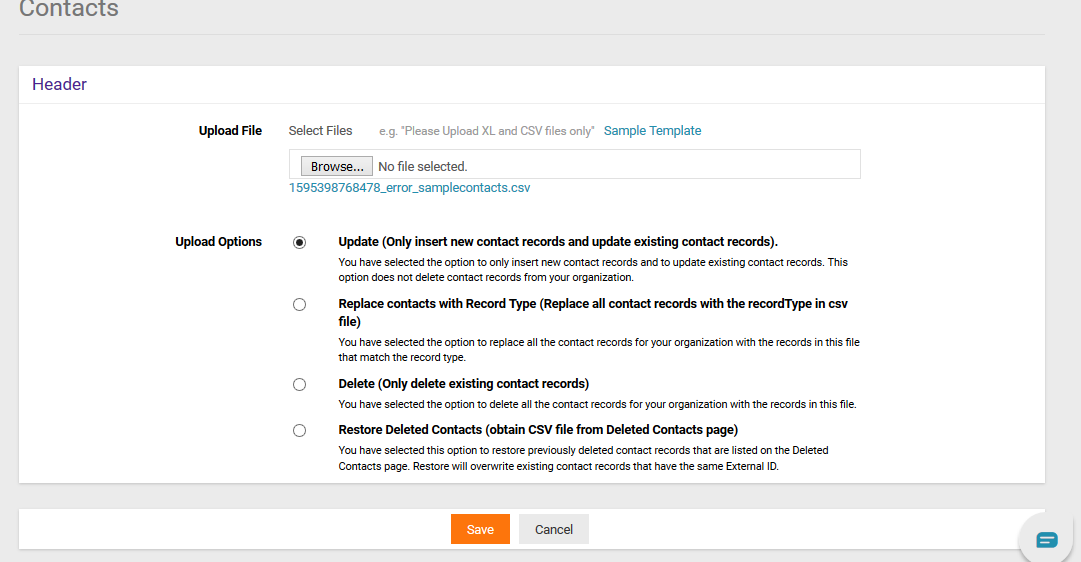
Firstly, the User has to download the “Sample Template” given. After that fill the Contacts details accordingly and Add the file using the “Browse” button available there.
Below this, there are some “Upload Options”, select preferred one and “Save”.
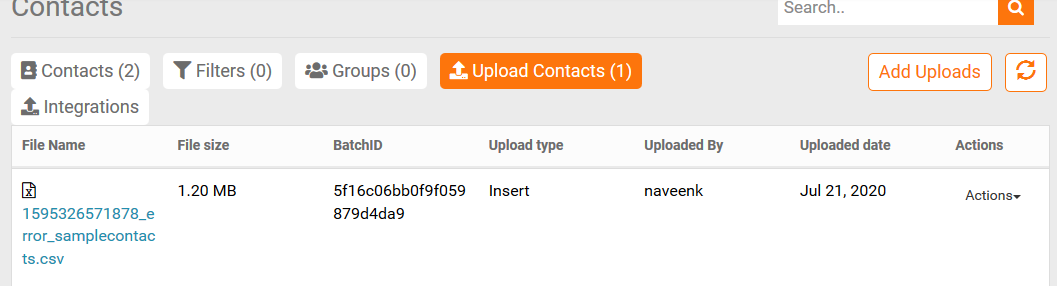
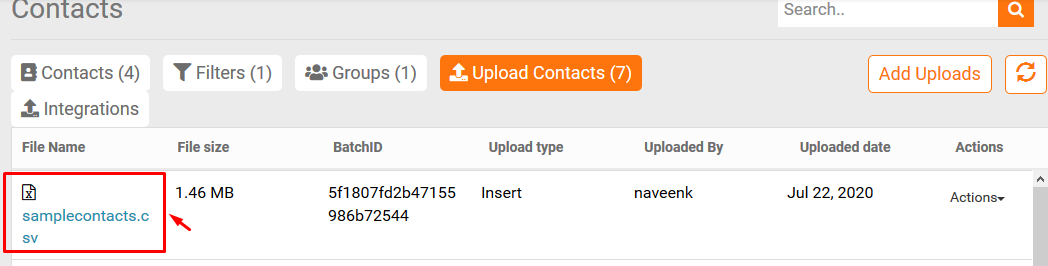
Under the Upload Contacts tab, we can see all the history of contacts which are uploaded till date.
By clicking on the uploaded file name, we can see the complete details and contacts uploaded with that sheet.
Editing Individual Contacts:
Step by step process on “How to edit and delete single contacts present” in Zsuite, Quick and Easy with this video.
There are two options for editing the contacts.
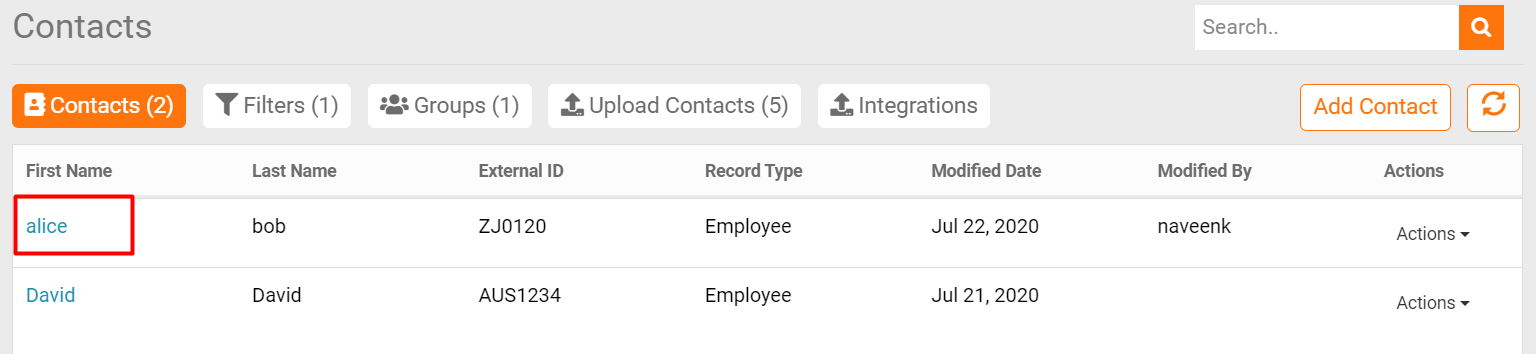
If the user wants to edit the contact details click on the “First Name” in Contacts tab.
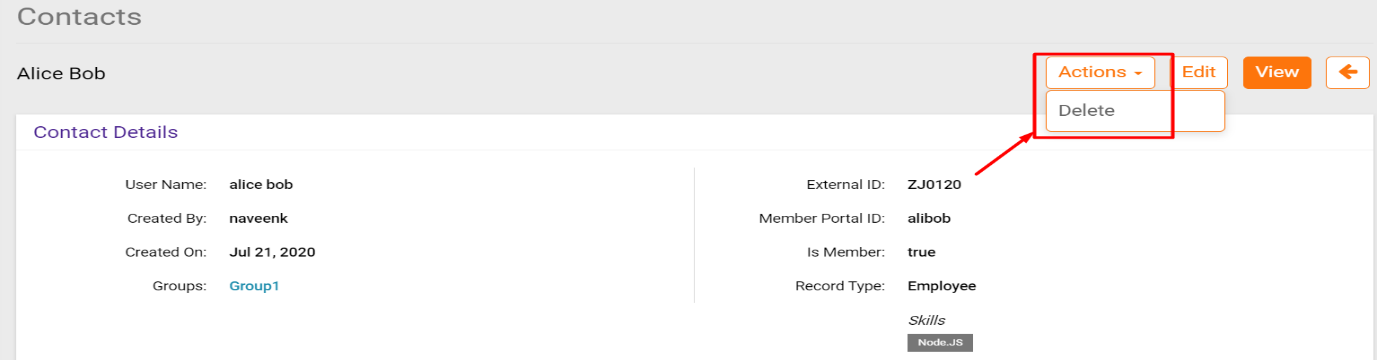
The user will be redirected to the “Contact details” page. Click on the “Edit” button.
The user can edit the details and click on the “Save” button.
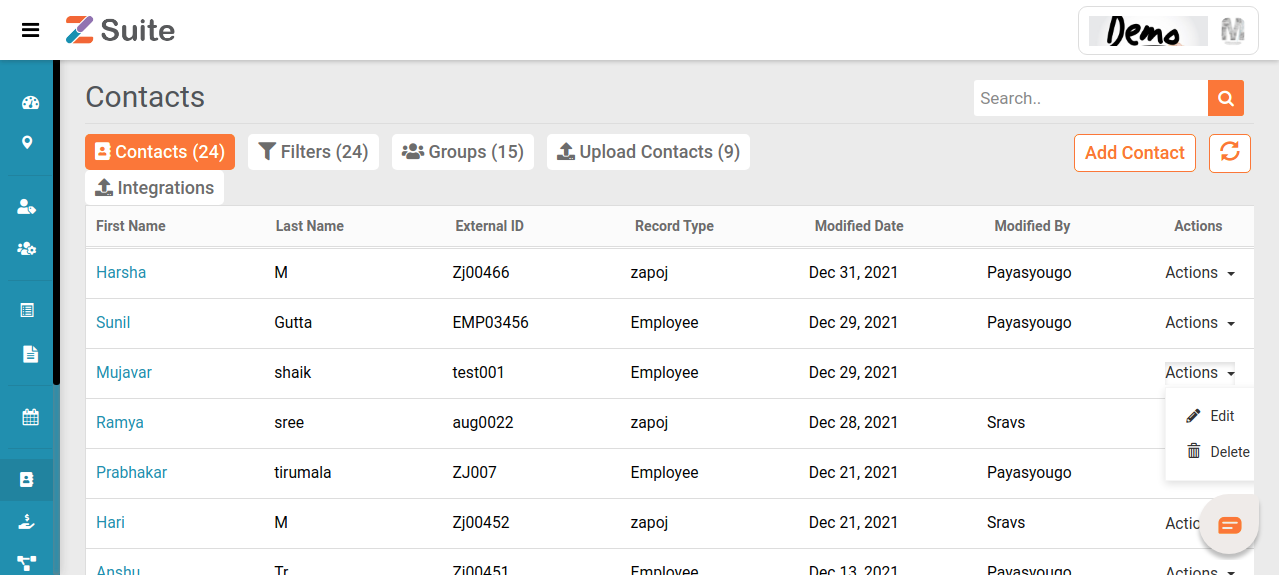
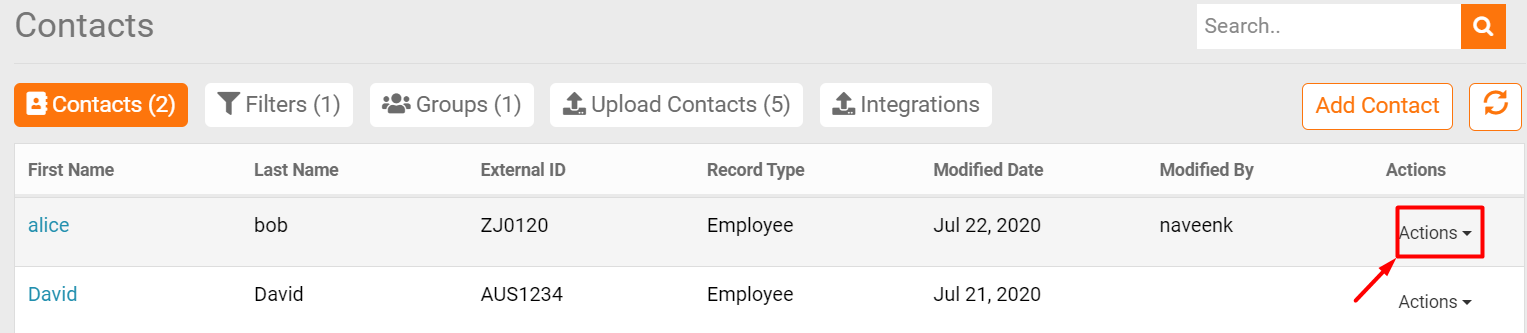
By clicking on the “Actions” dropdown button, the user has two options: “Edit” and “Delete”. Click on “Edit” for Editing.
The user will be redirected to the Contact details page. Edit the preferred details and “Save”.
Deleting Individual Contacts:
There are two ways for deleting an Individual Contact:
If the user wants to delete the contact details click on the “First Name” in Contacts tab.
It will be redirected to the contact details page, click on the “Actions” button and Delete the contact details.
If the user wants to delete the contact details click on the “Actions” in Contacts tab.
A dropdown with Edit and “Delete” options are seen. Select “Delete”.
Editing bulk Contacts:
This is useful for Editing more “Contacts” at a time. There are two ways for editing bulk Contacts.
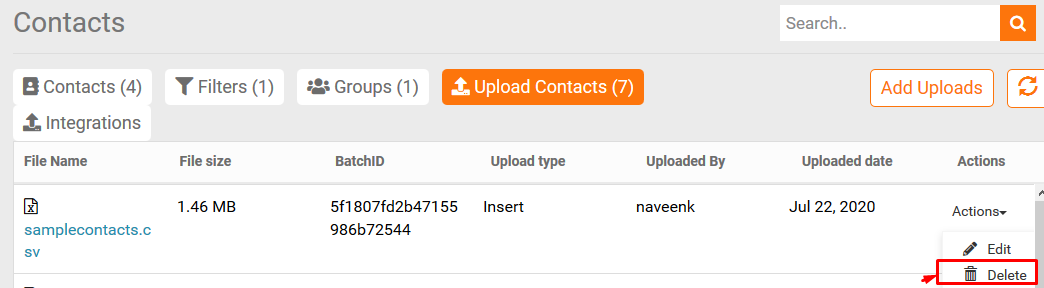
Click on the “Upload Contacts” tab, then click on “Actions” dropdown button and click on “Edit”.
The user will be redirected to a page where the user can see all the details, do the preferred action and click on “Save”.
The other way is to click on the “Upload Contacts” tab, click on “File Name”, the user will be redirected to the contact details page, then click on the “Edit” button.
Edit the preferred one and click “Save”.
Deleting bulk Contacts:
Step by step process on “How to delete contacts in bulk” in Zsuite, Quick and Easy with this video.
Click on the “Upload Contacts” tab, then click on “Actions” dropdown button and click on “Delete”.
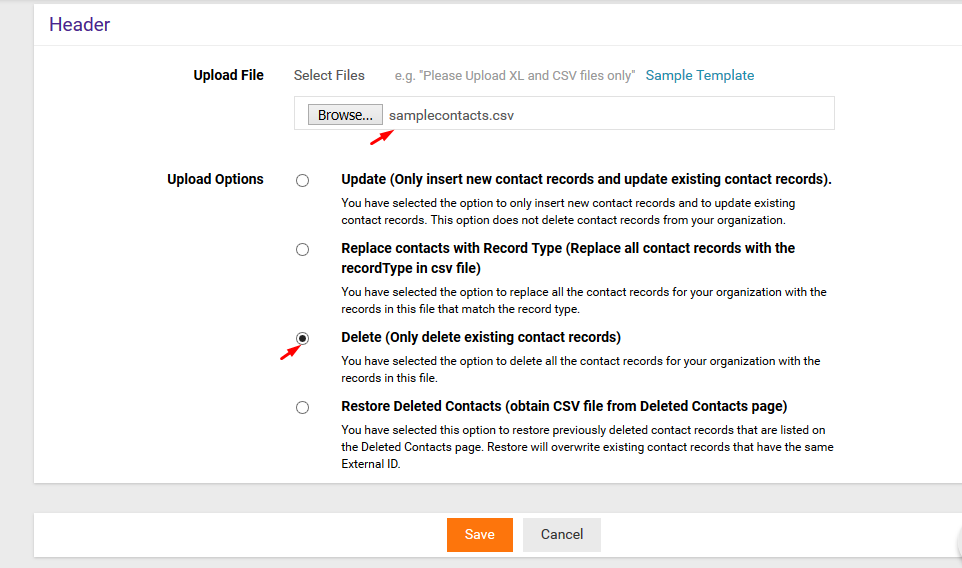
Click on “Add Uploads”, upload the data to be deleted and select the “Delete” option. Click on the “Save” button to save the changes.
Equipment
Equipment
Equipment are machinery, tools, devices, etc., that are significant for the ability, safety, quality standards and business objectives of any organization.
Step by step process on “How to create equipments” in Zsuite, Quick and Easy with this video.
Equipments:
All the created equipments are listed here.
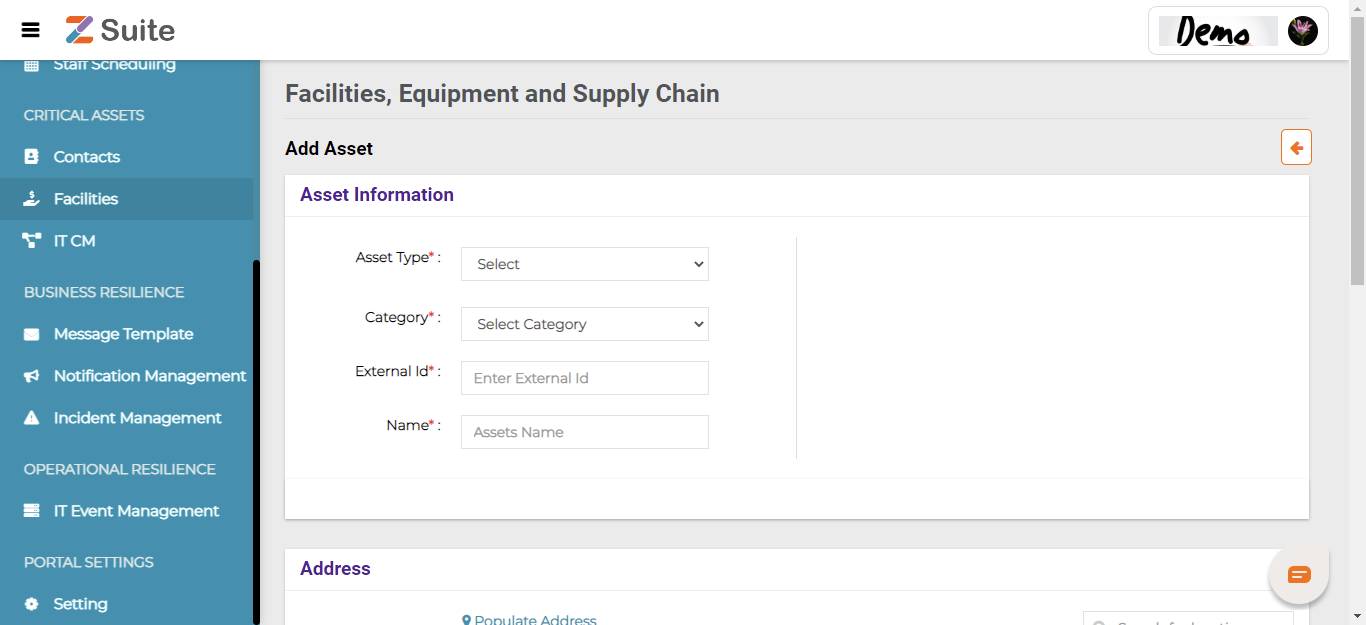
Add Equipment:
Category: Select the Equipment Category from the dropdown list. Equipment category can be used to categories equipment under Electrical & Power, Fire Safety, Physical Security, etc.,
External ID: Asset ID is the unique Equipment ID with Alphabets or Numbers or Alphanumeric.
Example:
IND_BLR_TGW_PARK_SDB_9_GEN_1
DEN_COP_TULIPS_GRFL_UPS_2
External ID cannot be changed once data is saved and created.
Name: Users can enter the Equipment name.
Calendar: Users can select the respective staff Calendar
Create an Equipment:
Click on the “Add Asset” button displayed in the top right
The user will be navigated to the” New Asset” page
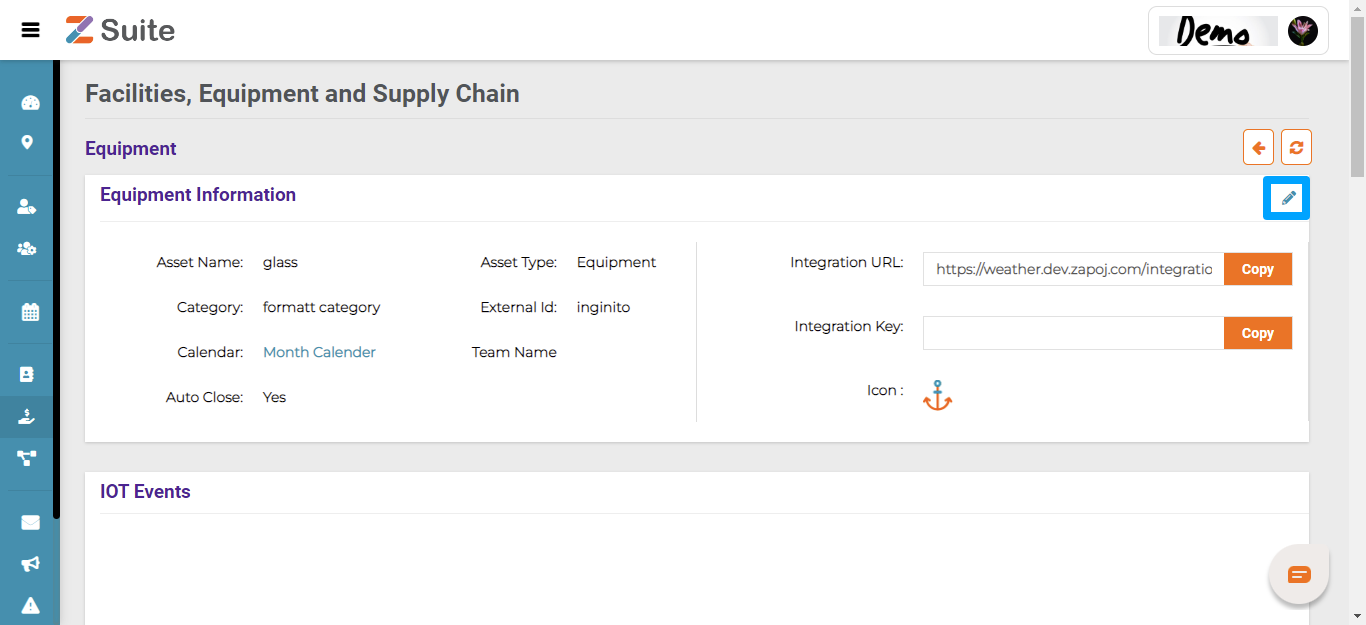
Add Information :
User can fill Equipment category, external id, name, staff calendar, and integration key of any devices that can emit data signals like GPS, CCTVs, etc.,
IoT equipment use embedded sensors to collect, exchange, and share data with other devices, applications, and systems, in real-time. With the help of Integration key and URL these equipment can be integrated to share specific alerts or notifications.
Example: IoT devices tagged with sensors are used for tracking real time location of medical equipment like wheelchairs, defibrillators, nebulizers, oxygen pumps and other monitoring equipment.
Address Details:
Add the address of the Equipment as at least one address is mandatory.
Click on the “Save” button after filling in the details
Now User can see this asset details on the assets tab of the assets page
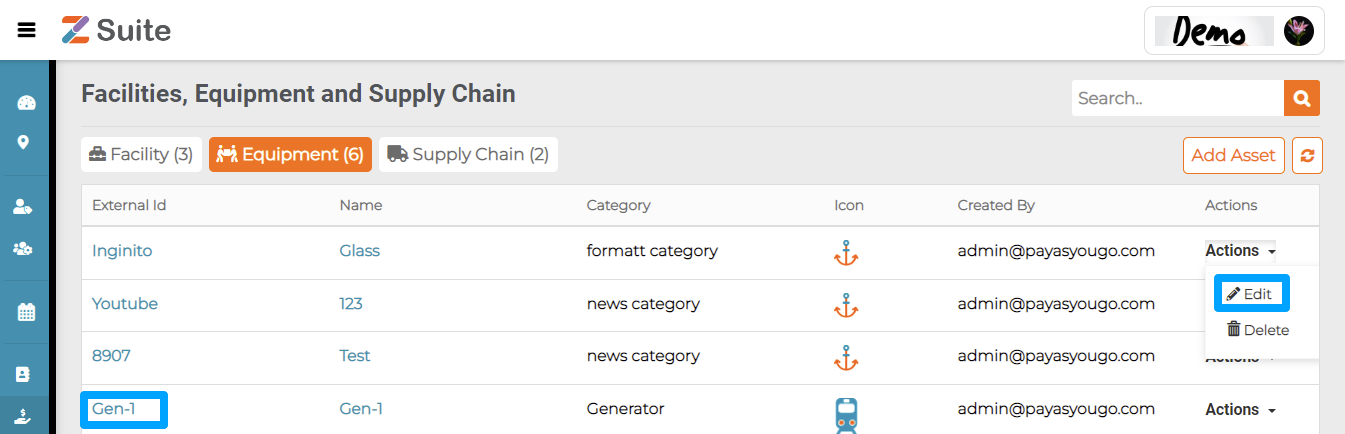
Click on “Equipment Name” or on the “Actions” dropdown and click on “Edit”.
Editing an Equipment:
The user will be redirected to the “Equipment details” page.
The user can Edit the details and click on the “Save” button.
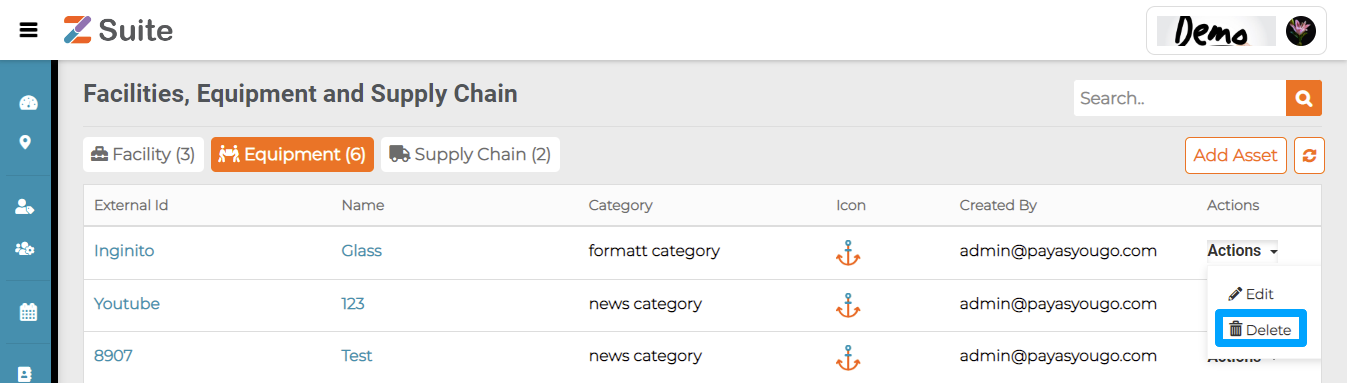
Deleting an Equipment:
If the user wants to delete an Asset, click on the “Actions” dropdown, and then the “Delete” option.
Facilities
Facilities
Facilities are generally termed as Commercial and Institutional Office Buildings, Hospitals, Laboratories, Hotels, Restaurants, Educational Facilities and Industrial Areas. Facility Management is an organizational function which integrates people, place and process within the facility to improve the quality and productivity of people and business.
Step by step process on “Understanding facilities creation” in Zsuite, Quick and Easy with this video.
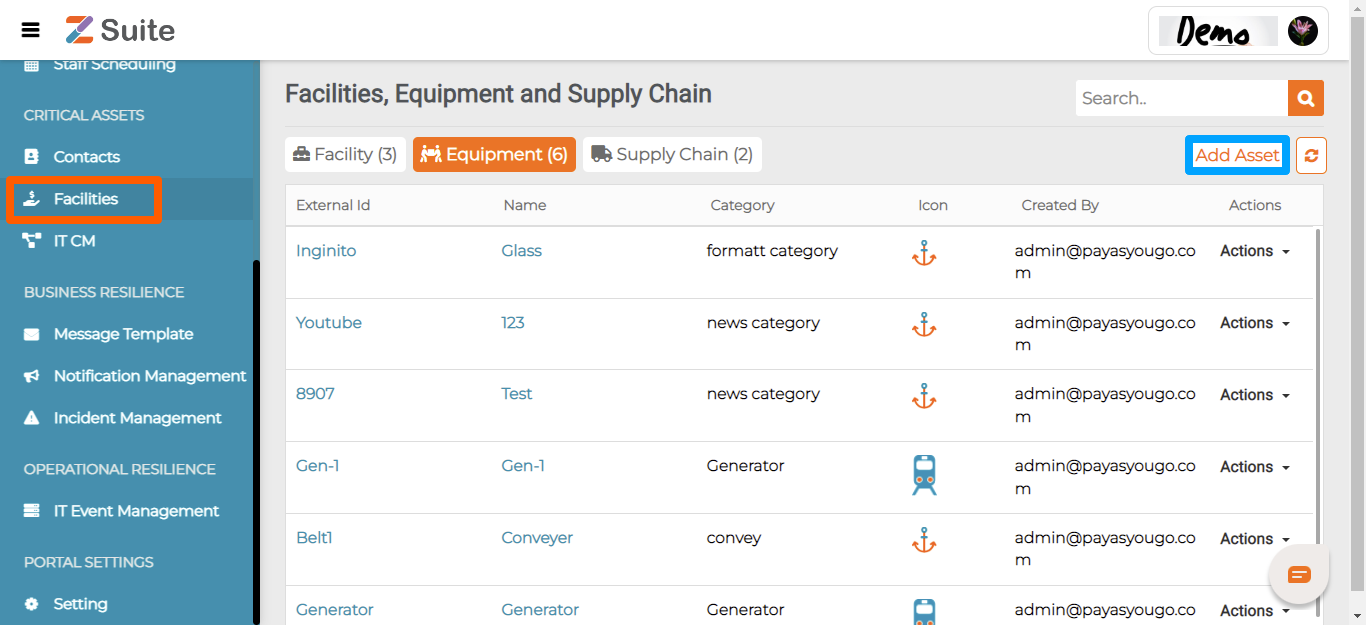
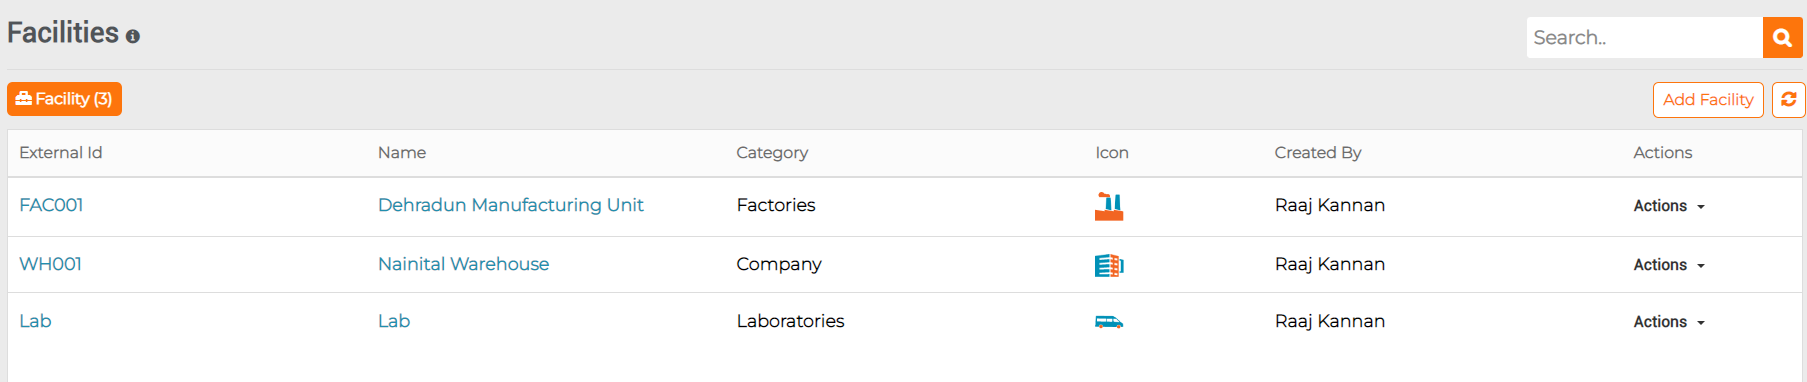
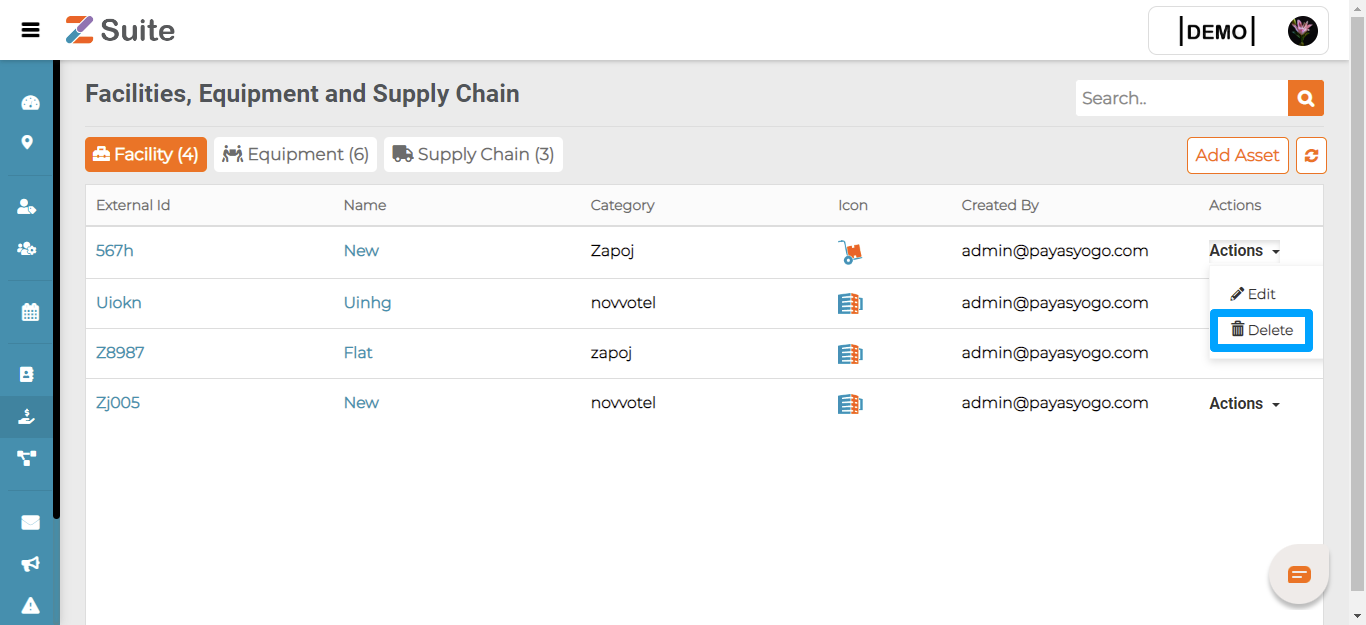
All the created “Facilities” are listed here.
Add Facility
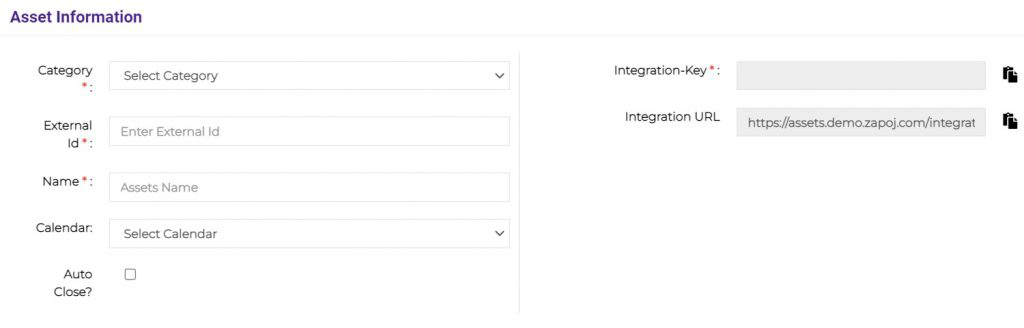
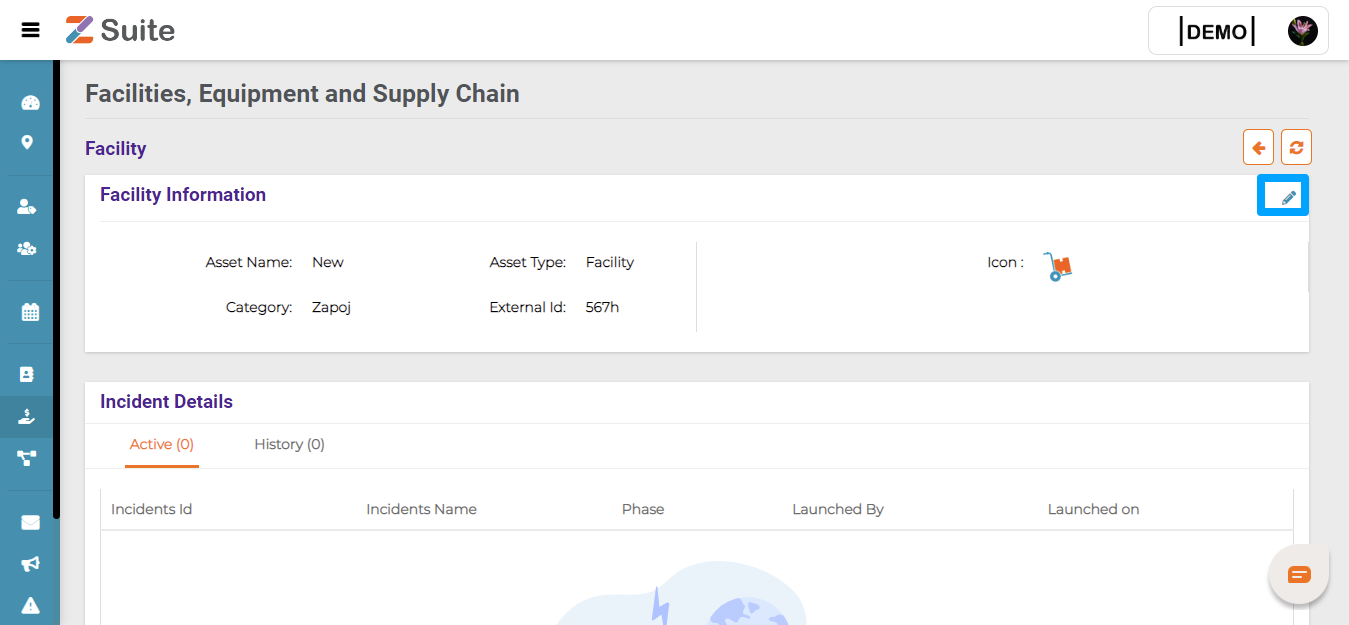
Facility Information
Category:
Select Category from the dropdown list after selecting Asset Type as Facility. Facility categories can be Factory, Shop, Warehouse, Training Center, Lab, etc.,
External ID:
Unique Facility IDs with Alphabets or Numbers or Alphanumeric can be entered here.
Example:
APAC_IND_BLR_LAKEVIEW_TECH_PARK_SDB_1
EUR_DEN_COP_TULIP_TOWER_FLR_2
Please note that the External ID cannot be changed once Facility is saved/created.
Name:
Users can enter the Facility Name as per the naming standard.
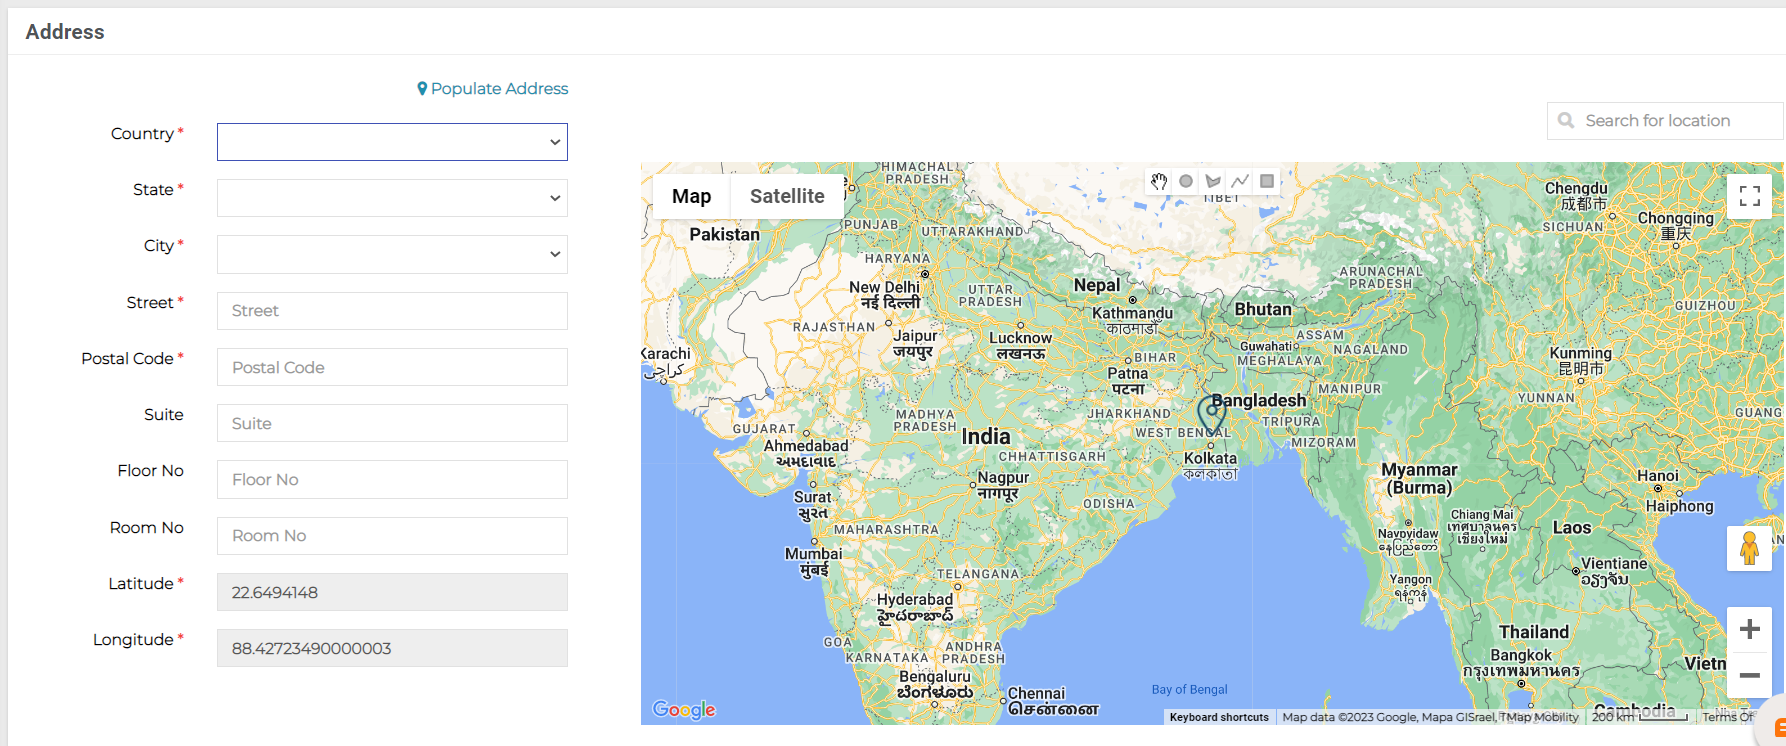
Address Details:
Users can enter the respective Facility Address and the map location will be displayed for the address entered.
Click on the “Save” button after filling in all the mandatory data.
Editing a Facility:
Click on “Facility Name” or on the “Actions” dropdown and click on the “Edit” option.
The user will be redirected to the “Facility details” page.
The user can Edit the Facility details and click on the “Save” button.
Deleting a Facility:
If the user wants to delete an Asset, click on the “Actions” dropdown, and then the “Delete” option.
Who can access Critical Assets features?
Who can access Critical Assets features?
Contact Manager: Contact Manager is the one who is authorized to add, edit and delete the contacts.
Contact Manager can Create, Edit and Delete the Contacts, Groups and Filters, Add the record type, set legends under Portal Settings for Contacts and View the Dashboard.
Contact Organizer: Contact Organizer is the one who is authorized to organize and manage the contacts for proper storage, quick access, editing and tracking.
Contacts can be organized using the Excel Template provided to Upload Contacts or integrating an existing HRM System with Z Suite to sync the Contact.
HR: Responsible for all the HR activities.
Filters
Filters
A contact filter is a set of contacts that are dynamically grouped together to send message or alerts to everyone in that filter at once.
Adding a Filter:
A Filter can be created with Contact’s First Name, Middle Name, Last Name, External ID, Record Type, Delivery Options, Country Code, Delivery Options Type, Country, State and City.
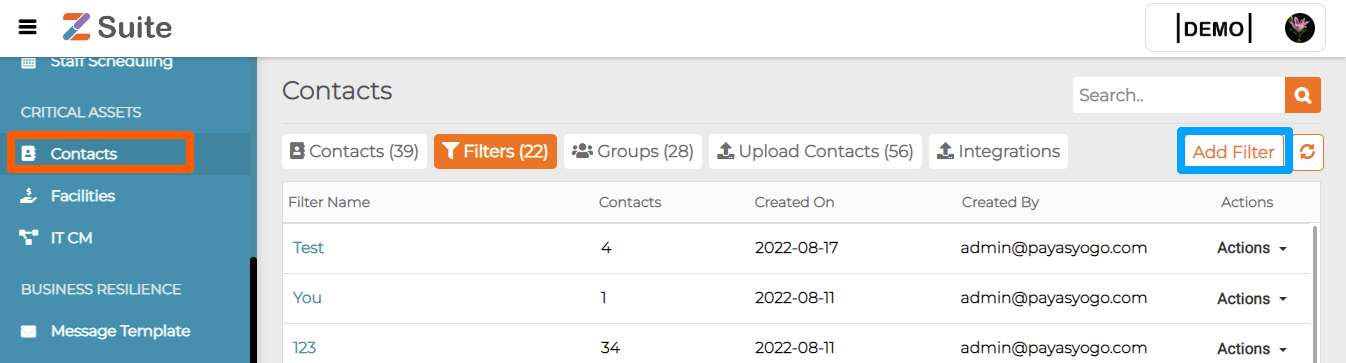
Users can add their own Filters . Click on the “Add Filter” button to create one.
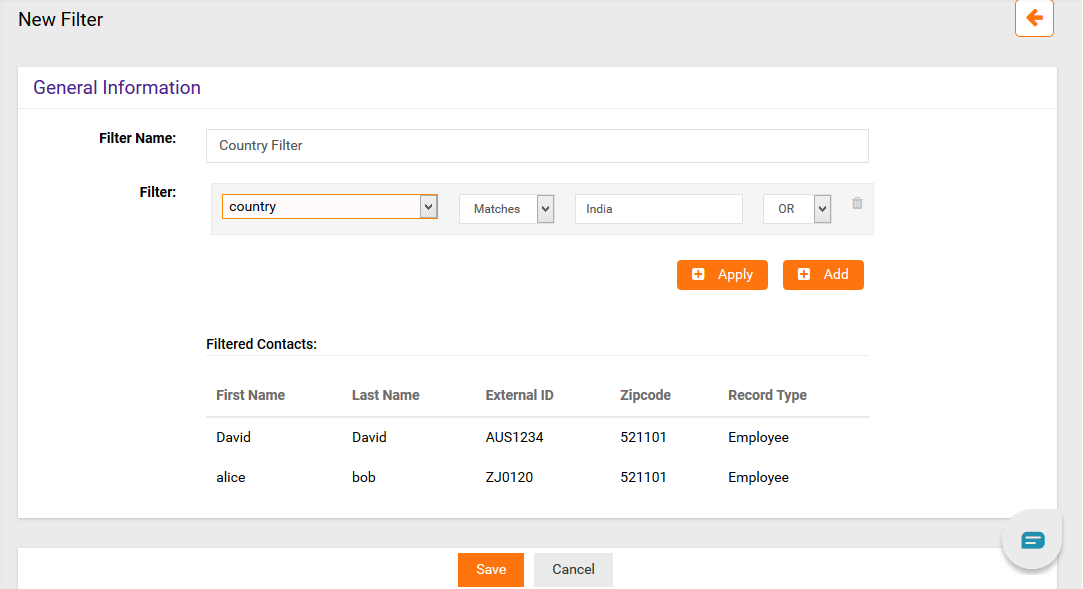
The users will be redirected to the “New Filter” page. Fill in the details and click on the “Save” button.
A new “Filter” can be created with criteria like “country matches India”, “State matches Maharashtra”, etc.,
Editing a Filter:
A user can “Edit” an existing filter in two ways.
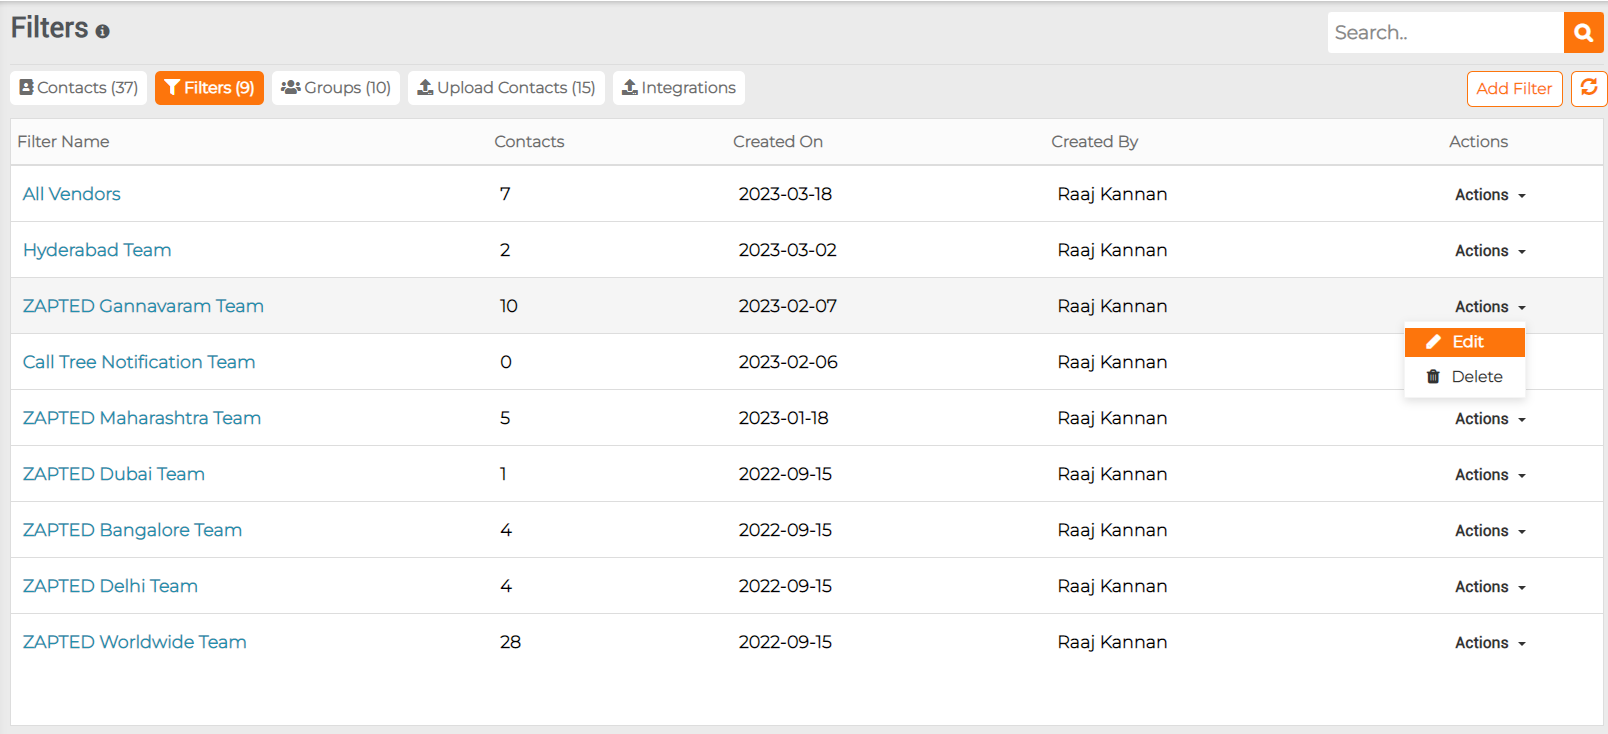
Click on “Actions” which is shown on the “Filters” tab. A dropdown with “Edit” and “Delete” is found. Click on “Edit”, it redirects to the General Information. The User can edit the details and click on “Save”.
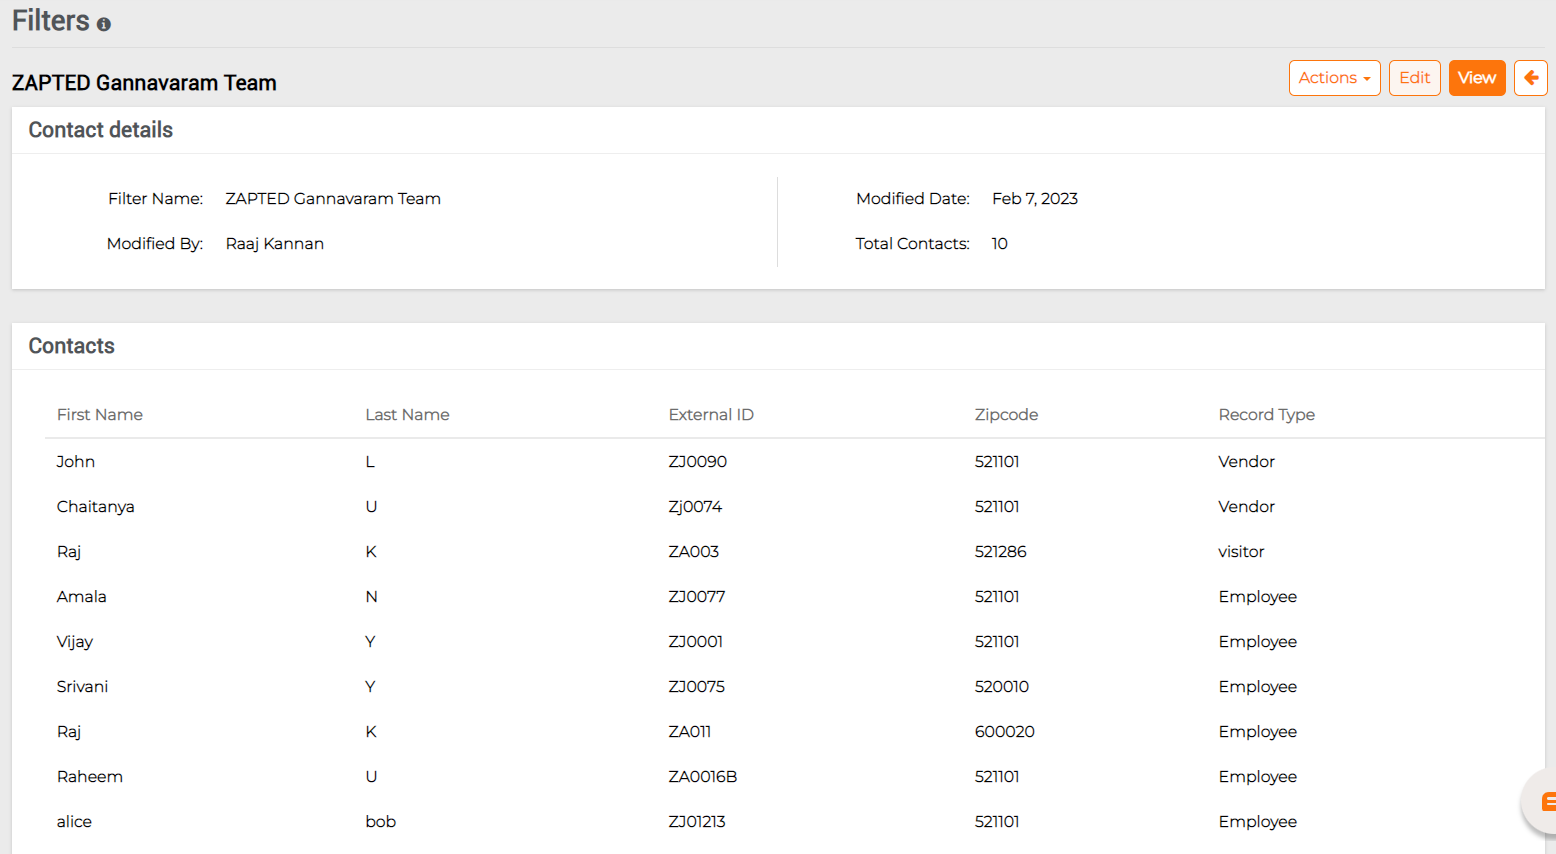
Click on the name of the filter.
Then click on the “Edit” button provided to edit the details. Click on the “Save” button after completing the changes.
Deleting a Filter:
The user can delete a “Filter” in two ways.
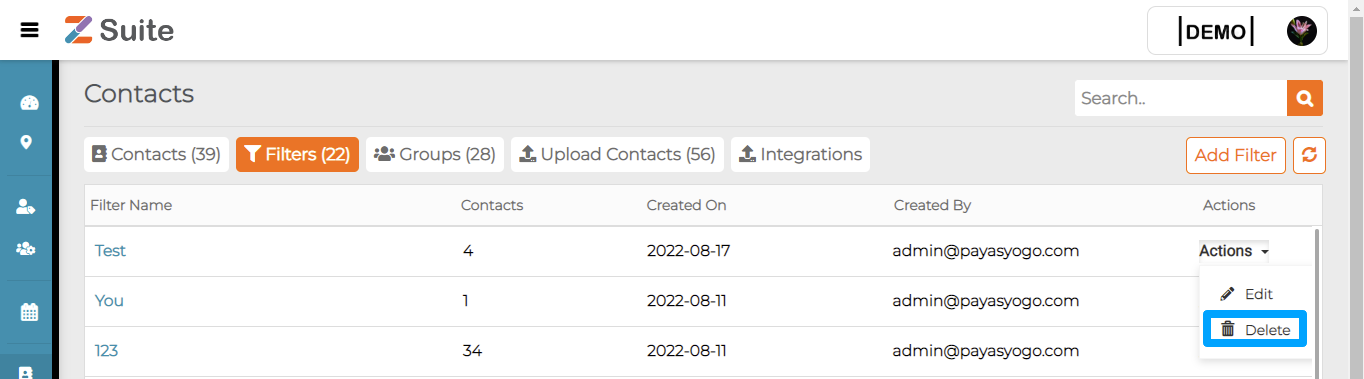
Click on “Actions” which is shown on the “Filters” tab. A dropdown with “Edit” and “Delete” is found. Click on “Delete”.
The other way is to click on the name of the filter. Then Actions – > “Delete”.
IT CM
IT Process
Click on Name of the IT Process to view it. Here are the Details you find there like Process Name ,Process Description, Services Count, Response Time, Resolve Time, Close Time, Actions.
Creating a New Process:
The user will be directed to a “New Process” page. Fill the mandatory details for creating a new process.
Viewing a history:
Edit an Icon:
You can Edit whenever you want by clicking on Actions ->Edit.
Change the details you want to and Update.
IT Services
Click on Name of the IT Services to view it. Here are the Details you find there like Services Name, Description,process ,Status ,calendar Name ,Actions.
Creating a New Services:
The user will be directed to a “New Services” page. Fill the mandatory details for creating a new Service.
Viewing a history:
Settings:
Click on Viewing a history: view it. Here are the Details you find there like Settings, integrations,Ruleset,maintenance mode,service dependence
Creating a New integration:
The user will be directed to a “New integration” page. Fill the mandatory details for creating a new integration.
Creating a New Ruleset :
The user will be directed to a “New Ruleset” page. Fill in the details for creating a newRuleset.
Creating a New Maintenance Mode :
The user will be directed to a “New Maintenance Mode” page. Fill in the details for creating a new Maintenance mode.
Creating a New service dependency Mode :
The user will be directed to a “New service dependency Mode” page. Fill in the details for creating a new service dependency mode.
Click on Active Incidents Here are the Details you find there like active incidents, history incidents. and incident id ,incident title ,priority ,launched on ,incident mode, launched by .
Click on History Incidents: Here are the Details you find for past incidents, incident id , incident title , priority,launched on ,incident mode,launched by .
Edit an Icon:
You can Edit whenever you want by clicking on Actions ->Edit.
Change the details you want to and Update.
Contacts
Contacts
Click on the menu icon displayed on the left side of the Z-suite logo and select “Roles” from the menu options.
The Main Contacts
This is how the main “Contacts” page looks like.
If the user wants to create a Contact there are two ways.
To create individual contact, click on the “Add Contact” button displayed on the top right.
To create bulk contacts, click on the “Upload Contacts” button.
Creating an Individual Contact:
Click on the “Add Contact” button displayed on the top right.
The User will be navigated to the “New Contact” page
For creating a new Contact, the user needs to fill in the information like “Contact Details”, “Delivery Methods” and “Address” of the contact that needs to be created.
Contact Details
Fill in the details that are mandatory i.e., “User Name”, “External ID”, “Record Type”.
User Name: The user has to give the details of the User as asked below.
Note: First Name, Last Name, and Suffix like Mr/Ms are mandatory.
External ID: This is a unique ID given by the user, it can be numbers, alphabets or Alphanumeric.
Record Type: There are some categories in record type. For example, Manager, Employee, Customer and Vendor.
If the user is adding a Contact as “Customer” record type, the user needs to add the product details. Press the “Enter” key in the keyboard after providing each product detail.
If the user is adding a Contact of an Employee, the user should add the skills of that employee.
Delivery Details:
Here we can set the delivery methods such as SMS, email, and voice call for which the user needs to be notified during a crisis, emergency, event invites, etc
Note: “Email” and “SMS” details should be provided in order to create a contact.
Click on “Add Delivery Method”. The User can add as many delivery methods they need.
Email: For the “Email” Delivery method there are two options, The User can add “personal” or “office” Email Id. And add the mail address in the Delivery Method Details.
SMS: For “SMS” add mobile and give the number there. Give the country code and mobile number.
Phone: For the “Phone” Delivery Method there are three options, like mobile, office, home. Add the preferred number there.
We can adjust the priority of the Delivery Method.
By clicking on the Up and Down arrow, we can change the sequence of delivery method.
Delivery Method List:
Email – Office: Upon selecting this option, an Email notification will be sent on the Official Email ID.
Email – Personal: Upon selecting this option, an Email notification will be sent on Personal Email ID
Phone: Upon selecting this option, notification will be shared via phone call.
SMS: Upon selecting this option, notification will be shared via Message.
Address Details:
For adding a new contact User has to give the address of the contact to be created. One address is mandatory. Every detail here is mandatory here except the “Apartment/suite”.
After filling in all the details, the map is located.
Click on the “Save” button after filling in the details.
Multiple Address:
In case a user/member wants to add more than one address then he can surely add multiple addresses by clicking on the option Add More Addresses.
Now the User can see this Contact on the Contacts tab of the “Contacts” page.
Creating Bulk Contacts:
After clicking “Upload Contacts” the User has to click on the “Add Uploads” button.
The User will be redirected to the “New Upload” page.
Firstly, the User has to download the “Sample Template” given. After that fill the Contacts details accordingly and Add the file using the “Browse” button available there.
Below this, there are some “Upload Options”, select preferred one and “Save”.
Under the Upload Contacts tab, we can see all the history of contacts which are uploaded till date.
By clicking on the uploaded file name, we can see the complete details and contacts uploaded with that sheet.
Editing Individual Contacts:
There are two options for editing the contacts.
If the user wants to edit the contact details click on the “First Name” in Contacts tab.
The user will be redirected to the “Contact details” page. Click on the “Edit” button.
The user can edit the details and click on the “Save” button.
By clicking on the “Actions” dropdown button, the user has two options: “Edit” and “Delete”. Click on “Edit” for Editing.
The user will be redirected to the Contact details page. Edit the preferred details and “Save”.
Deleting Individual Contacts:
There are two ways for deleting an Individual Contact:
If the user wants to delete the contact details click on the “First Name” in Contacts tab.
It will be redirected to the contact details page, click on the “Actions” button and Delete the contact details.
If the user wants to delete the contact details click on the “Actions” in Contacts tab.
A dropdown with Edit and “Delete” options are seen. Select “Delete”.
Editing bulk Contacts:
This is useful for Editing more “Contacts” at a time. There are two ways for editing bulk Contacts.
Click on the “Upload Contacts” tab, then click on “Actions” dropdown button and click on “Edit”.
The user will be redirected to a page where the user can see all the details, do the preferred action and click on “Save”.
The other way is to click on the “Upload Contacts” tab, click on “File Name”, the user will be redirected to the contact details page, then click on the “Edit” button.
Edit the preferred one and click “Save”.
Deleting bulk Contacts:
If the user wants to delete a bulk of Contacts there are two ways.
Click on the “Upload Contacts” tab, then click on “Actions” dropdown button and click on “Delete”.
Click on “Add Uploads”, upload the data to be deleted and select the “Delete” option. Click on the “Save” button to save the changes.
Filters
Introduction:
In these filters users can add their own filters to make them easily. in these filters we can add filters and edit and delete the filters.
Who Can Access:
Users with the roles of Organization Admin, IT Incident Manager, Mass Notification Manager and its Dispatcher, HR, Incident Operator, Staff Schedule Manager, Contact Managers and Contact Organizers can access these features in the tool to create contacts in the organization and manage the same.
Adding a Filter:
Users can add their own Filters to make their task easy. Click on the “Add Filter” button to create one.
The users will be redirected to the “New Filter” page. Fill in the details and click on the “Save” button.
A new “Filter” is created with “country matches India”. Filter name is given as “Country Filter”.
Editing a Filter:
A user can “Edit” an existing filter in two ways.
Click on “Actions” which is shown on the “Filters” tab. A dropdown with “Edit” and “Delete” is found. Click on “Edit”, it redirects to the General Information. The User can edit the details and click on “Save”.
Click on the name of the filter.
Then click on the “Edit” button provided to edit the details. Click on the “Save” button after completing the changes.
Deleting a Filter:
The user can delete a “Filter” in two ways.
Click on “Actions” which is shown on the “Filters” tab. A dropdown with “Edit” and “Delete” is found. Click on “Delete”.
The other way is to click on the name of the filter. Then Actions – > “Delete”.
Groups
Introduction:
This is the place where the user can create a group with available contacts for sending information in bulk like Notifications etc. A single contact can be in as many groups.
Creating new Groups:
Adding a new group: For creating a Group click on the “Add Group” button.
The user will be directed to a “New Group” page. Fill the mandatory details for creating a new group.
Group Name: Name for the Group the User wanted.
Group Description: Users can write a description of the group here.
Select Contacts: Here Users can select Contacts for a Group in three ways.
Select from filters:
Here there are already some filters that are created. Users can select from them and add a group with the contacts which are available through that filter.
New Filters:
Users can add new filters here and create a Group from them. The process is the same as creating “Filters”. Give the filter name, then click on “Add” to add the requirements of the Filter. Select from the options given and apply filters and “Save” the changes.
Contacts:
A list of all the “Contacts” will be displayed here. Select the required Contacts and “Save”.
A User cannot create a “Group” with single Contact.
Users can now see the Group created.
Note: There are two types of “Groups”. One is “Static” and the other is “Dynamic”
A “Group” created by selecting contacts manually is referred as “static”
A “Group” created by selecting contacts from “Filters” is referred to as “dynamic”
Editing new Groups:
The user can edit a group’s details in two ways.
Click on “Actions” which is shown on the “Filters” tab. A dropdown with “Edit” and “Delete” is found. Click on “Edit”, it redirects to the Group Information. The User can edit the details and click on “Save”.
Click on the name of the “Group”, the user will be redirected to the group details page, click on the “Edit” button, edit the details needed and click on “Save” button.
Deleting a new Group:
There are two ways to “Delete” a Group.
Click on “Actions” which is shown on the “Filters” tab. A dropdown with “Edit” and “Delete” is found. Click on “Delete”.
Click on the name of the “Group”, the user will be redirected to the group details page, click on “Actions” and then click on “Delete”.