Templates
During incidents to save time and simplify the user input process, pre defined incident templates are used. These templates contain predefined data that populates when the template is applied to it, eliminating the need to manually reenter this data.
Step-by-step process on “How to create incident templates” in Zsuite, Quick and Easy with this video.
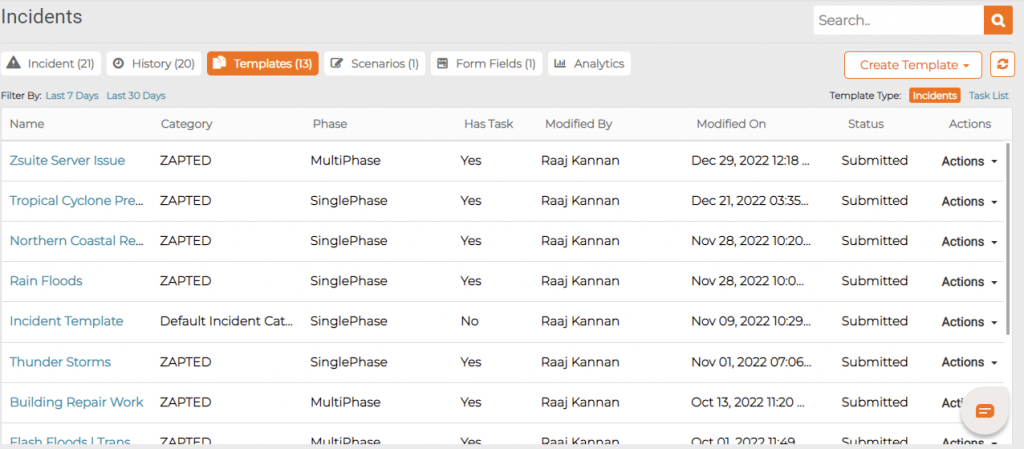
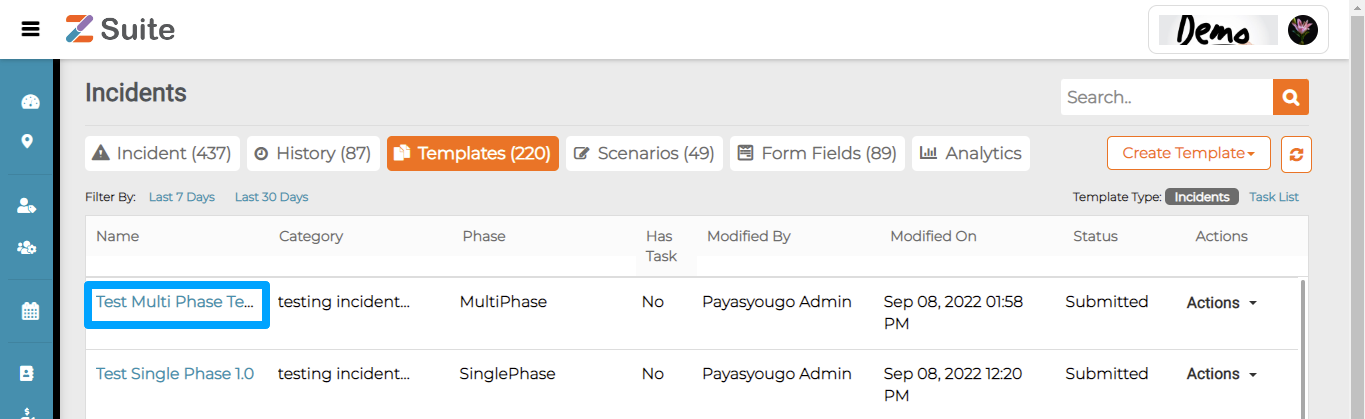
Click on templates to view the list of created templates panen99 link alternatif.
Creating a Template:
Incident Templates are pre defined template formats that can be reused when needed. This allows an organization to customize the template with dynamic form fields, organize incident messages with media (file/audio/video) and add task list for respective task owners.
Click on the create template button on top right.
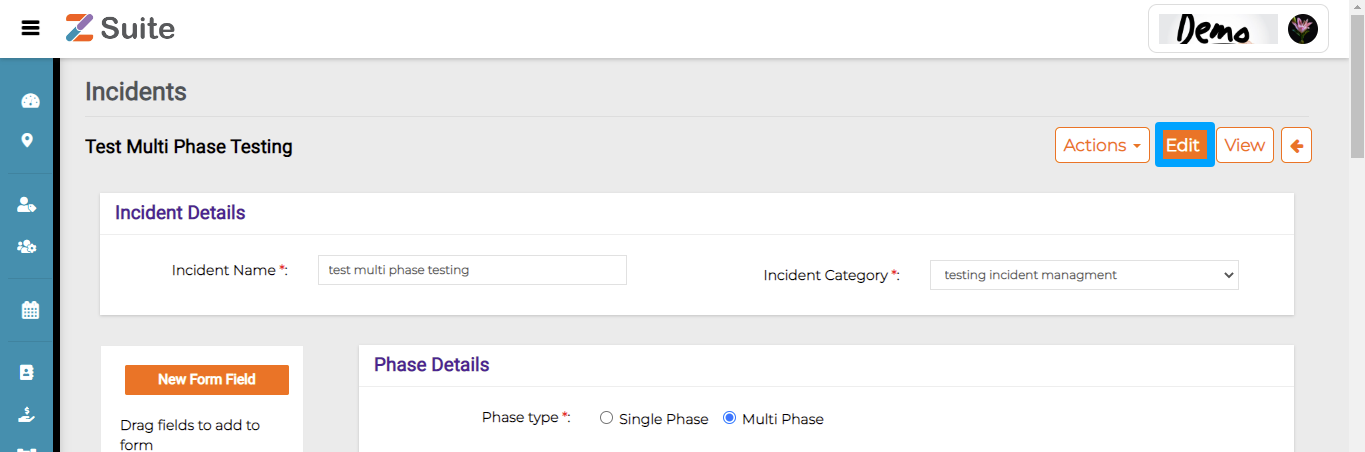
New Incident Template Creation
Incident Name: Enter the Incident Name.
Incident Category: Select the Incident Category from the dropdown list.
Phase Type: Select the Phase Type as Single Phase / Multi Phase from Radio buttons.
Operator Form: Drag and drop the Operator Form and the user can also create Form Field by clicking on New Form Field.
Message: Enter the incident message in the Message box.
Select Contacts: Select Contacts as Individuals / Zones / Groups.
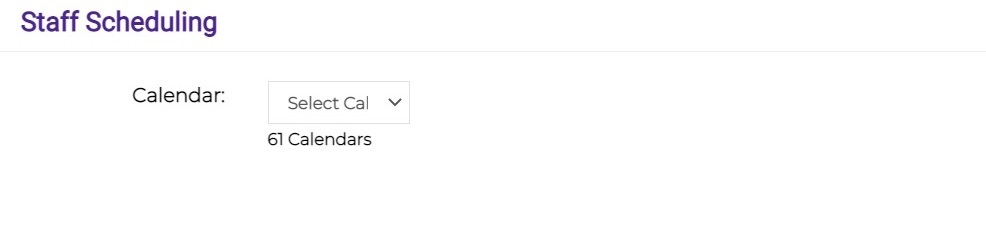
Staff Scheduling: Select the Calendar from the dropdown list.
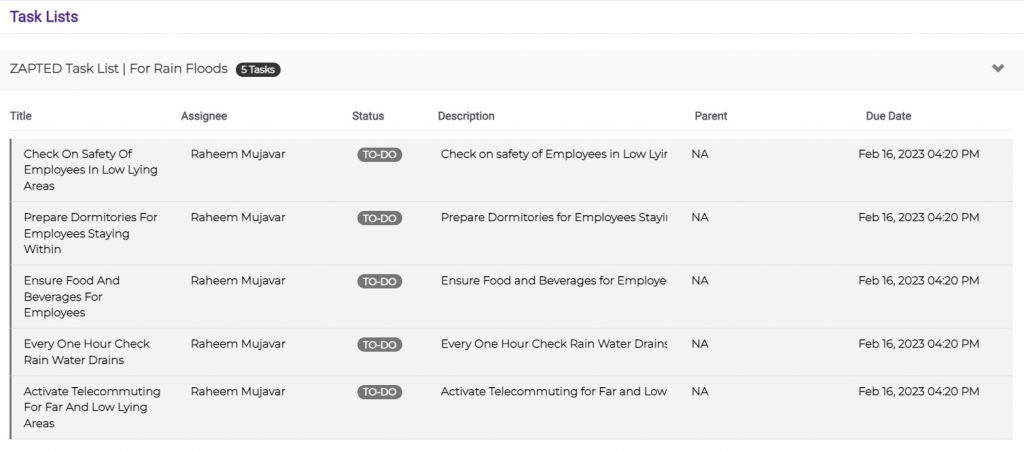
Task List: Select the Task List from the dropdown list.
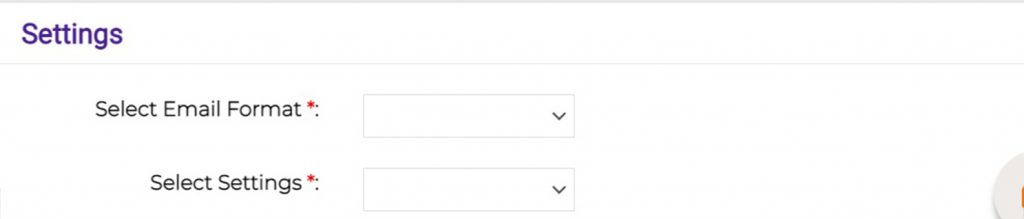
Settings: Select Email Settings and Format from the dropdown list.
You have to fill Incident details like Incident Name, Category, Phase type, Form Fields, Message.
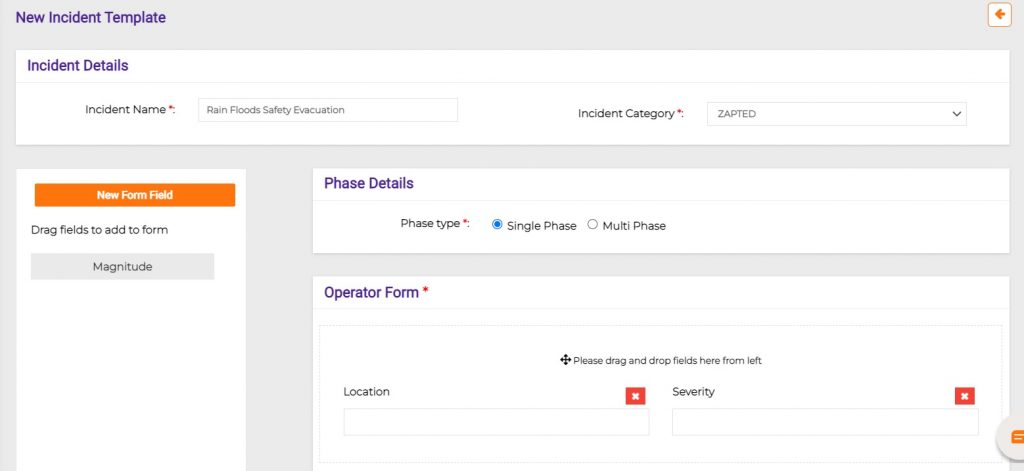
Phase details and Operator form: Incidents can be single and multiphase. Operator form is where you can create dynamic form fields for an Incident and drag and drop those fields as appropriate.
The above are the Phase details and operator form. There are two phases like single and multiphase. Operator form is where you can drag and drop the fields you have already created in form fields.
Message: Here you have to type the message you wanted to communicate on the Incident.
Example: IT Outage Incident Template
Subject: Mail Server Temporarily Down
Message: We are currently experiencing a service outage for our mail server. IT team is working to restore the service as quickly as possible.
We will update you with more details as we have them, you can check out our status page for the most up-to-date information.
If you click on Include a separate message for Email notifications, there opens an message box so that you can give your message there.
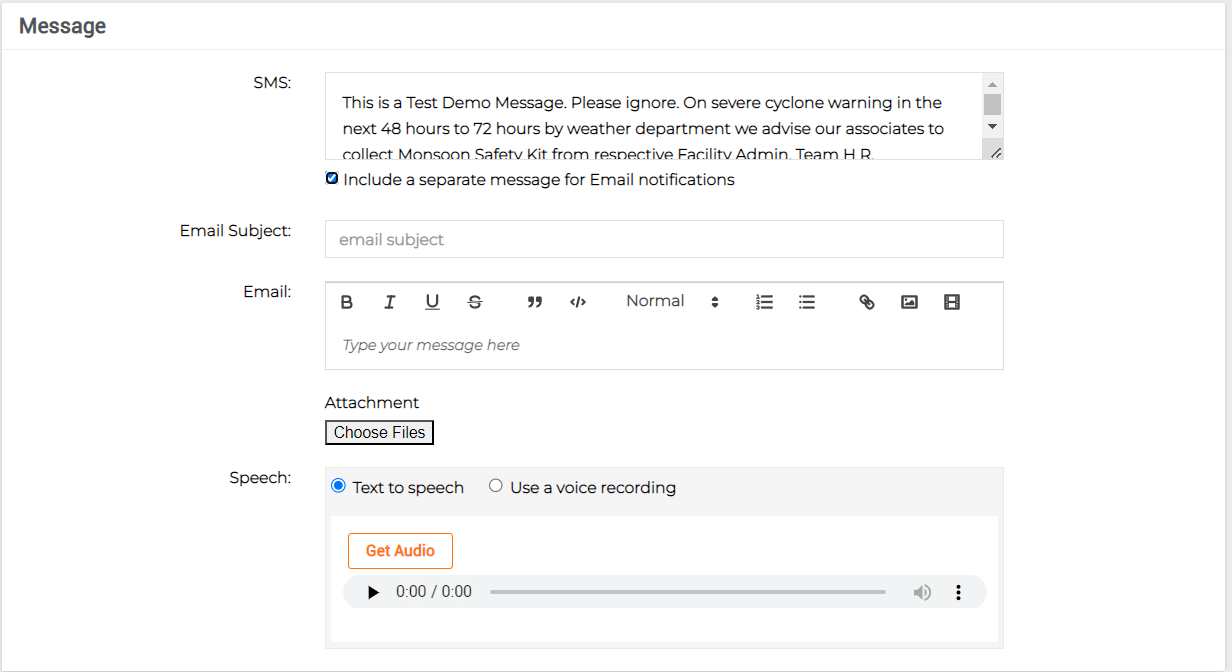
Text to Speech: This converts your message to Speech.
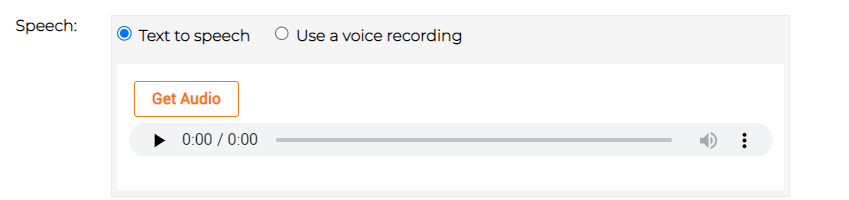
Use a voice recording: Here you can select an audio clip or record an audio to send a message.
If you can select None.
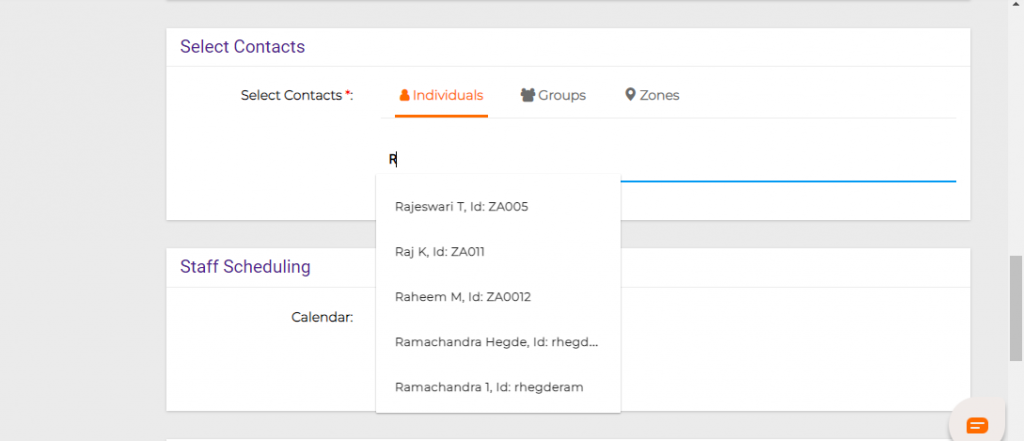
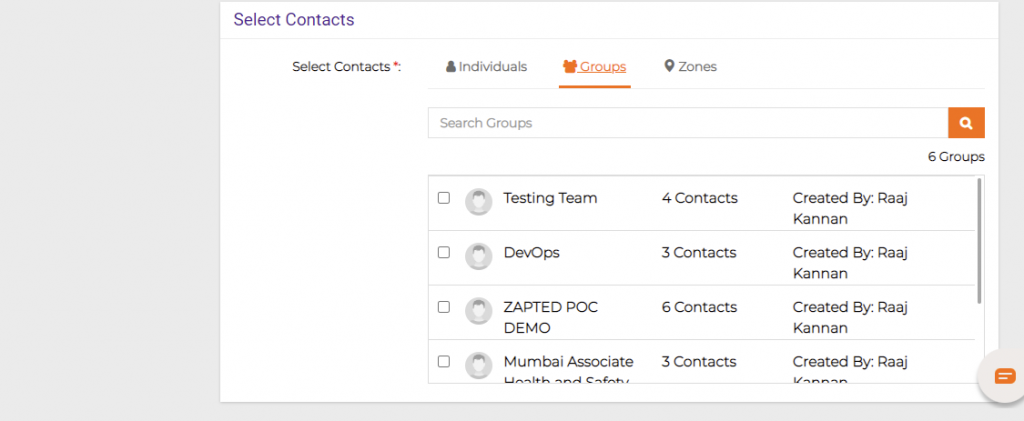
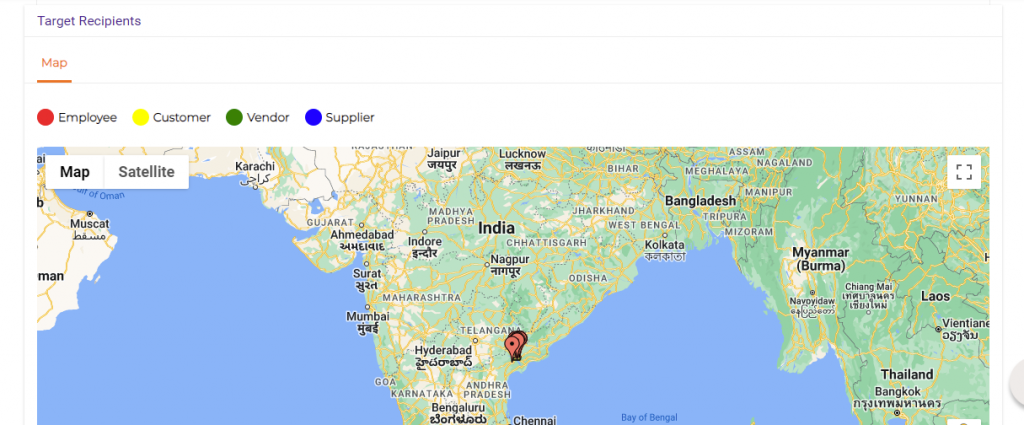
Select contacts: Here you have options to select from individual contacts, groups, zones i.e., based on locations and staff scheduling.
Individuals: Click on “Individuals” tab to select the individual contacts.
Groups: Click on “Groups” to select the preferred group from various organizational Groups.
Zones: This is used to select the zone i.e specific place, so that the message reaches the Users present in that area.
Staff Scheduling : Select the appropriate Staff Calendar from the dropdown .
Task List : Select the appropriate Task List from the dropdown .
The incident is an unplanned interruption and creation of the incident task is used when a particular incident requires specific organizational teams to get involved in their respective Incident response, recovery, restoration areas to collaboratively resolve a particular incident.

Settings : Select the appropriate Email Format and settings from the dropdown .
Click on “Save /Submit” after filling in all the mandatory data.
Edit Template
Click on “Template Name” and click on “Edit”.
The user will be redirected to the “Template details” page.
The user can edit the changes and click on “Submit”.
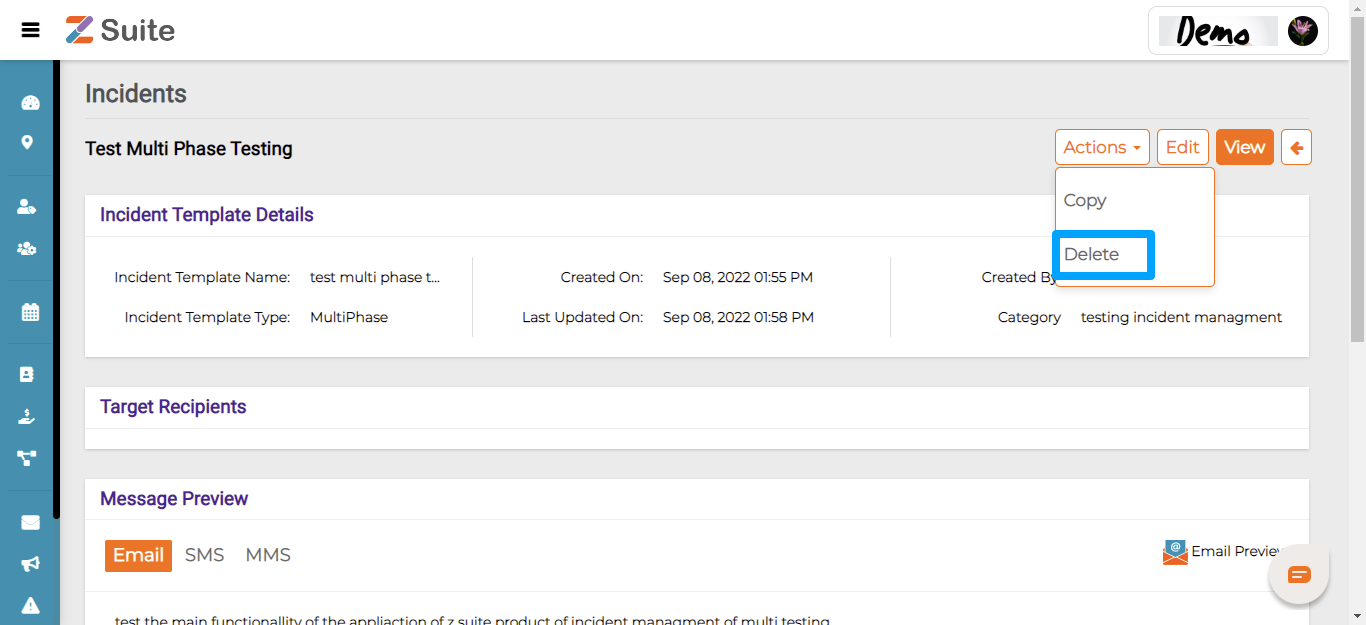
Delete Template
Click on the “Template Name”

The user will be redirected to the “Template details page”, click on “Actions” and click on “Delete”.
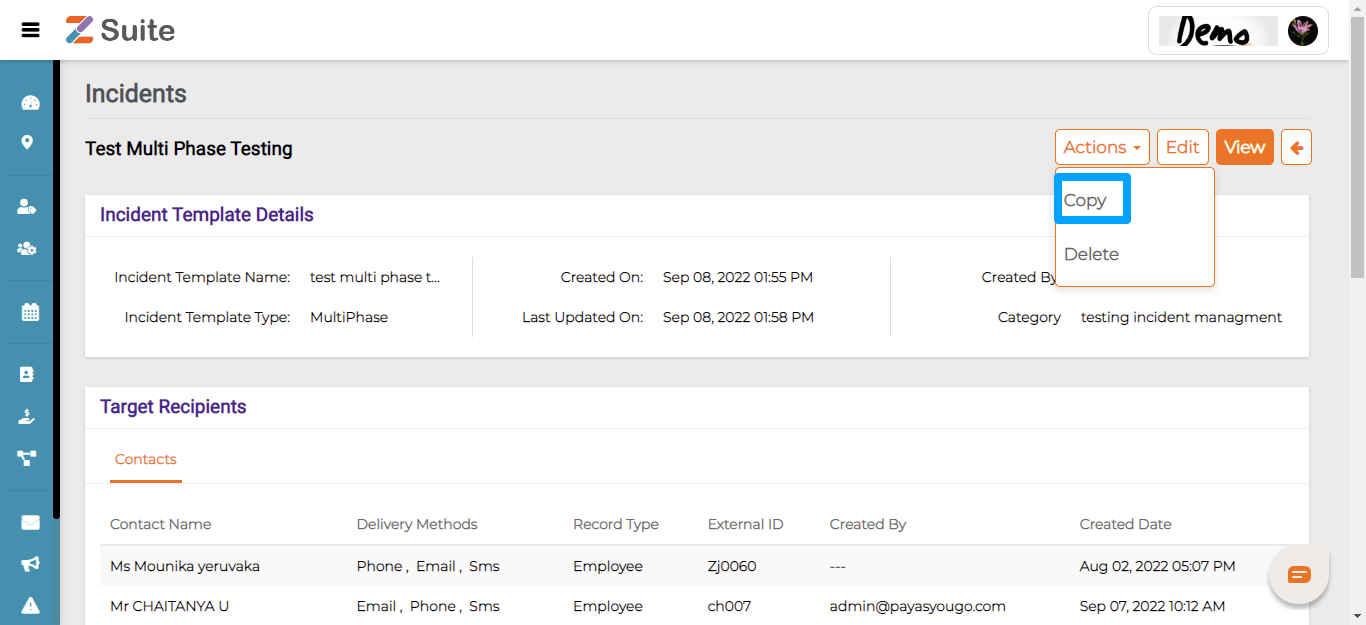
Copy Template
Click on “Template Name”

The user will be redirected to the “Template details page”, click on “Actions” and click on “Copy”.
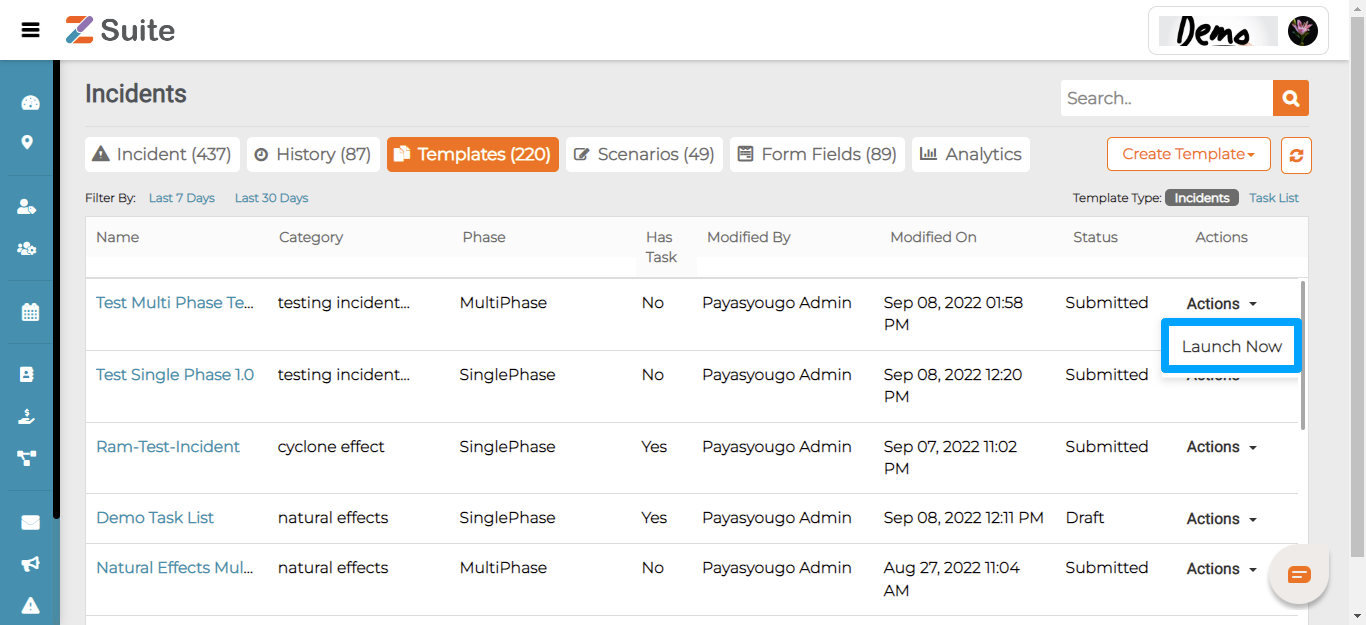
Incident Launch:
Click on the “Actions” dropdown and Click on “Launch” .
The user will be redirected to the Templates view. Select Timezone from the dropdown, enter operator form field data and click on ”Launch“.
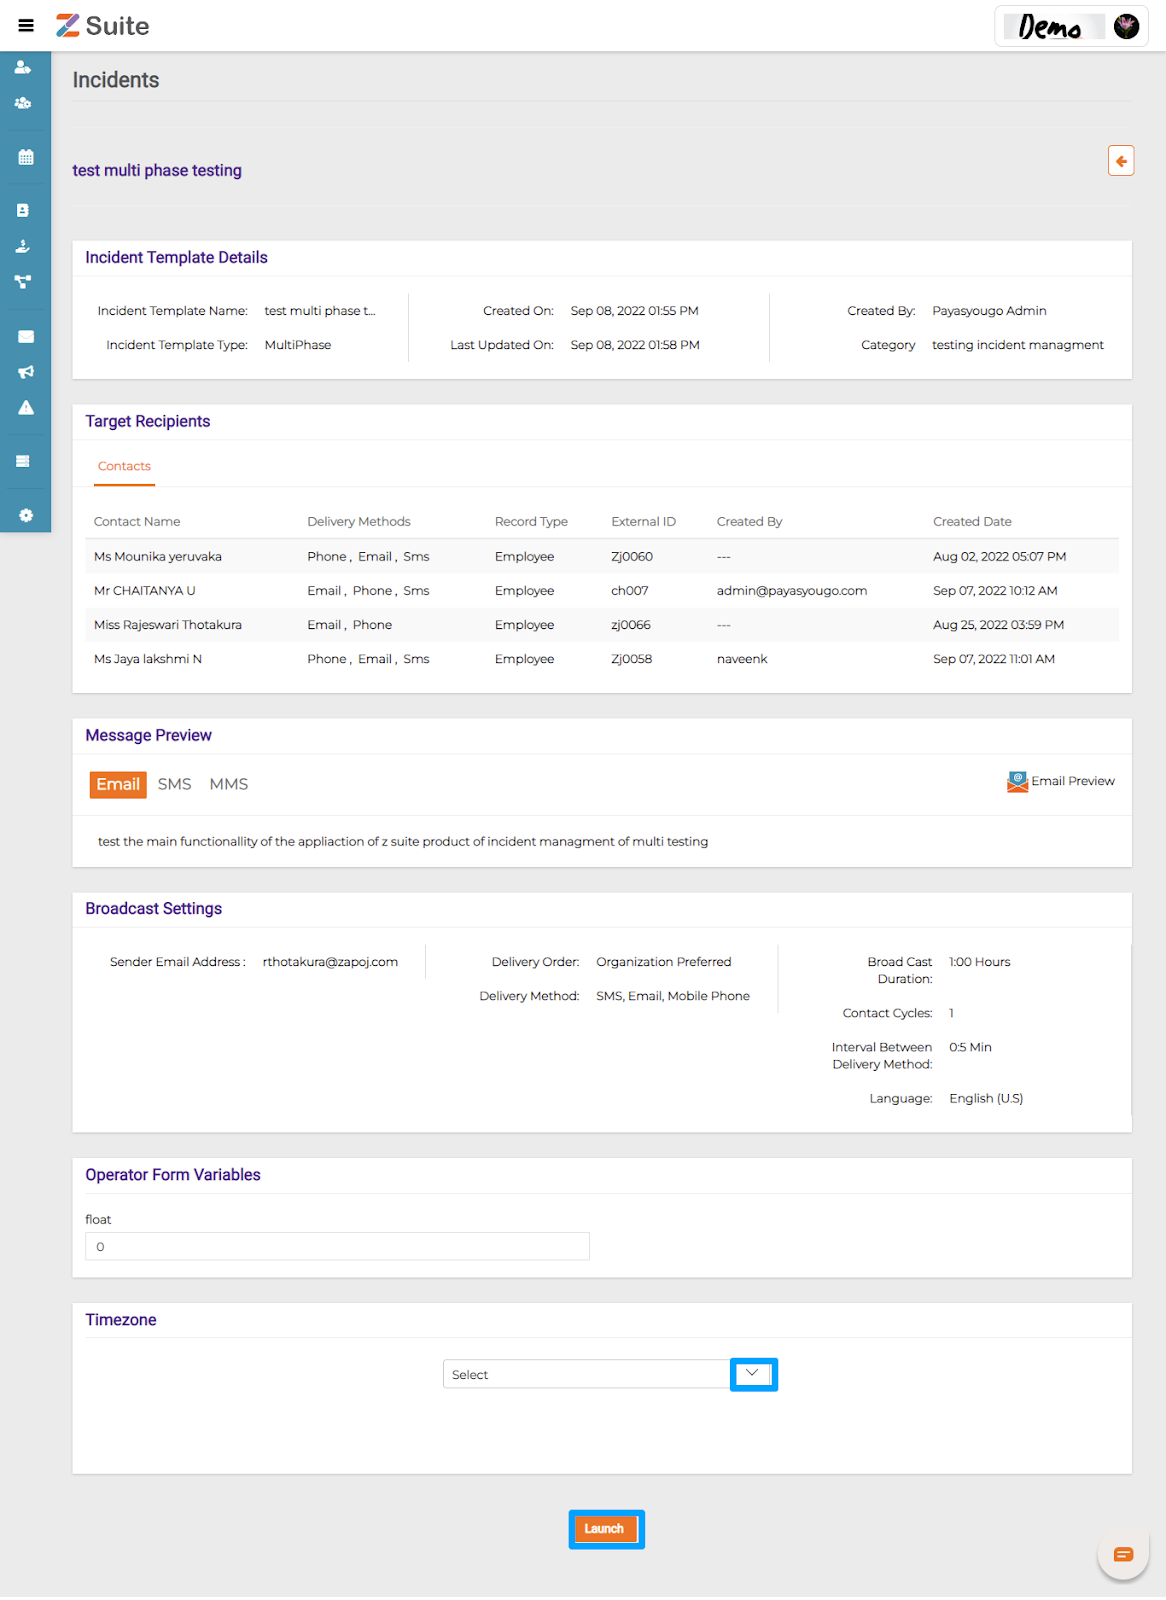
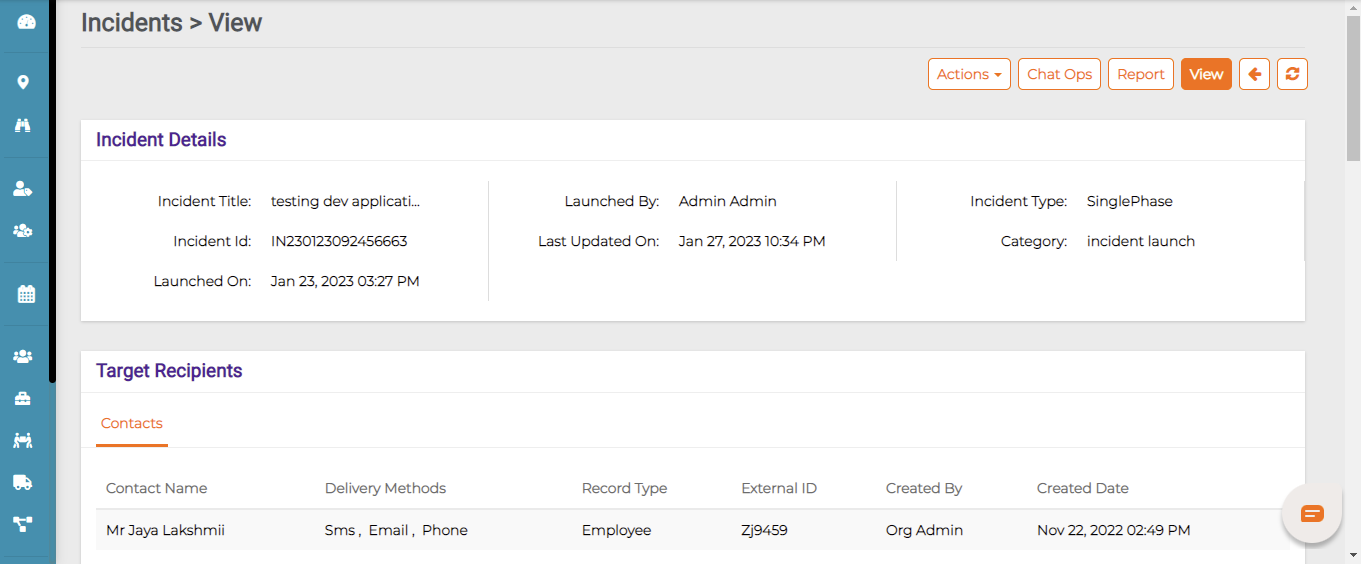
After Launching the Template, the template navigates to the Incident tab.
Click on the ID of the Template

The user will be redirected to the template view and click on Reports, their user can find the details of the Incident Template and Contacts who received the Incident notifications.
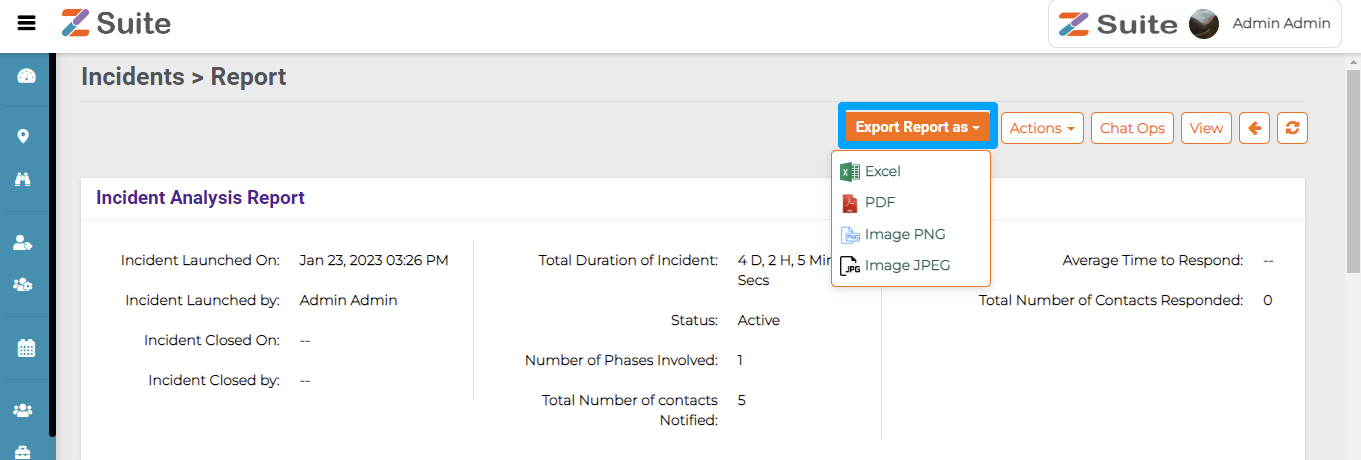
View
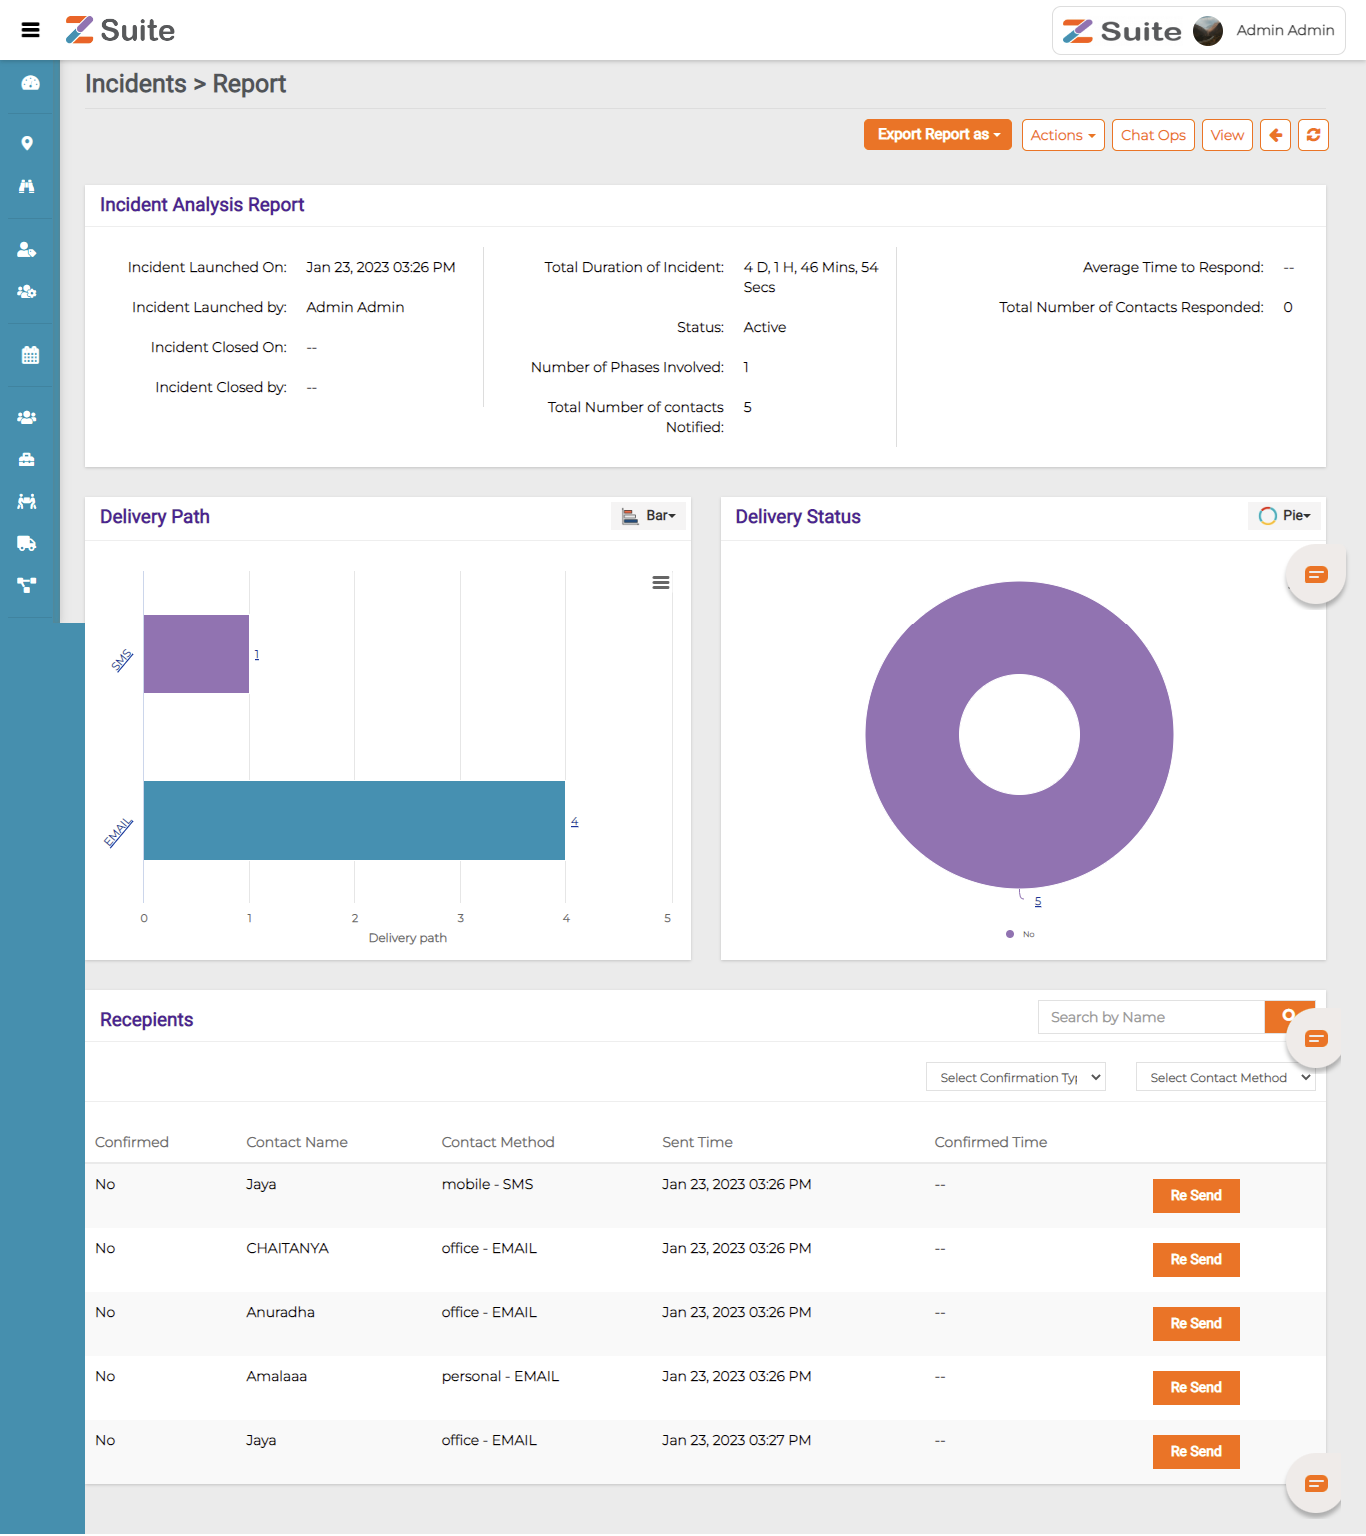
Click on Reports and click Export As to view the Report data as an Image of PNG, JPEG, and PDF.
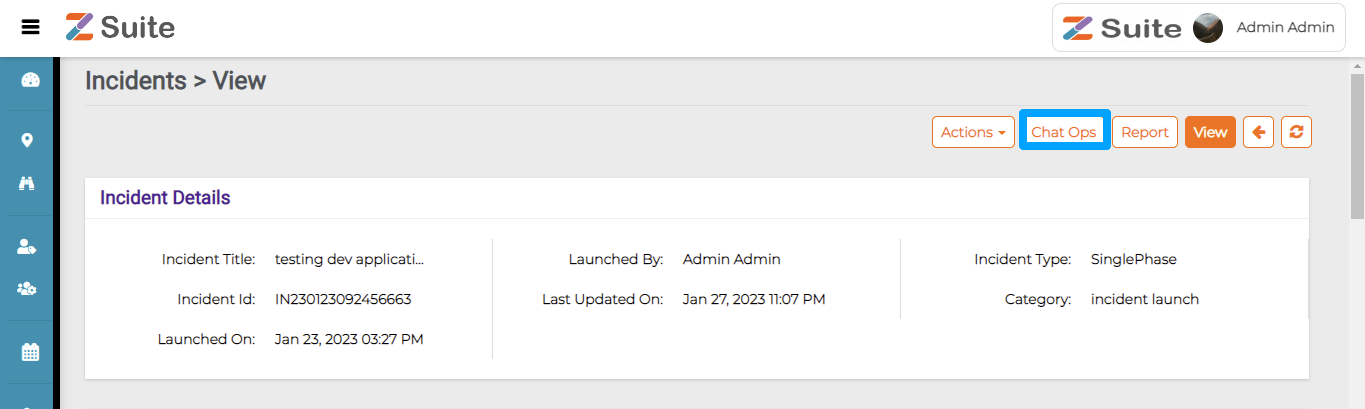
Chat Ops
Click on the Chat Ops Option.
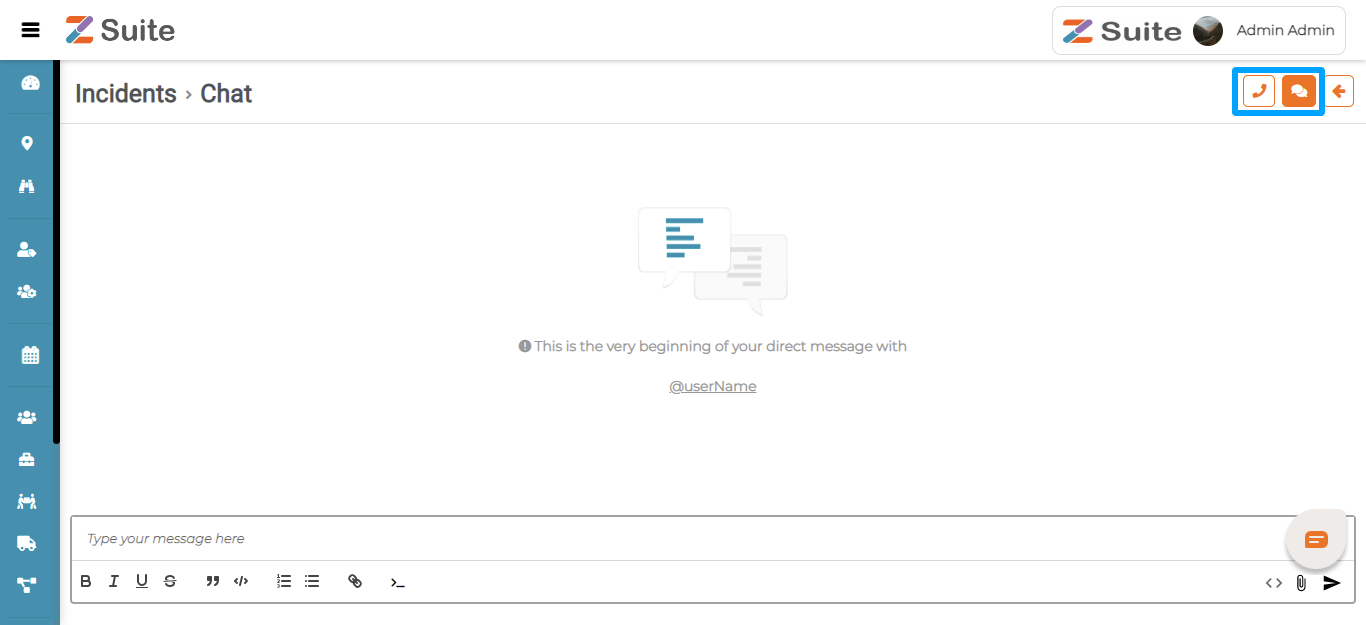
Users can see the calling and messaging options.
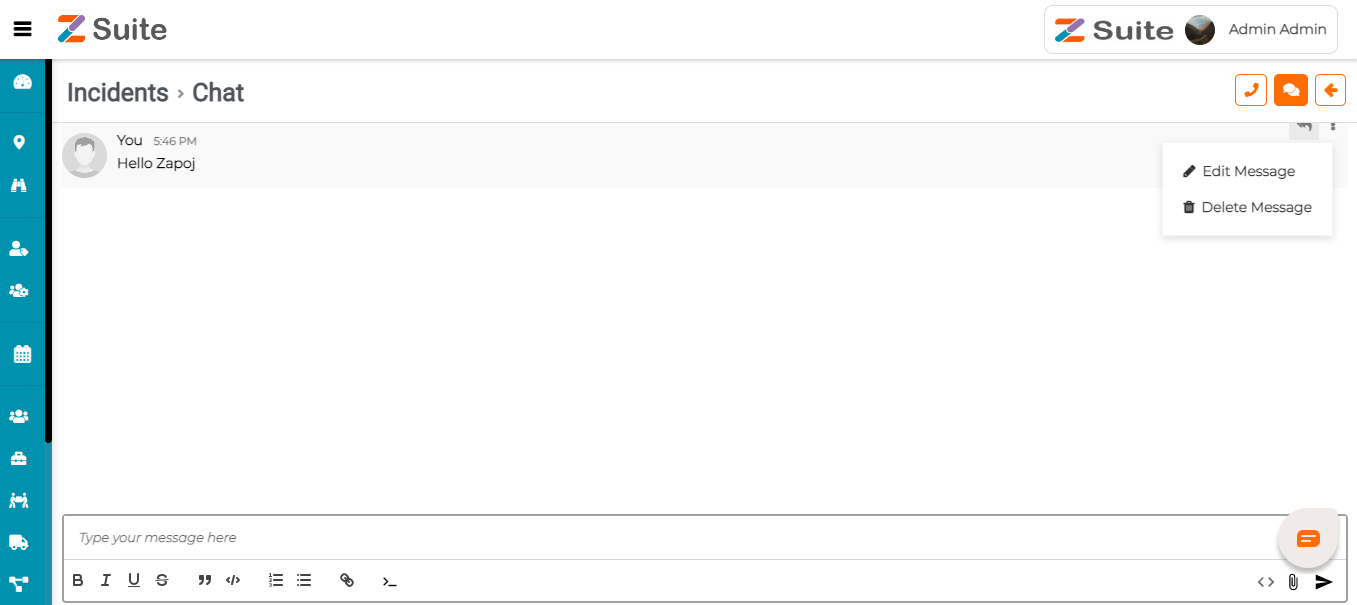
Users can send, Edit, and Delete messages and also have Bold, Italic, Underline, Strikethrough, Quotes, Numeric, dots, and insert File options.
Click on the Calling icon.