
IT Event Templates
During IT Incidents to save time and simplify the user input process, pre defined IT incident templates can be used. These templates contain predefined data that populates when the template is applied to it, eliminating the need to manually re-enter this data.
Step by step process on “How to create and use IT incident templates” in Zsuite, Quick and Easy with this video.
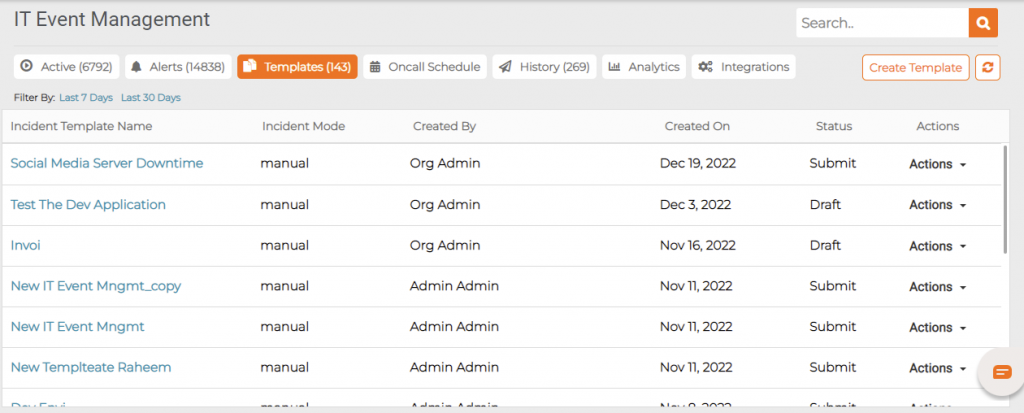
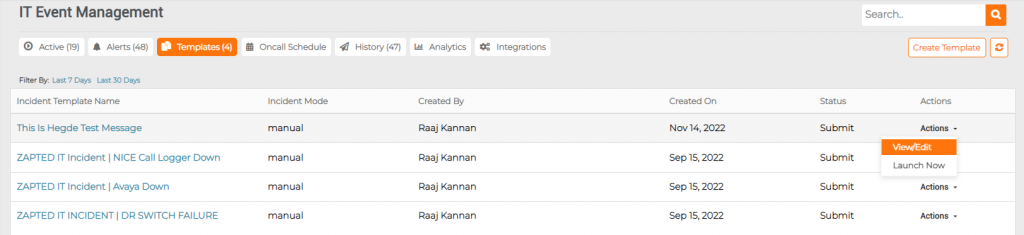
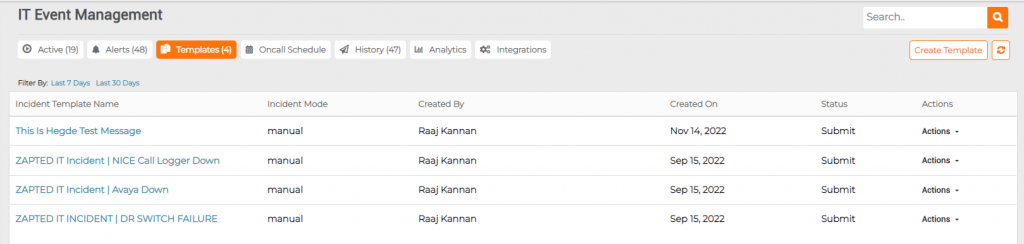
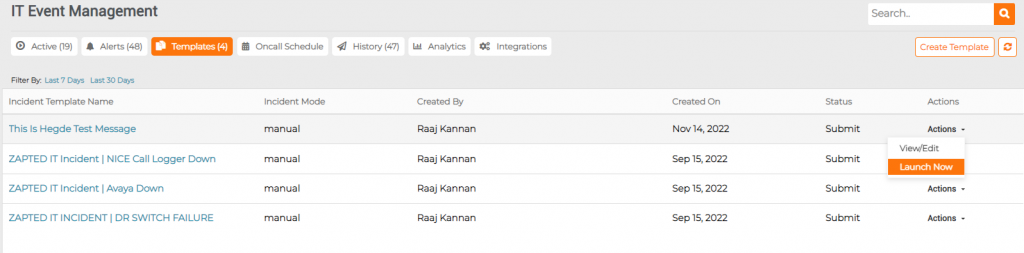
Click on templates to view the list of created templates.

Creating a Template: To create a new template, click on the “Create Template” button given on the right top.
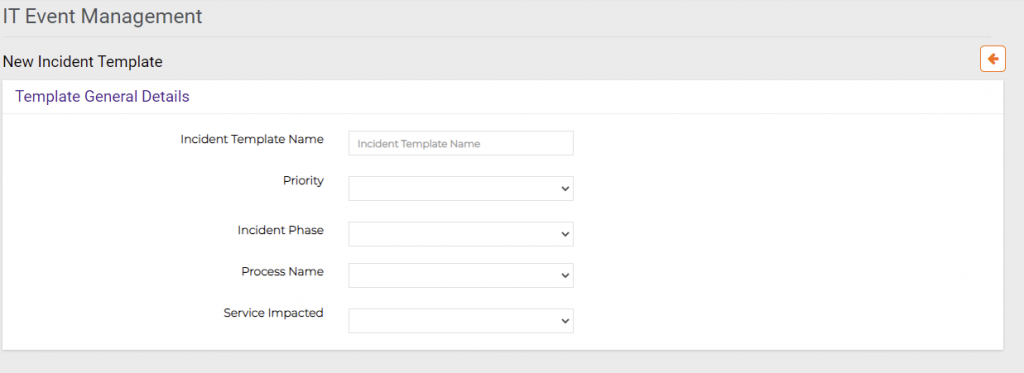
After clicking on the “Create Template” button you will be redirected to the page where you have to fill in some details like Template General Details, Fields, Messages, Responders and Settings.
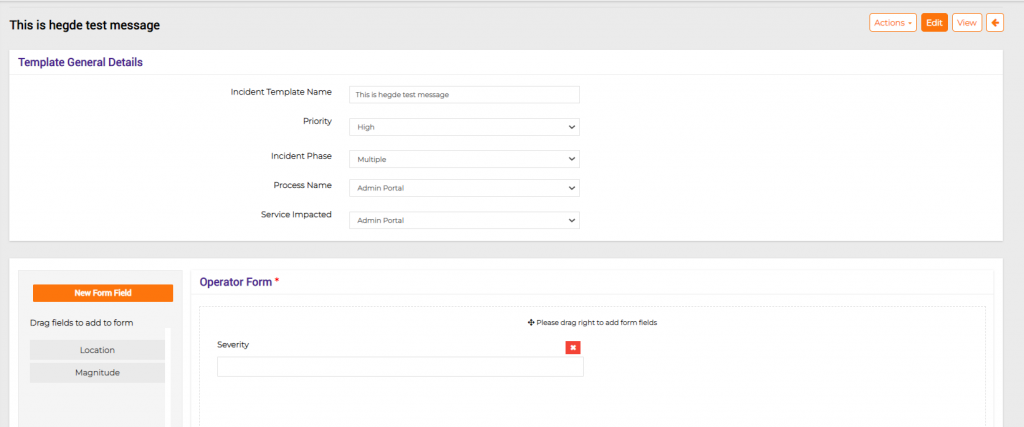
Template General Details:
New Incident Template Creation:
Incident Template Name: Enter the Incident Template Name.
Priority: Select Incident Priority from the dropdown list
Incident Phase:Select Single or Multi Phase from the dropdown list
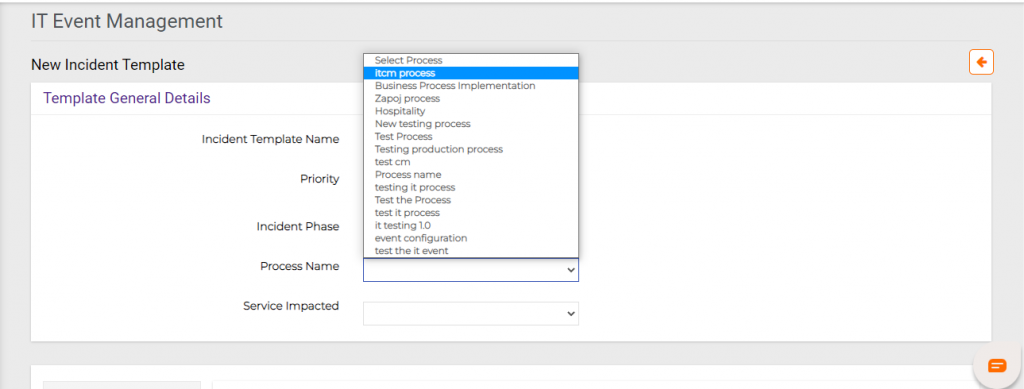
Process Name: Select the impacted IT Process name from the dropdown list
Service Impacted: Select the impacted IT Service from the dropdown list
Form Operators: Drag and drop the Operator Form and users can also create Form Field by clicking on New Form Field.
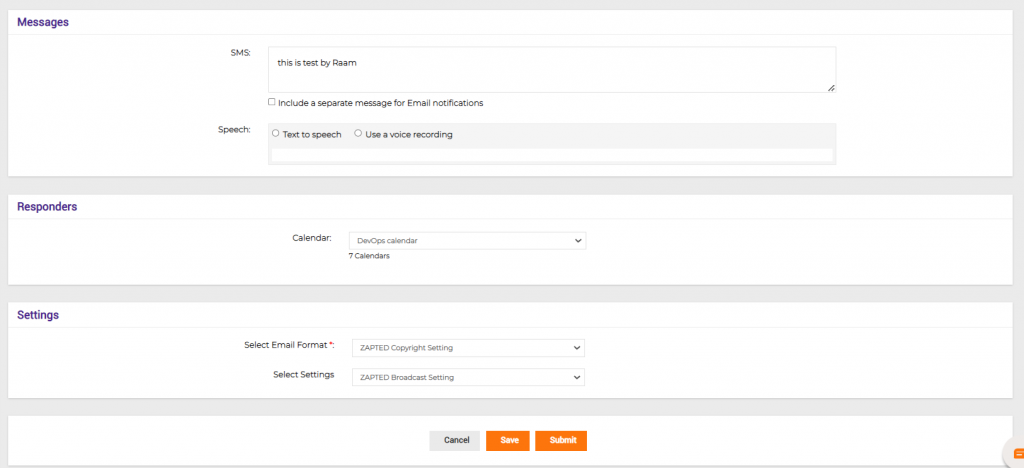
Messages: Enter the IT Incident Message in the Message box.
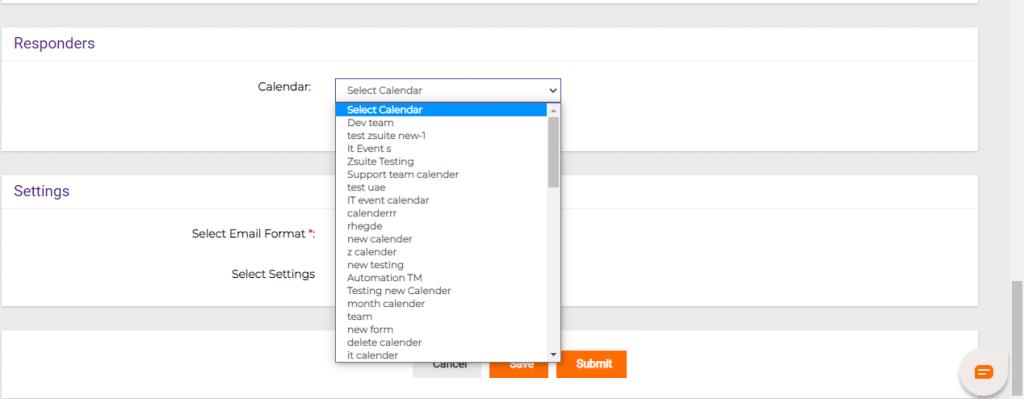
Responders: Select the IT shift calendar from the dropdown list to notify respective recipients.
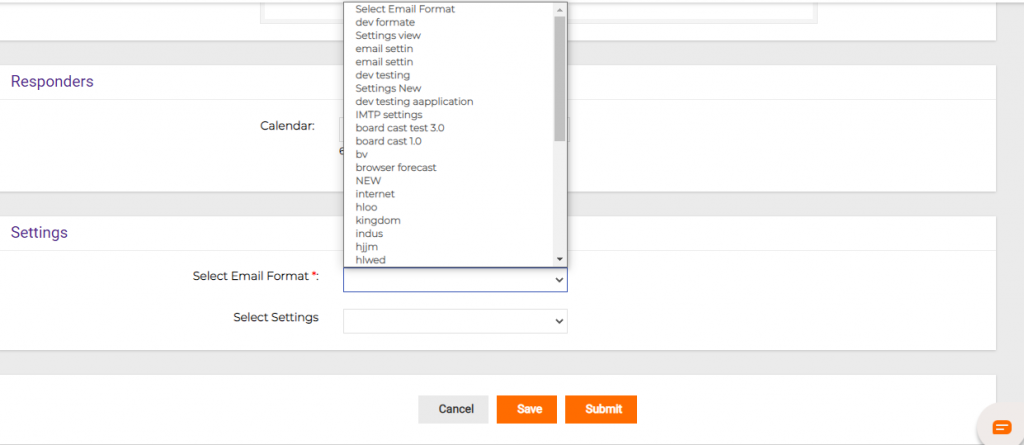
Settings: Select Email Settings and Format from the dropdown list.
Service Impacted:
Next, we have a Message option, where we can give the information which we wanted to share.
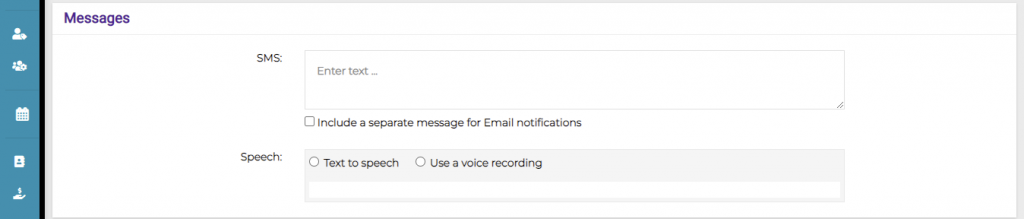
We will have the flexibility of adding up a separate message for Email Notification.
This is not mandatory but if we want to share a separate message then we can opt for this option.
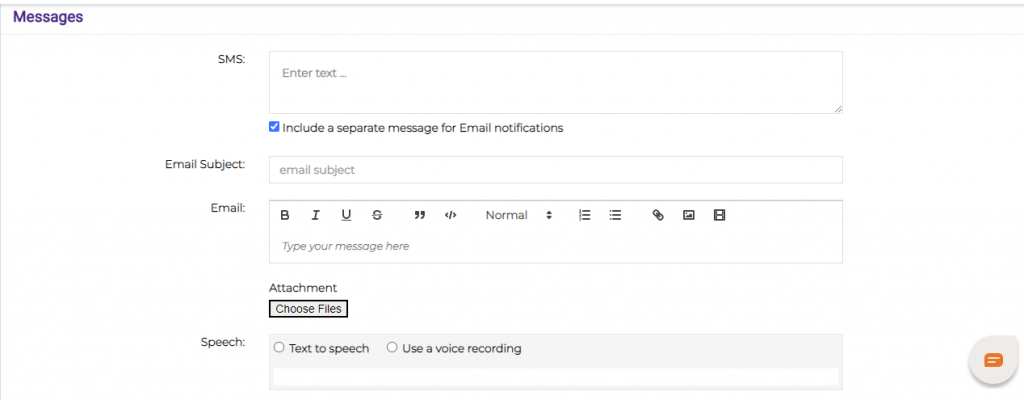
Next, we have an option of Text to Speech. Where we can convert text to audio, or we can also upload a voice recording.

Next, We have the option of selecting the responders, which we can select the respective responders based on their staff calendar from the dropdown.
Now we have to select the required Email Format and select the required Settings from their respective dropdowns and click on Save or Submit buttons for saving the new template.
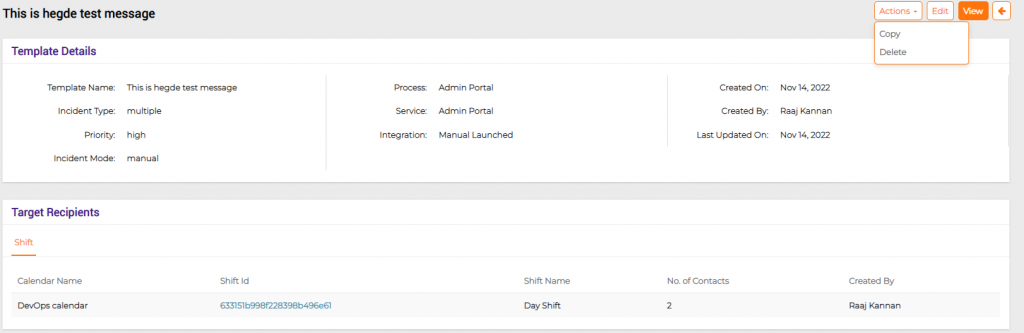
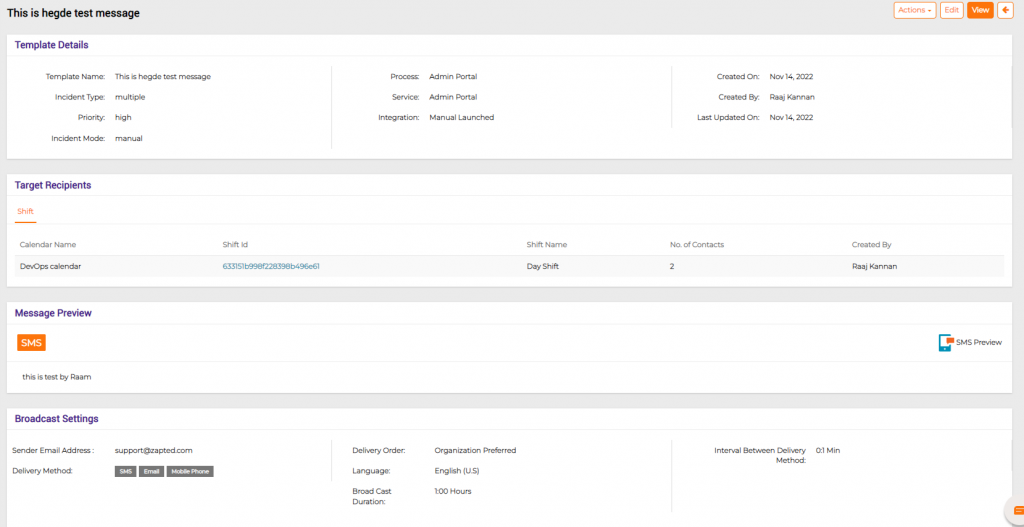
View / Edit Template
Click on “Template Name” or click on “Actions “ dropdown and click on “View / Edit”.
The user will be redirected to the “ Template details” page.
The user can View / Edit the changes and click on “Submit”.
Delete Template
Click on the “Template Name”
The user will be redirected to the “Template details page”, click on “ Actions” and click on “Delete”.

Copy Template
Click on “Template Name”.

The user will be redirected to the “Template details page”, click on “ Actions” and click on “Copy”.
Launch Template
Click on the “Actions” dropdown and Click on “Launch Now” .
The user will be redirected to the Templates view.
Fill form field data, Alert Summary, select Timezone from the dropdown, and click on Launch. After Launching the Template, the template navigates to the Active tab.
IT Event Report
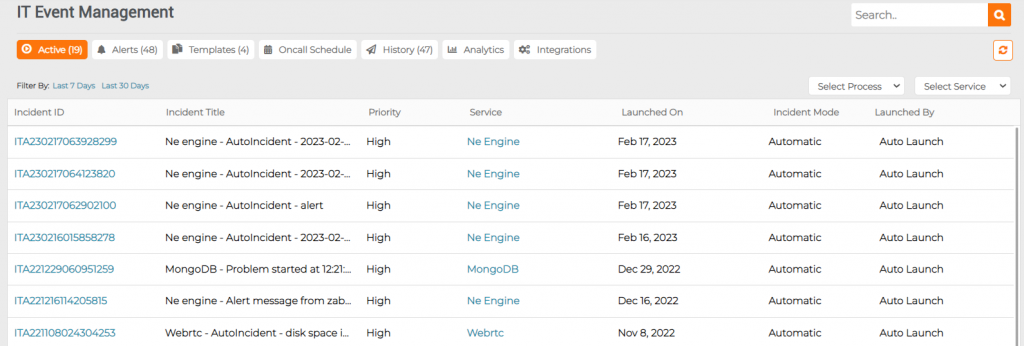
Click on the Incident ID. The user will be redirected to the Incident view. Click on the Reports, the user can find the Incident details and Contact details who received the notifications.
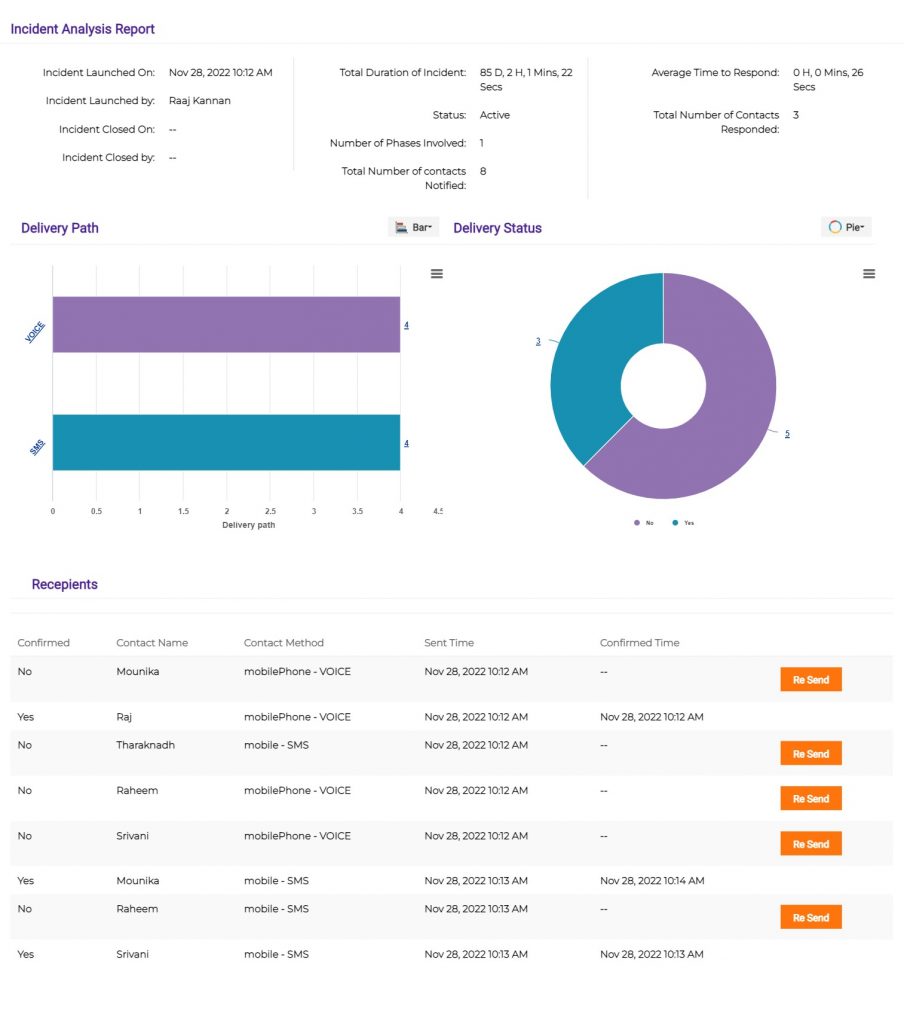
Here the user can see the complete report with Incident analysis that include details like Incident Launched On Date and Time, Total Duration of Incident, Average Time to Respond, Incident Launched By, Status, Total Number of Contacts Responded, Incident Closed On, Number of Phases Involved, Incident Closed By, Total Number of Contacts Notified and Delivery paths.
Recipients details such as Confirmed, Contact Name, Contact Method, Sent Time, Confirmed Time. Report is segmented into multiple sections. Every section show the respective details such as details related to incident creation, launching date and time.
Click on Reports and click Export As to view the Report data as an Image of PNG, JPEG, and PDF.

Close Template
Click on the Incident ID.
Users will be redirected to the Incident view page and click on “Actions” dropdown and click on “Close”.