Splunk
Url:- https://d3boqi1zs4oa8r.cloudfront.net/
Id:- admin@payasyougo.com
Password:- Password@1
Splunk Login details :-
zapojadmin
Shine@123
Login to the dev server using ssh .
(We have used Mediasoup dev server for Splunk)
Steps to install and configure Splunk on Linux server :-
Run the following commands in sequence for download , install and start splunk server
Step1:- wget -O splunk-8.2.6-a6fe1ee8894b-linux-2.6-amd64.deb “https://download.splunk.com/products/splunk/releases/8.2.6/linux/splunk-8.2.6-a6fe1ee8894b-linux- 2.6-amd64.deb”
Step 2:- sudo dpkg -i splunk-8.2.6-a6fe1ee8894b-linux-2.6-amd64.deb
Step 3:- Accept license agreement and set the Splunk server credentials
Step4 :- sudo /opt/splunk/bin/splunk start
Step5:- check the server status is it running or not
sudo /opt/splunk/bin/splunk status
Step 6:- Stop the splunk server
sudo /opt/splunk/bin/splunk stop
Go To Browser :-
Enter Ip Address with port number and Fill credentials

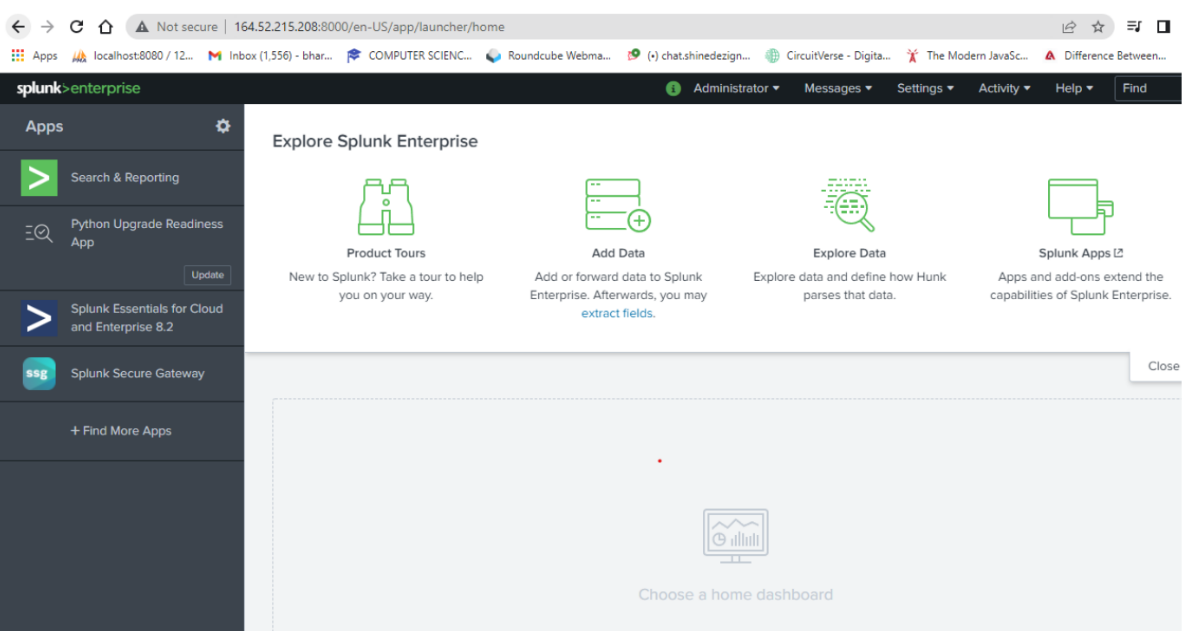
Connectivity with splunk successfully
In Zsuite app:-
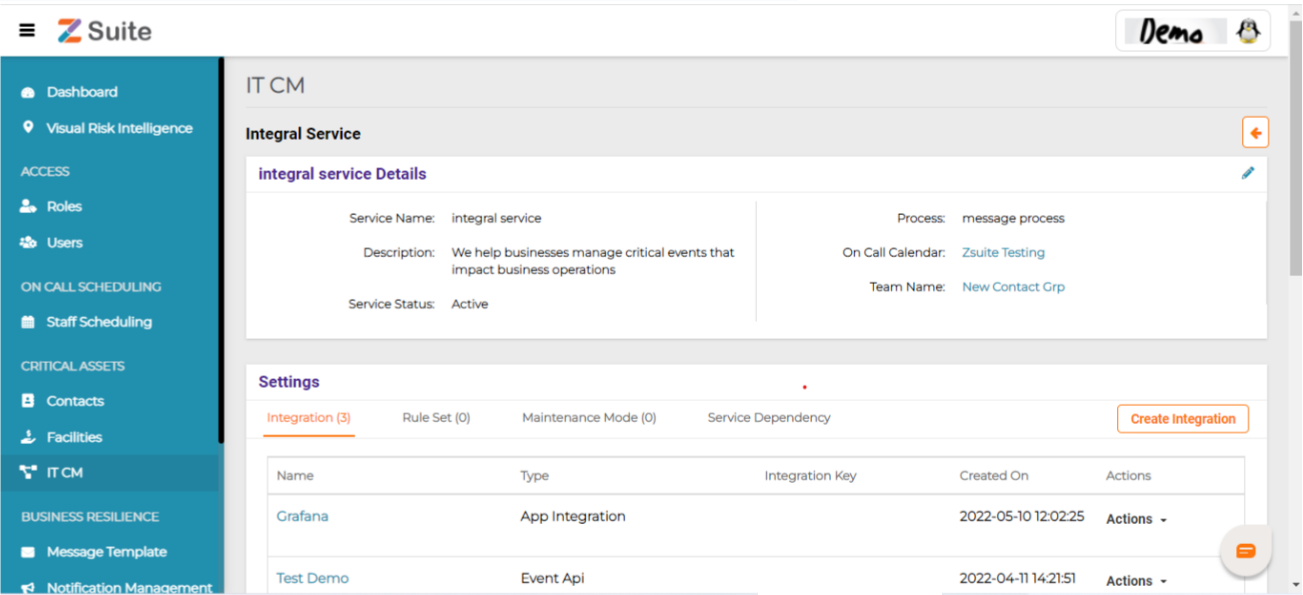
Step 1:- For creating a new service
It Cm -> IT Services->
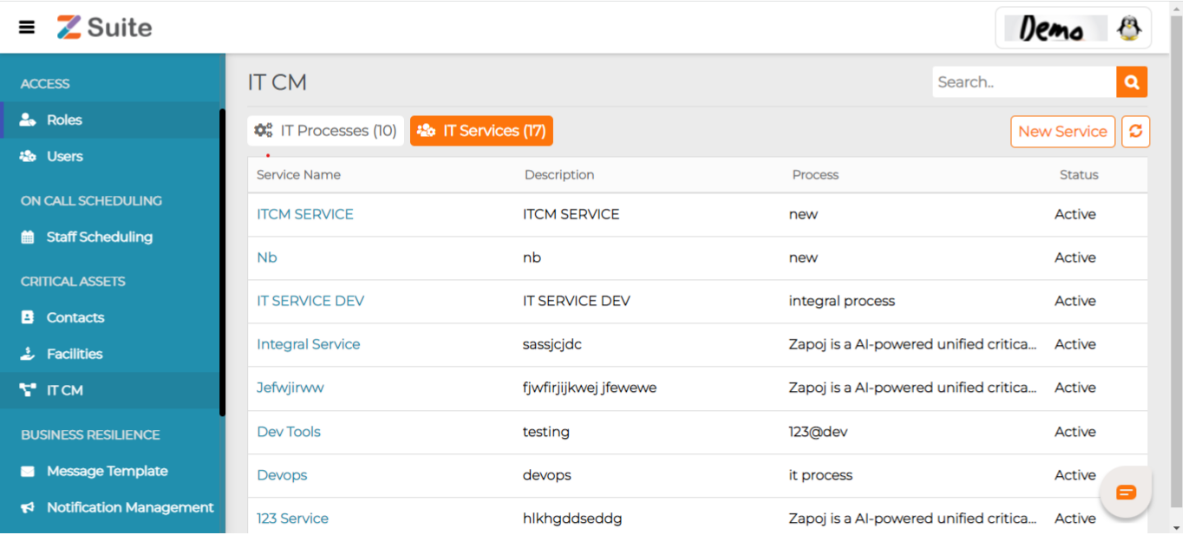
Click on New Service
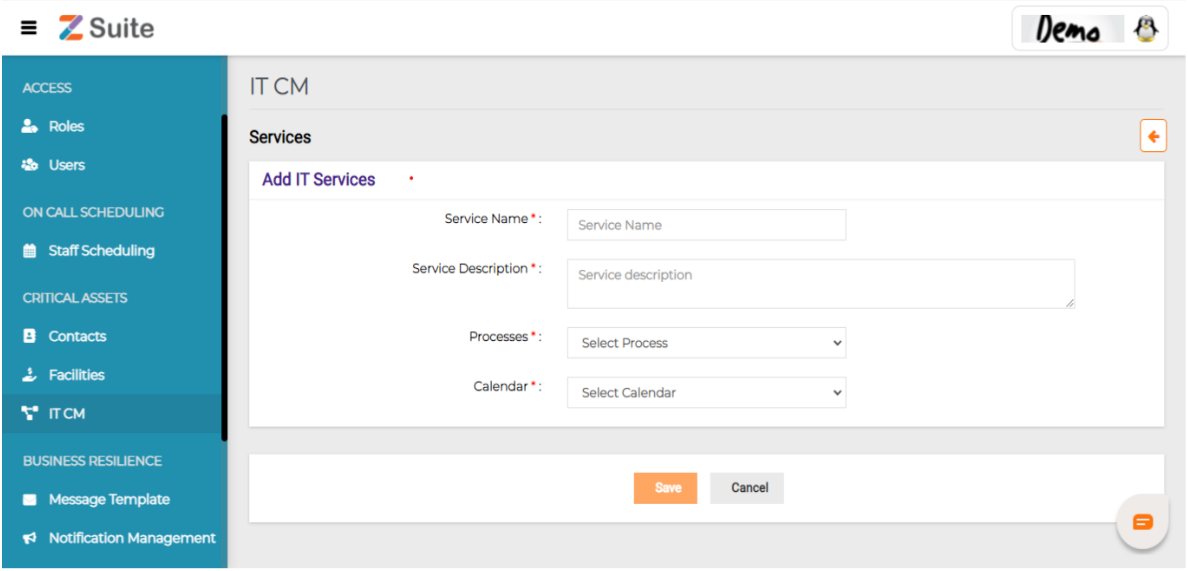
A. Fill Service name, description
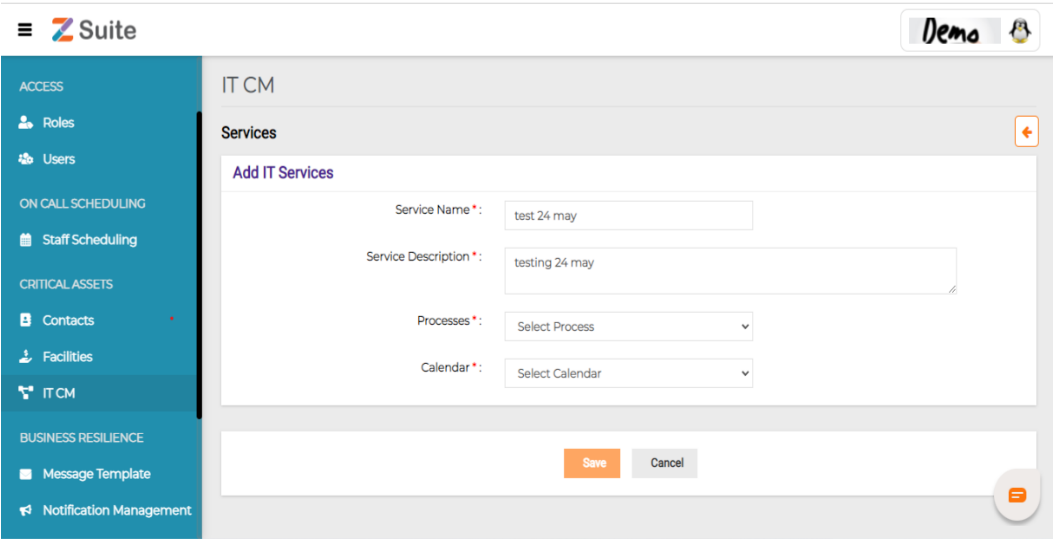
B. Select process
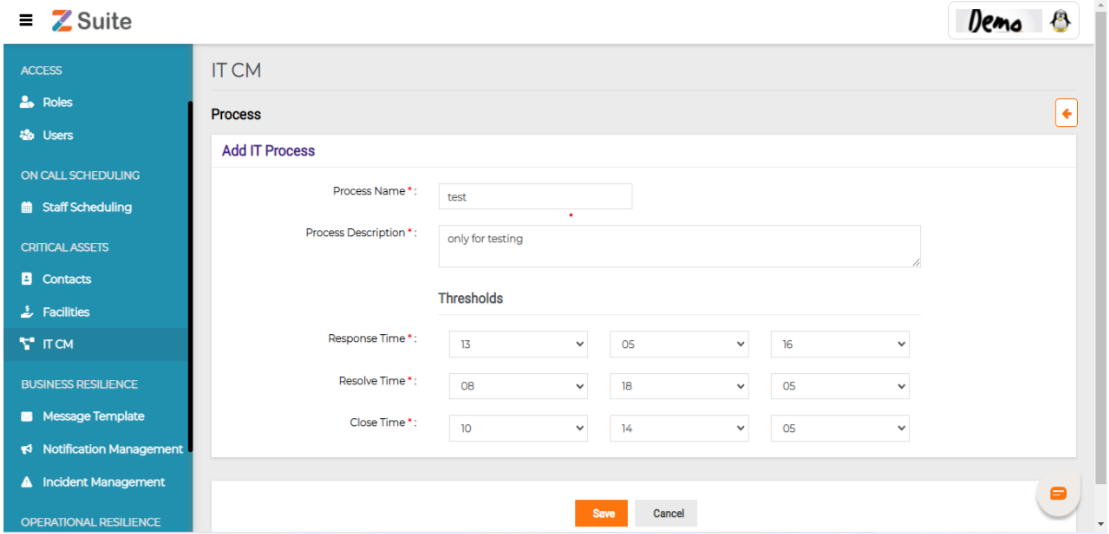
For Adding new process:- IT CM ->IT Process ->New Process
C. Select calendar
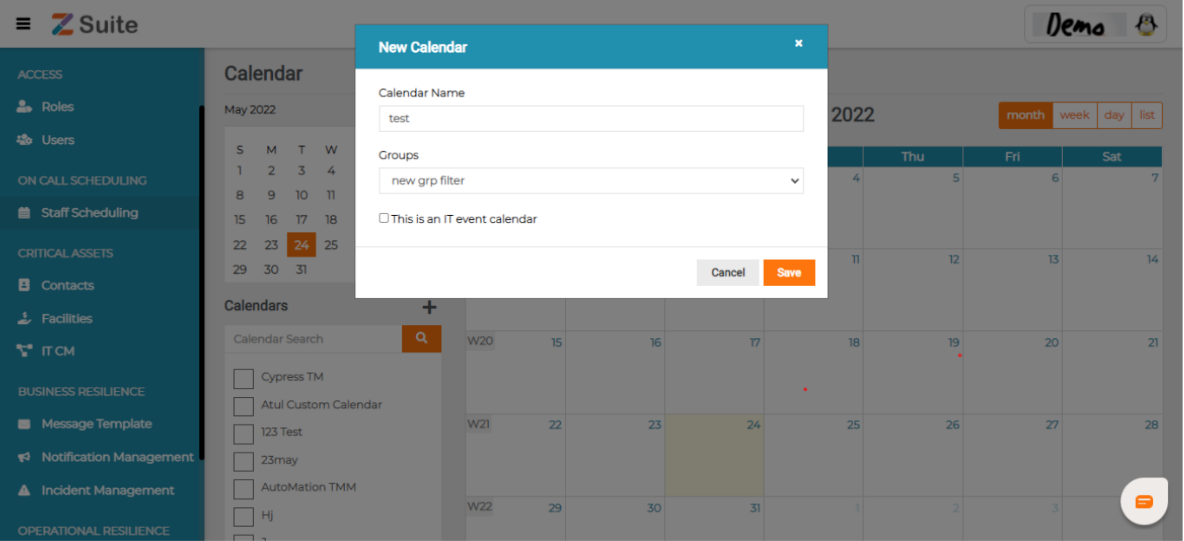
For Adding New Calendar:- staff scheduling ->add icon-> fill calender name and select groups
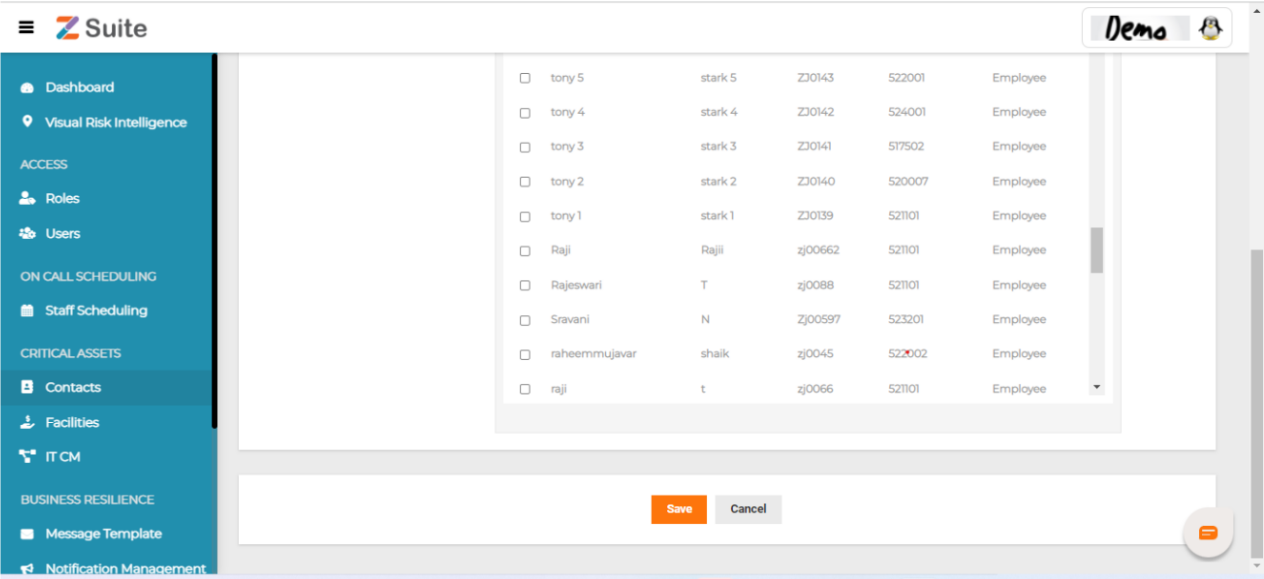
For making new group:- Contacts -> groups ->
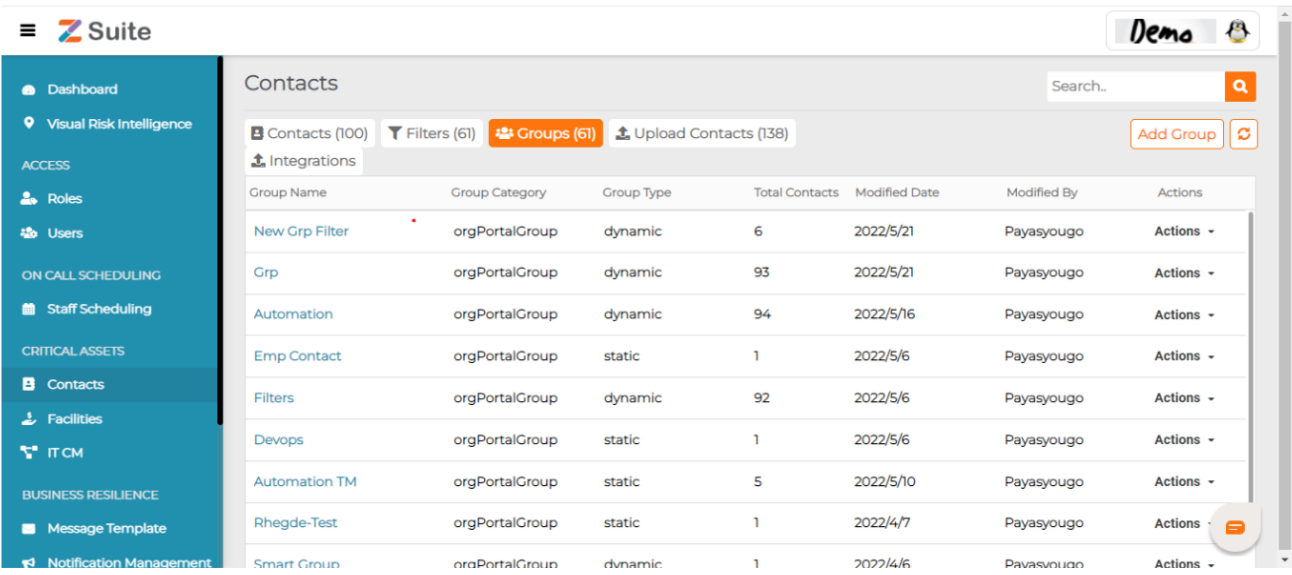
Add group -> Fill all details and select contact for making groups
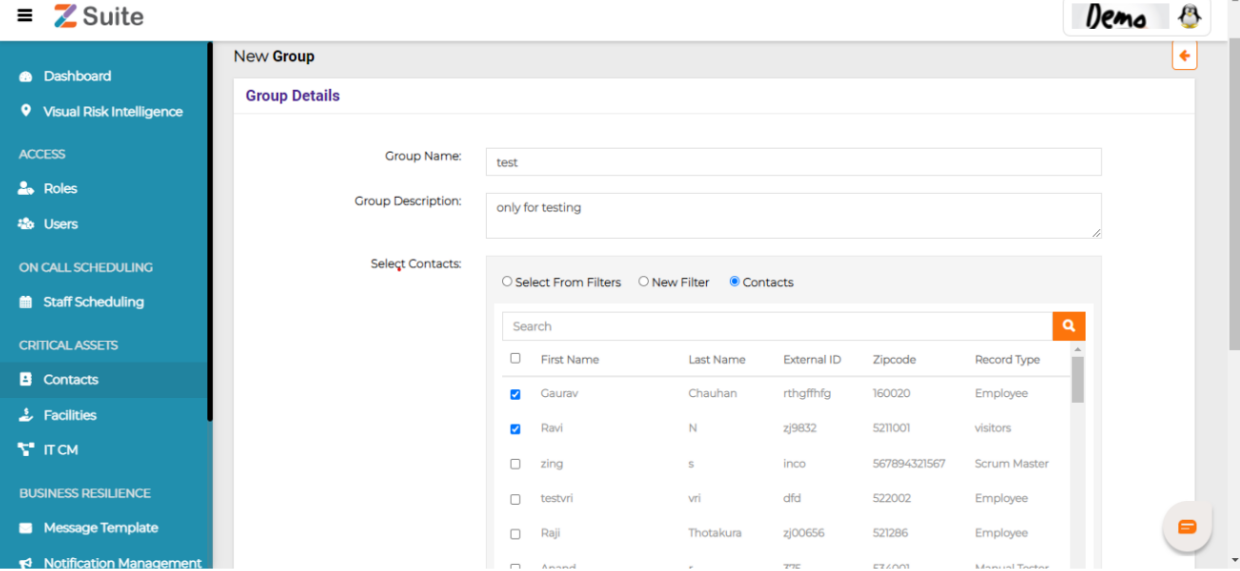
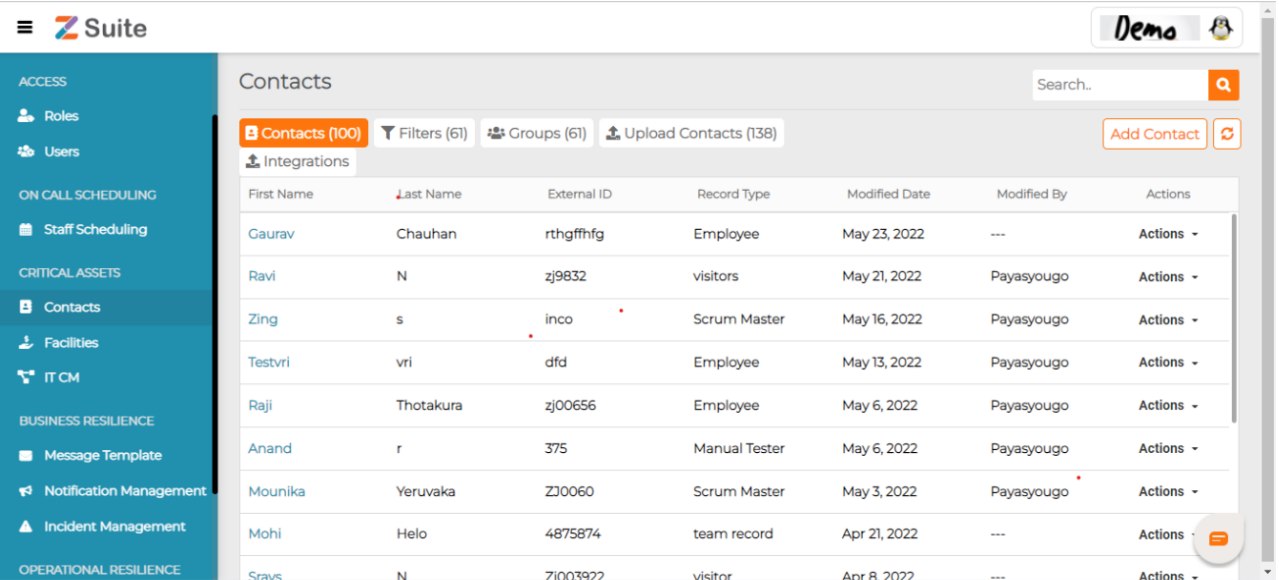
Note:- creating new contact add contacts :- Contacts-> Contacts->
click on add contacts -> fill all detail
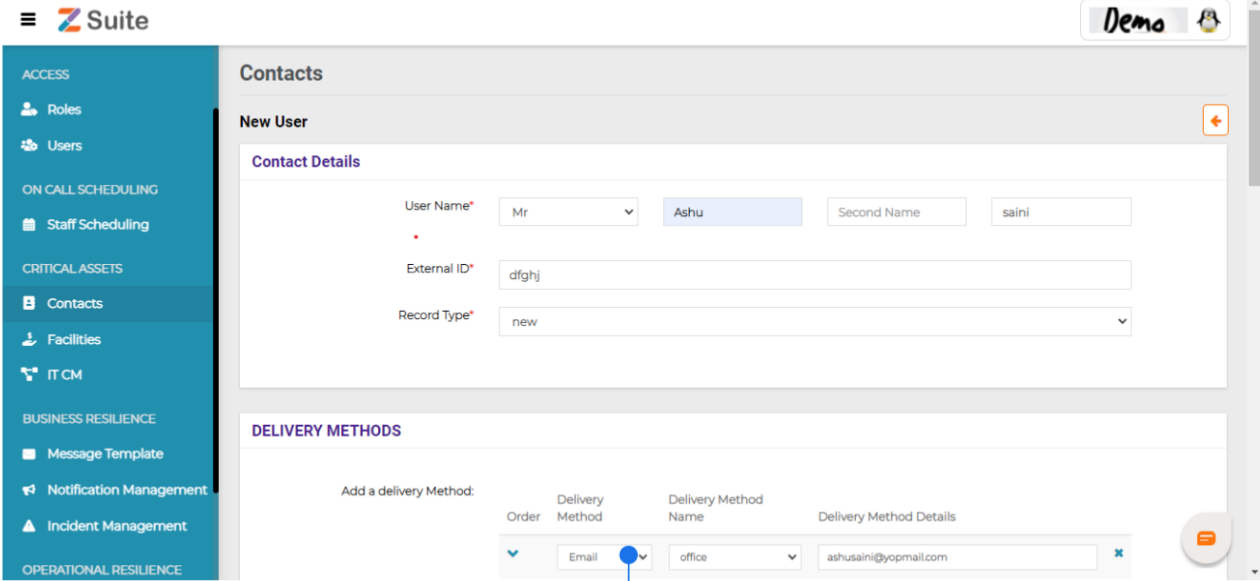
->save
Now a new service created successfully
Step 2:- click on service that has been been generated
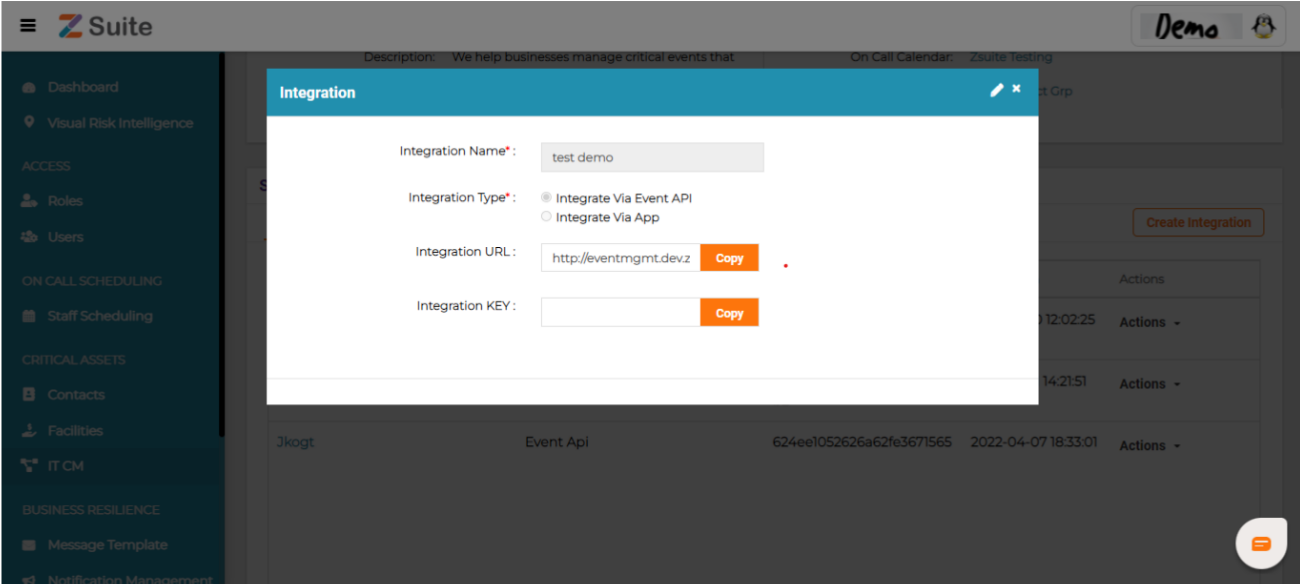
Step 3:- Integration-> Create integration-> fill integration name-> select integration via app-> Select App Name-> Save
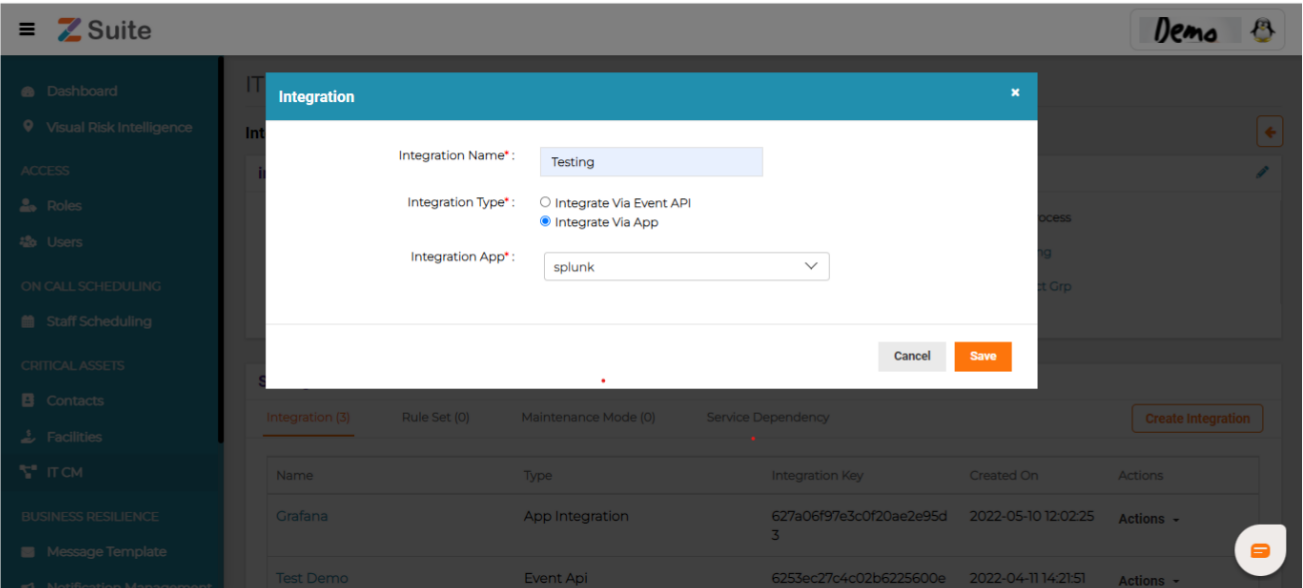
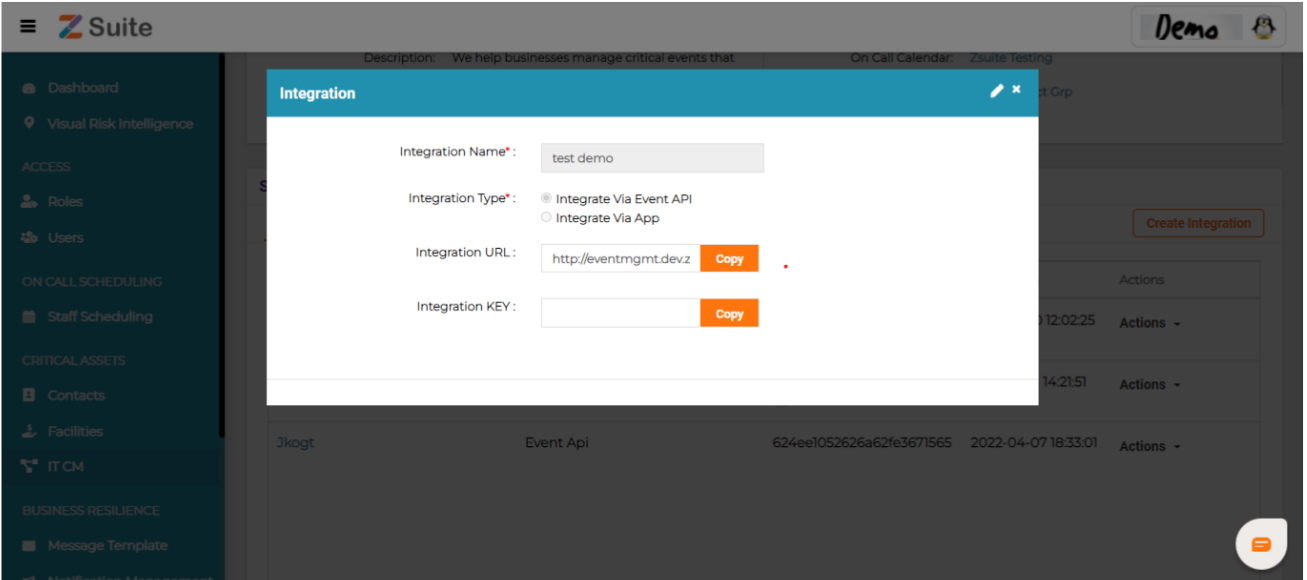
Step 4:- Service integration created automatically integration url and key
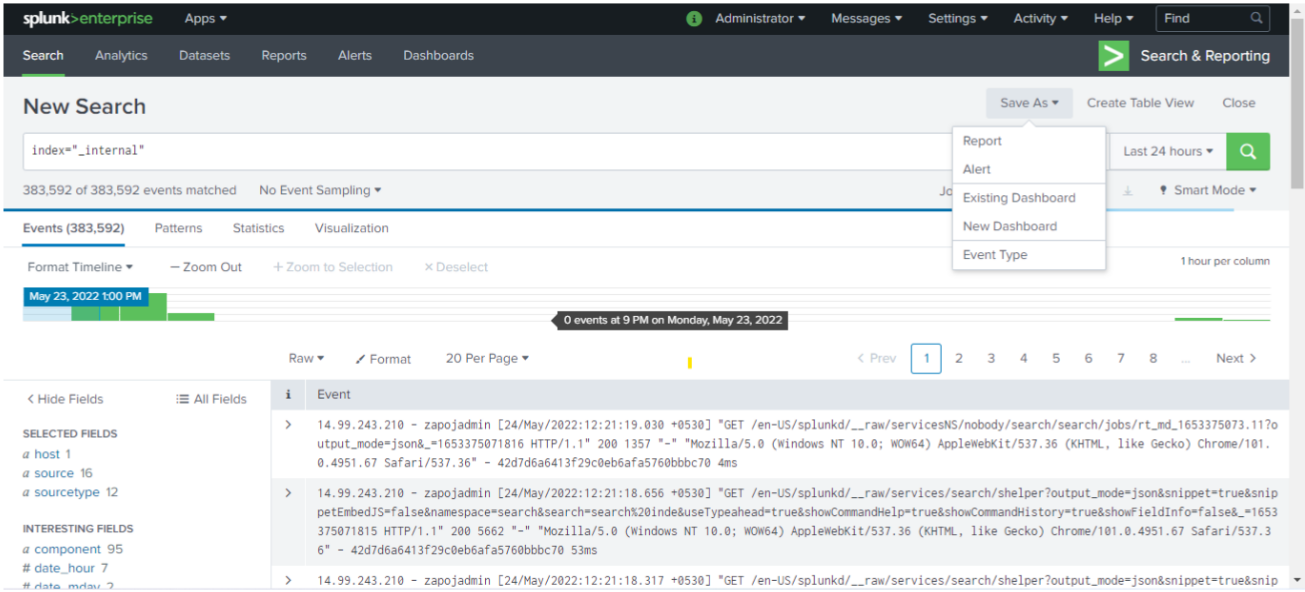
Step 5:– Now go to the splunk servers using ip address
Search & reporting -> add search on any index ->
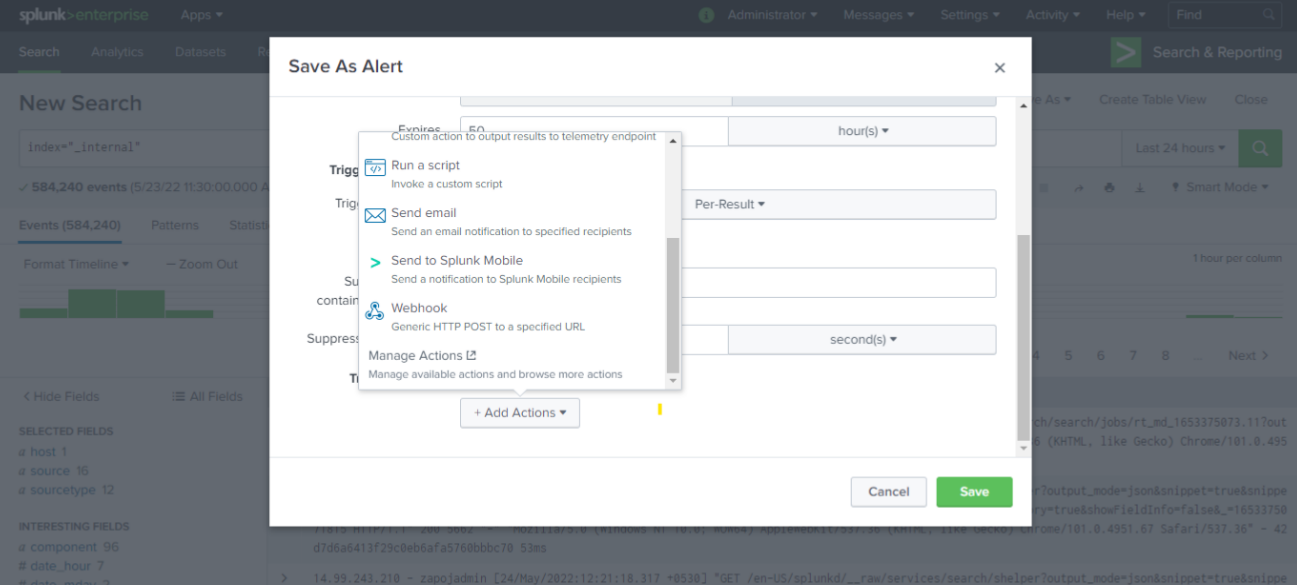
save as alert -> fill the detail and add webhook url which has been auto generated while create integration in service
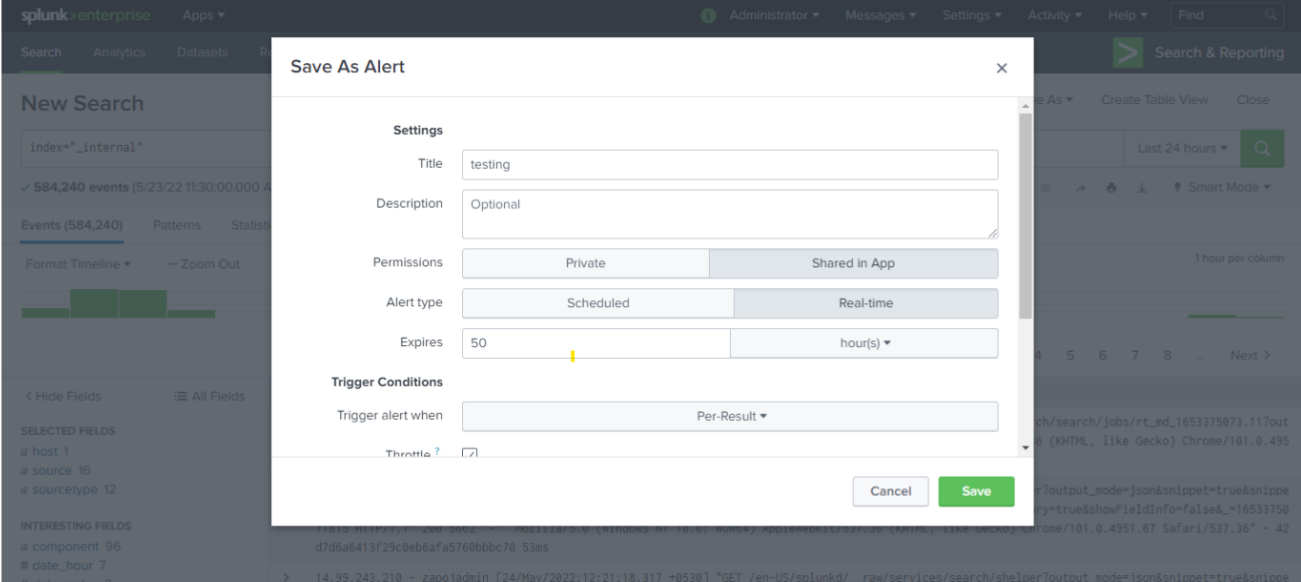
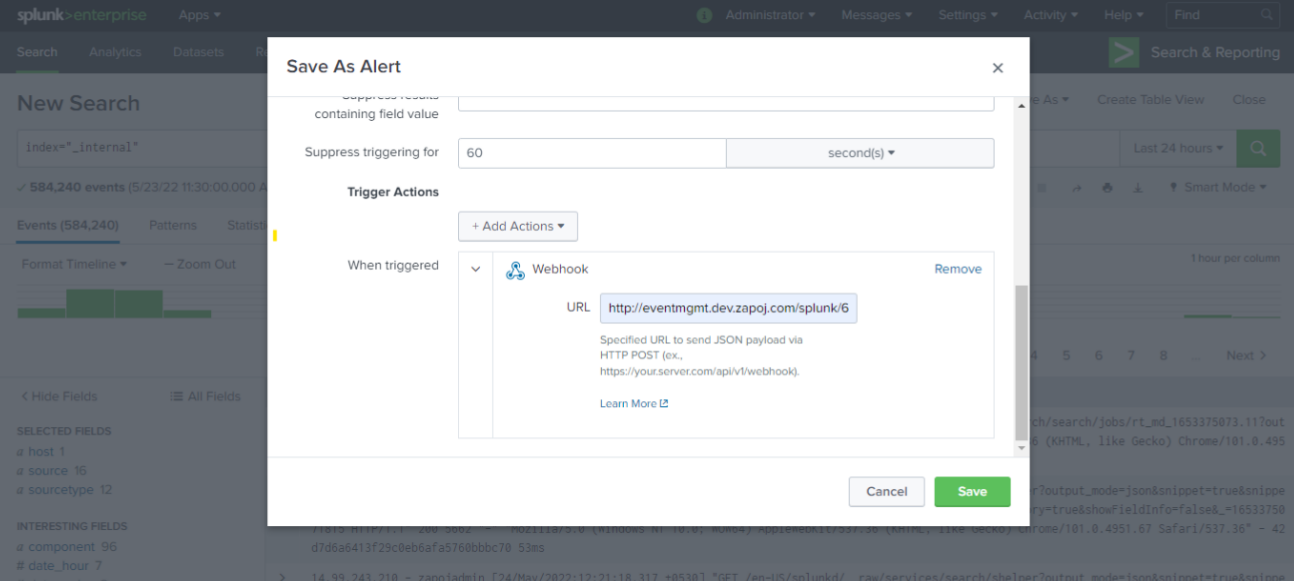
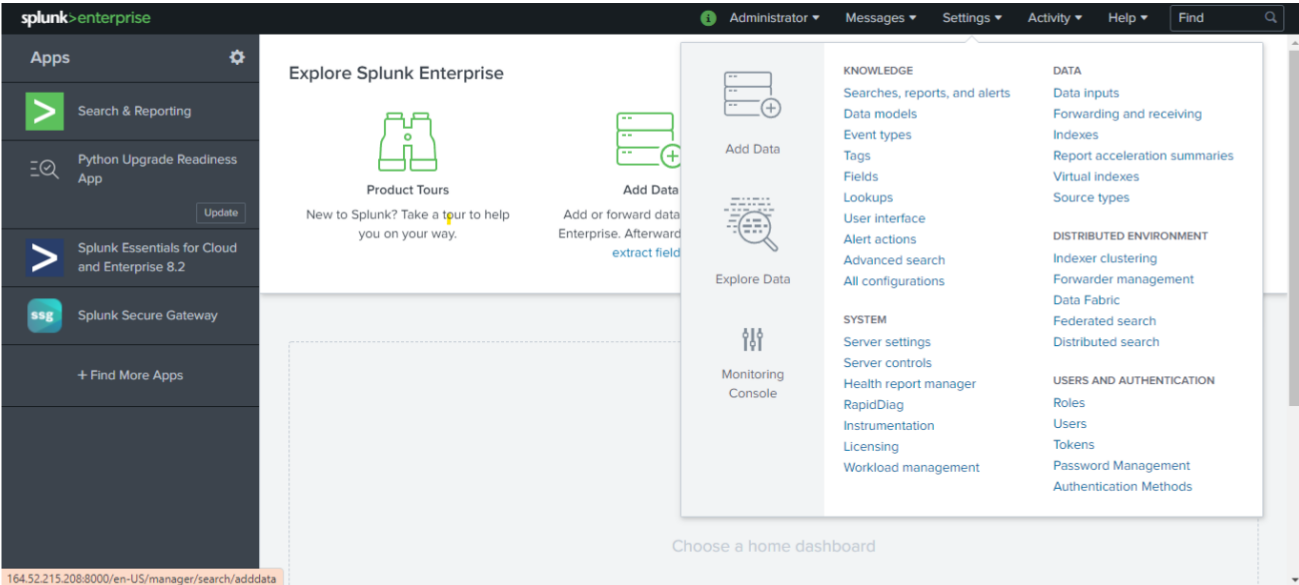
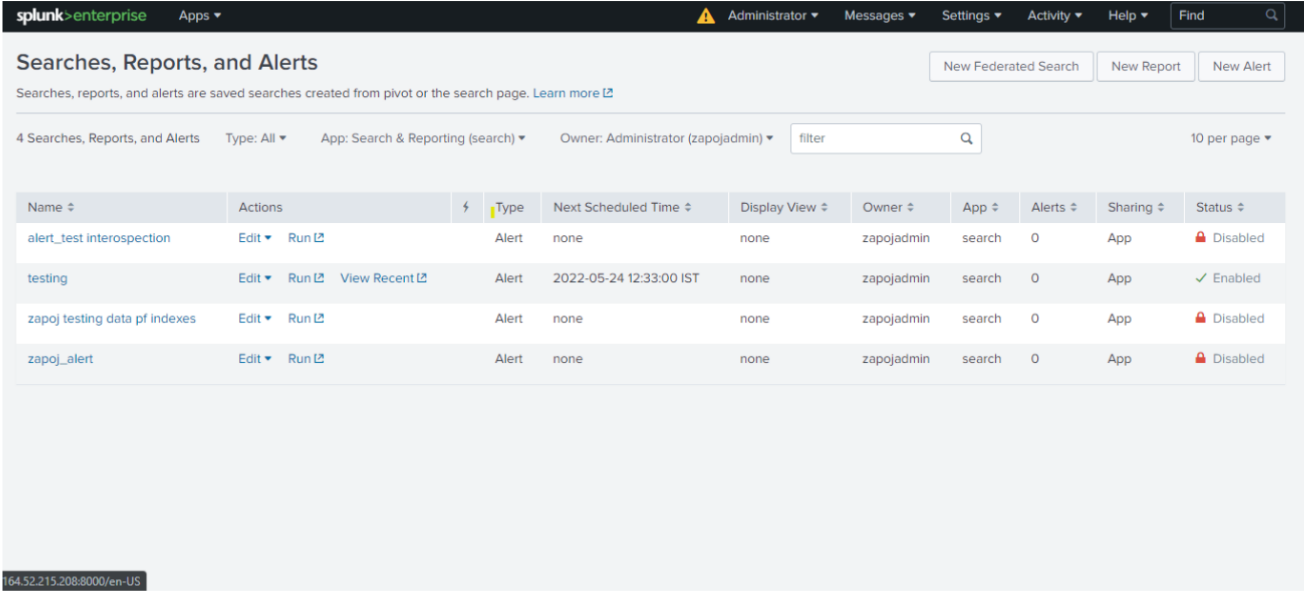
You can see the created alerts setting->Searches, reports and alerts
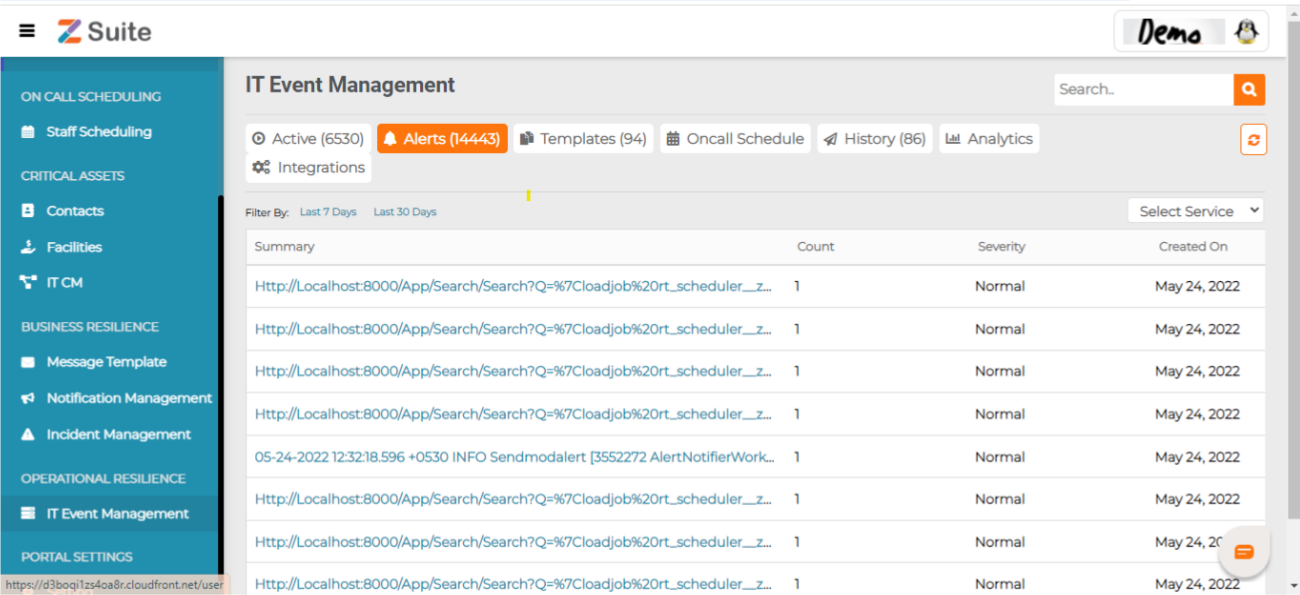
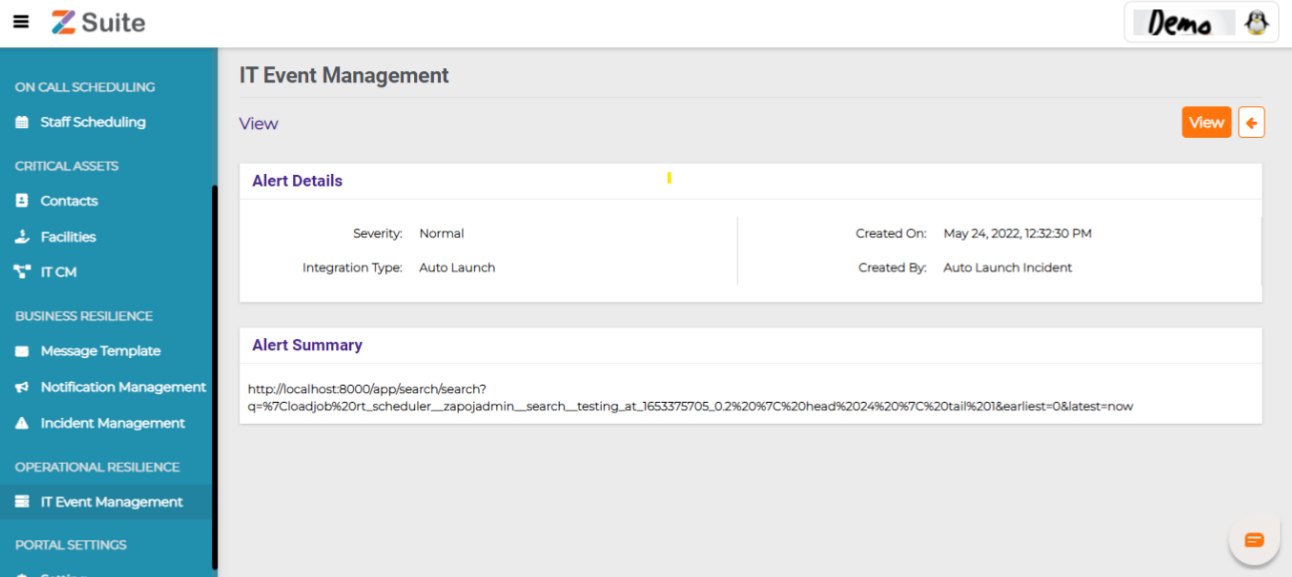
Step 6:- now we saw the notification of alerts in It Event Management-> Alerts
Note:-> Webhook url It CM-> Services->integrations->Copy this integration url and add on alert webhook
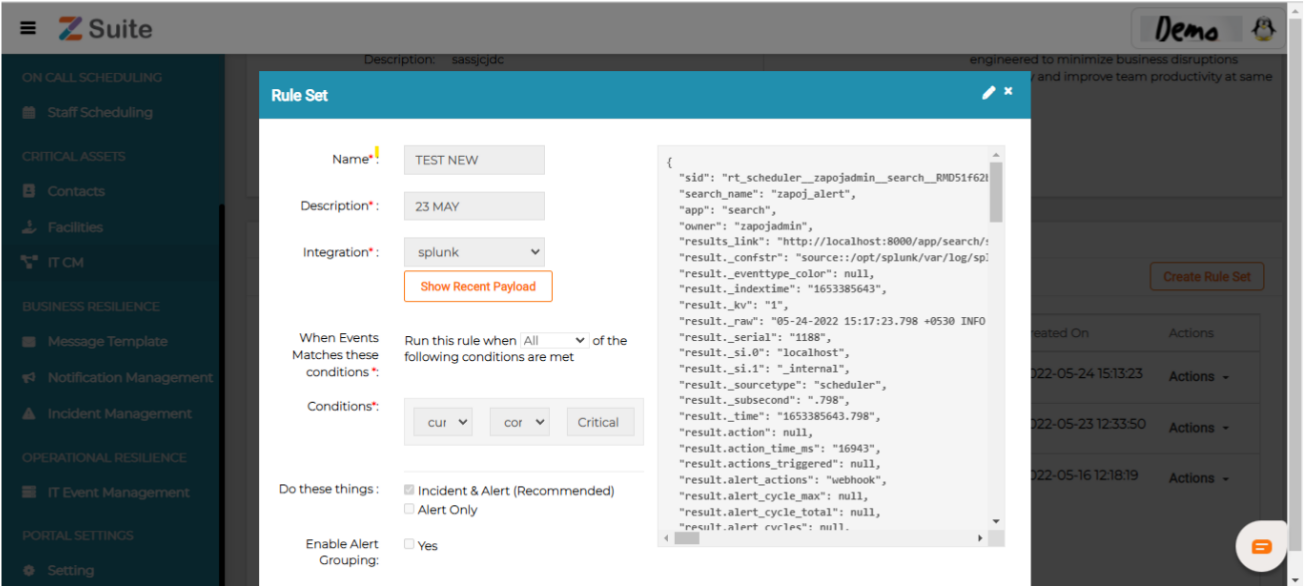
Rule Set Creation In Zsuite :- Rules are created for filtering payload data.
Step 1:- It Cm-> IT Service-> click on any service-> Rule Set-> Create Rule